Redmi Note 14 Pro Plus & Note 14 - First Things To Do! ( Hyper OS Tips & Tricks )
I'm going to show you more than 30 tips, tricks and hidden features on hyper OS. Here is the Redmi Note 14 series. I already know everything there is to know about these phones. Watch this video anyway and let me know if you learn anything new.
Always On
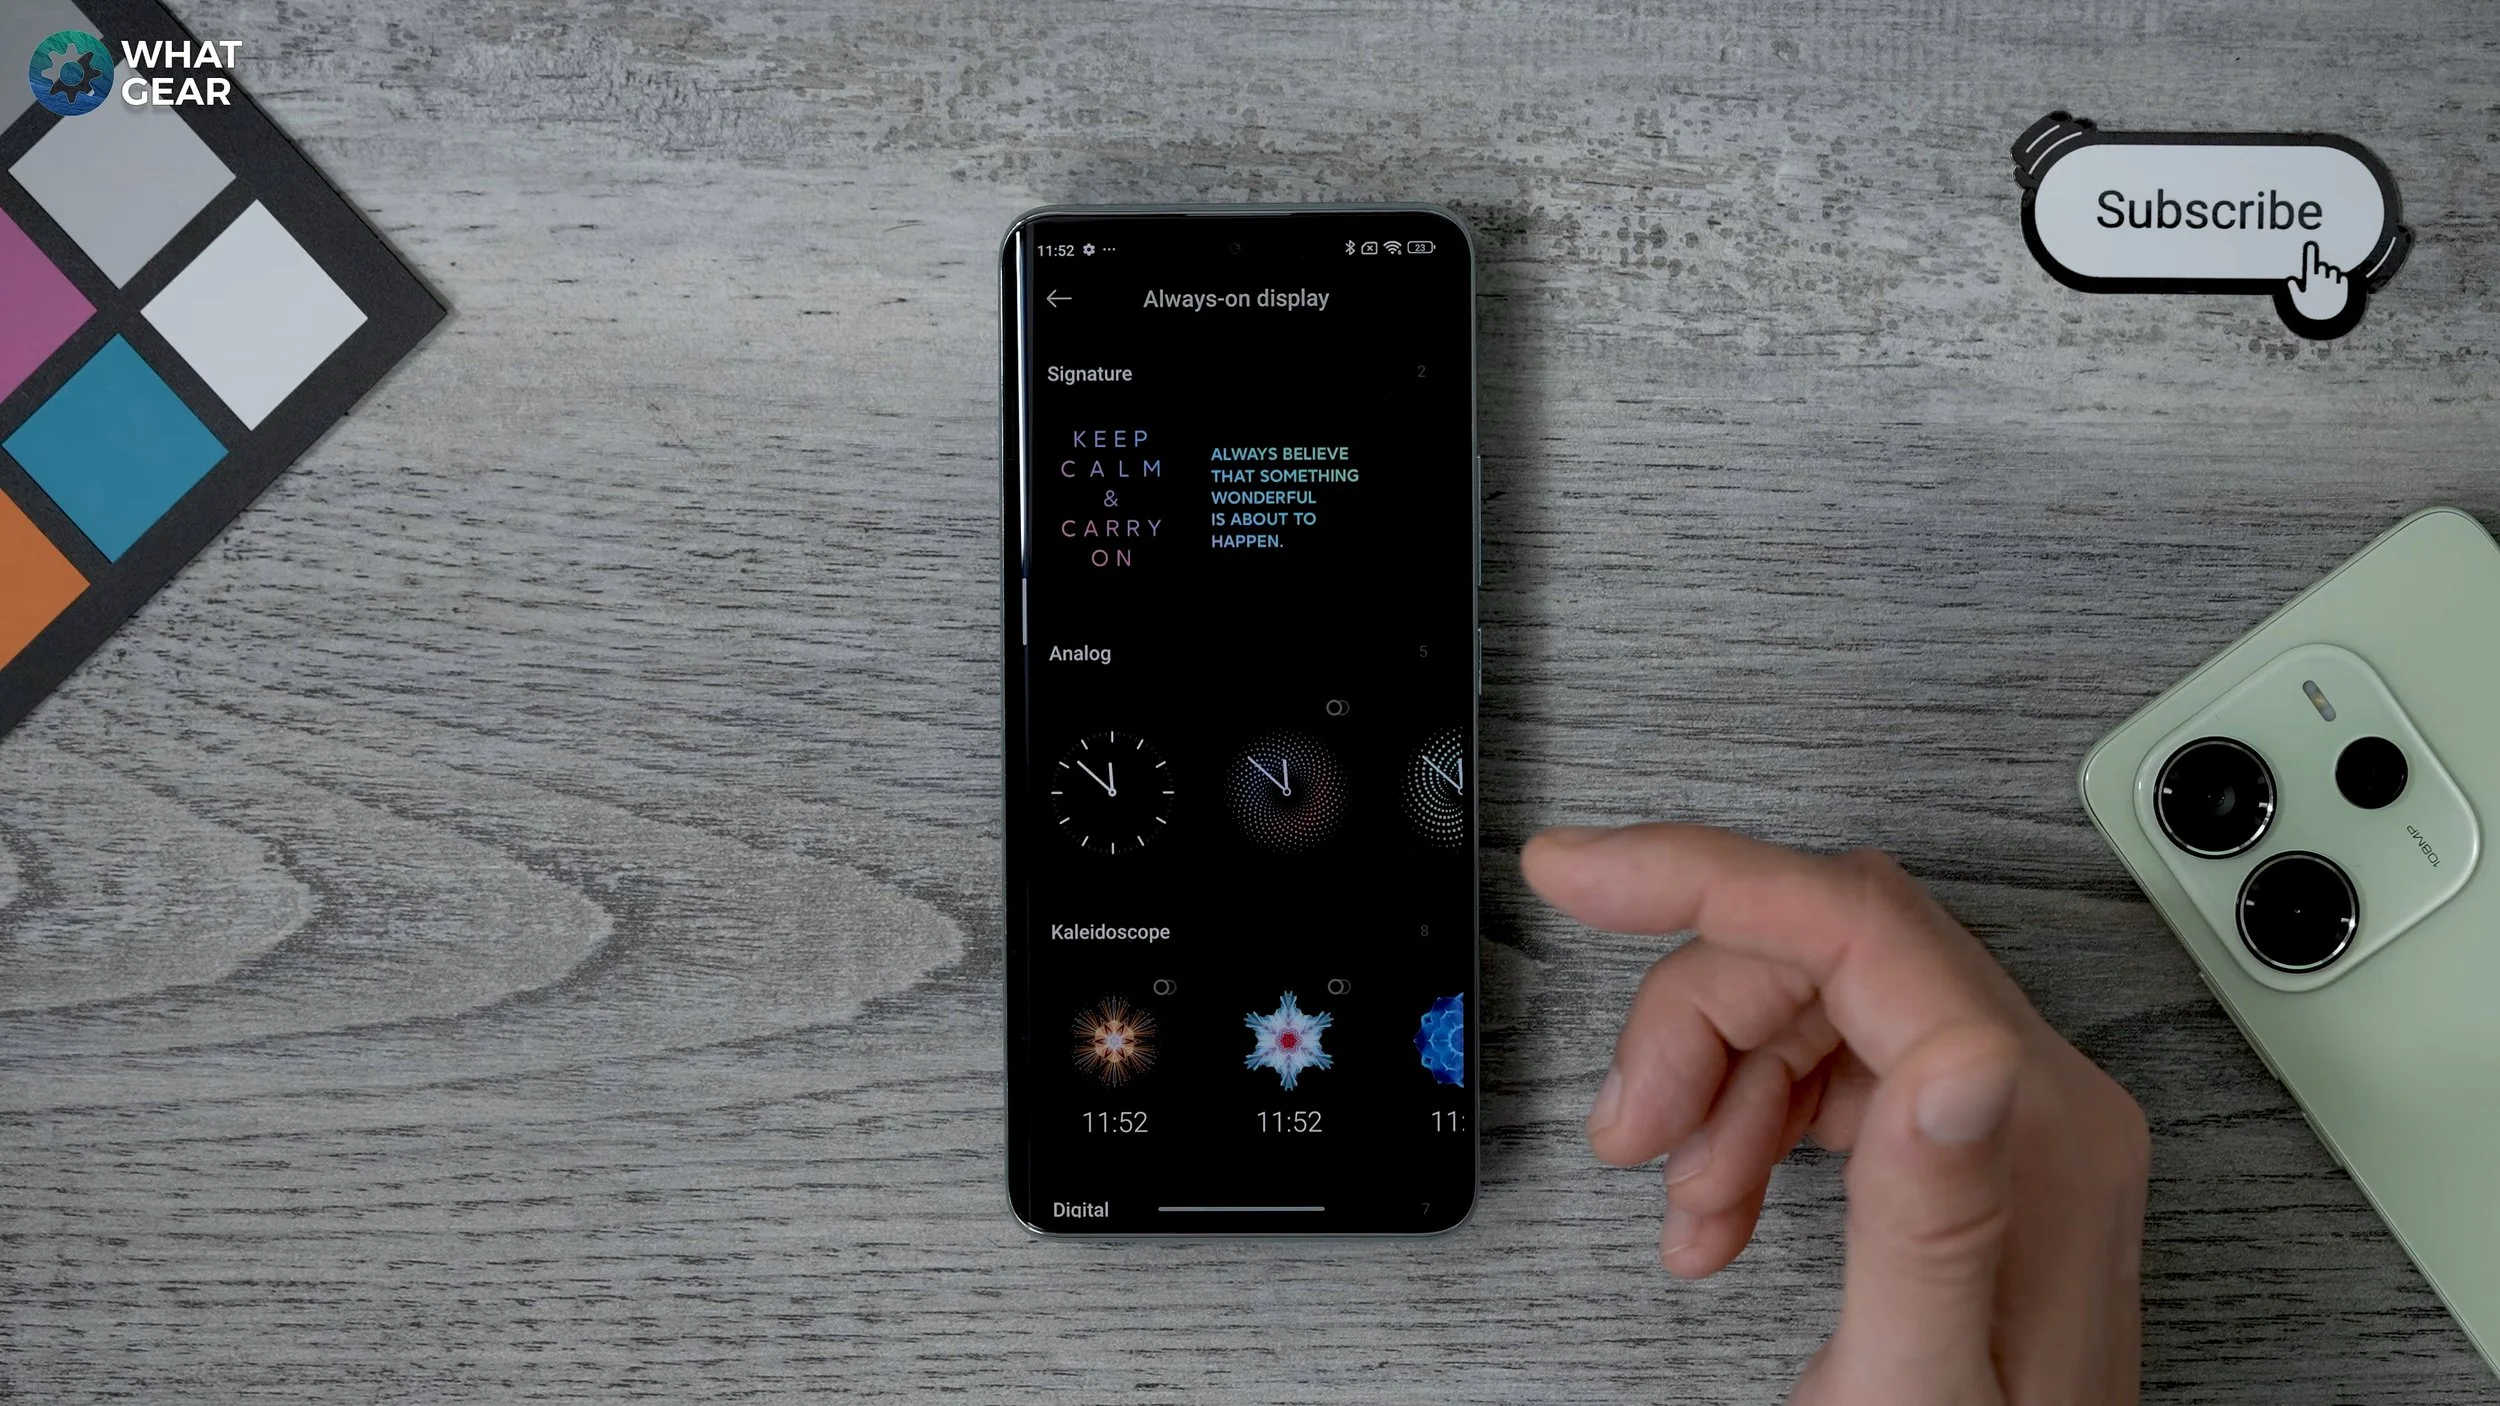
So let's kick this off with some personalization tips. So if you go to your settings, scroll down to Wallpaper and Personalization and here go to Always On. This might be switched off by default. So if it is switch it on. And you'll notice there's a bunch of always-on options. Whenever you see an icon that has these kinds of circles in the top right corner, that means that they have animations.
And beneath it, you can actually enable some of these little widgets. And there are some really cool ones here to play around with.
Notification Animation
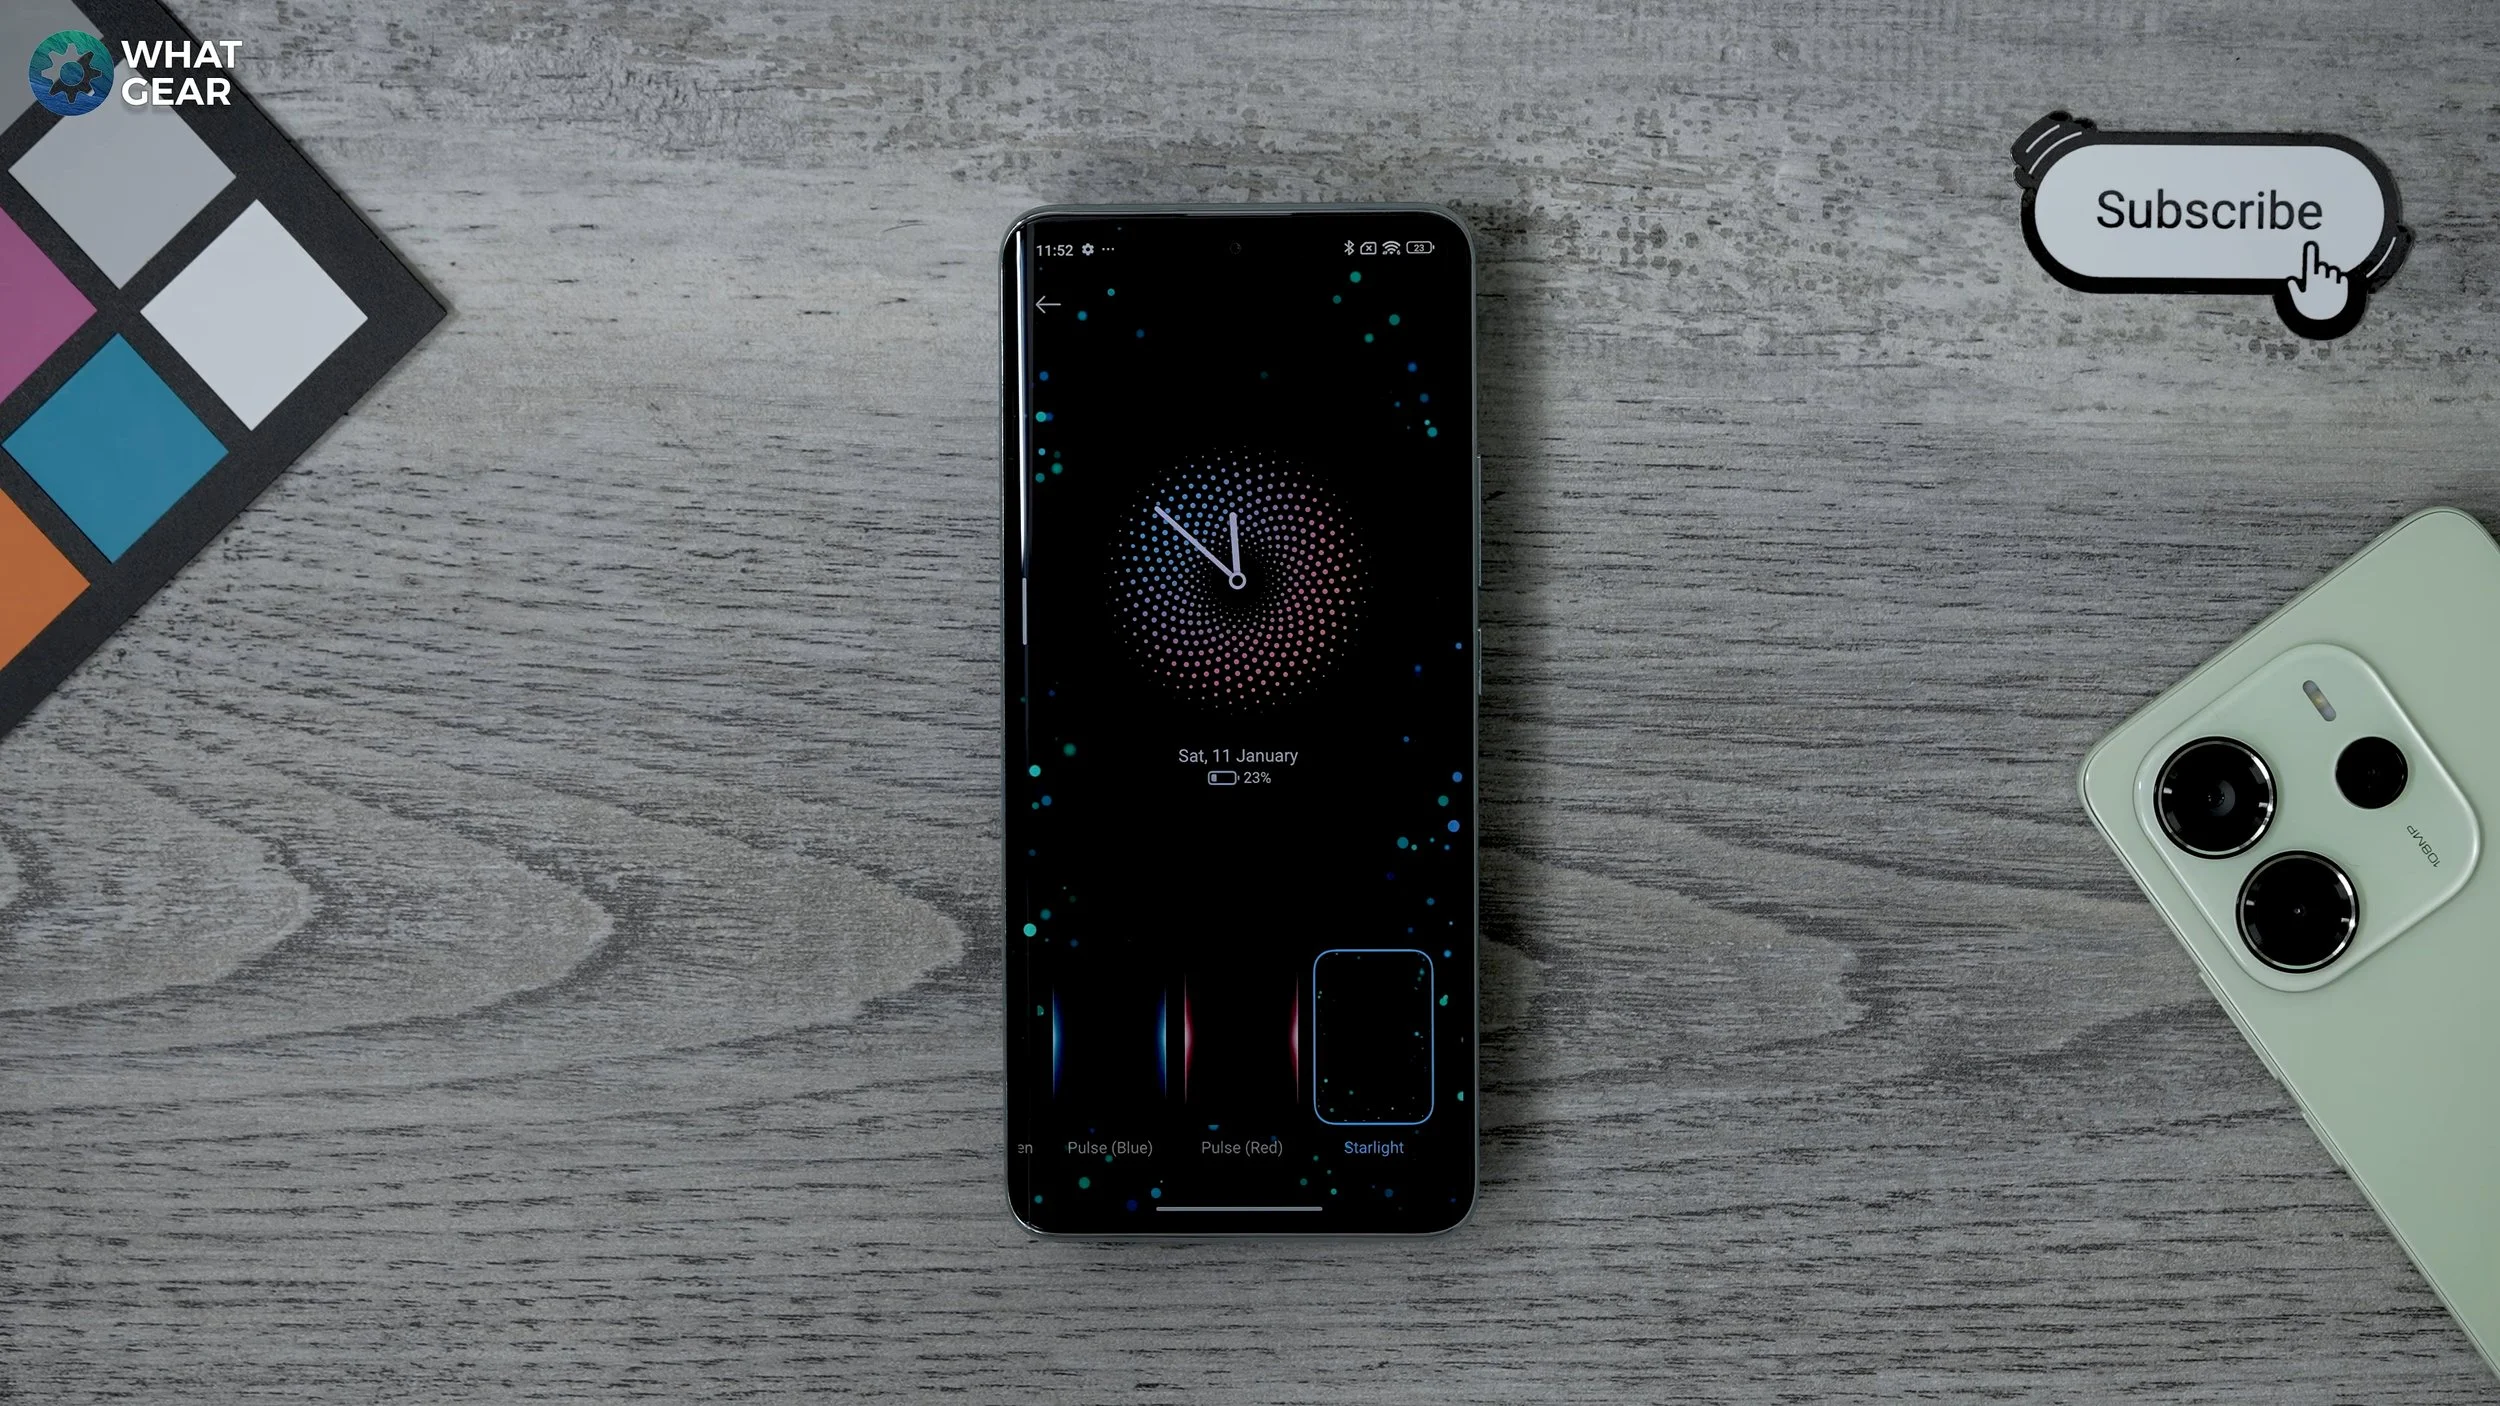
Staying within the wallpaper and personalization section, if you go to the notification effects here, you can actually add kind of edge lighting. And with this one here the Pro Plus version because it's a curved screen, if the phone is face down, you can still see these edge lighting effects happen. So this could be a nice little customization tweak to set up on day one.
Unlock Animations
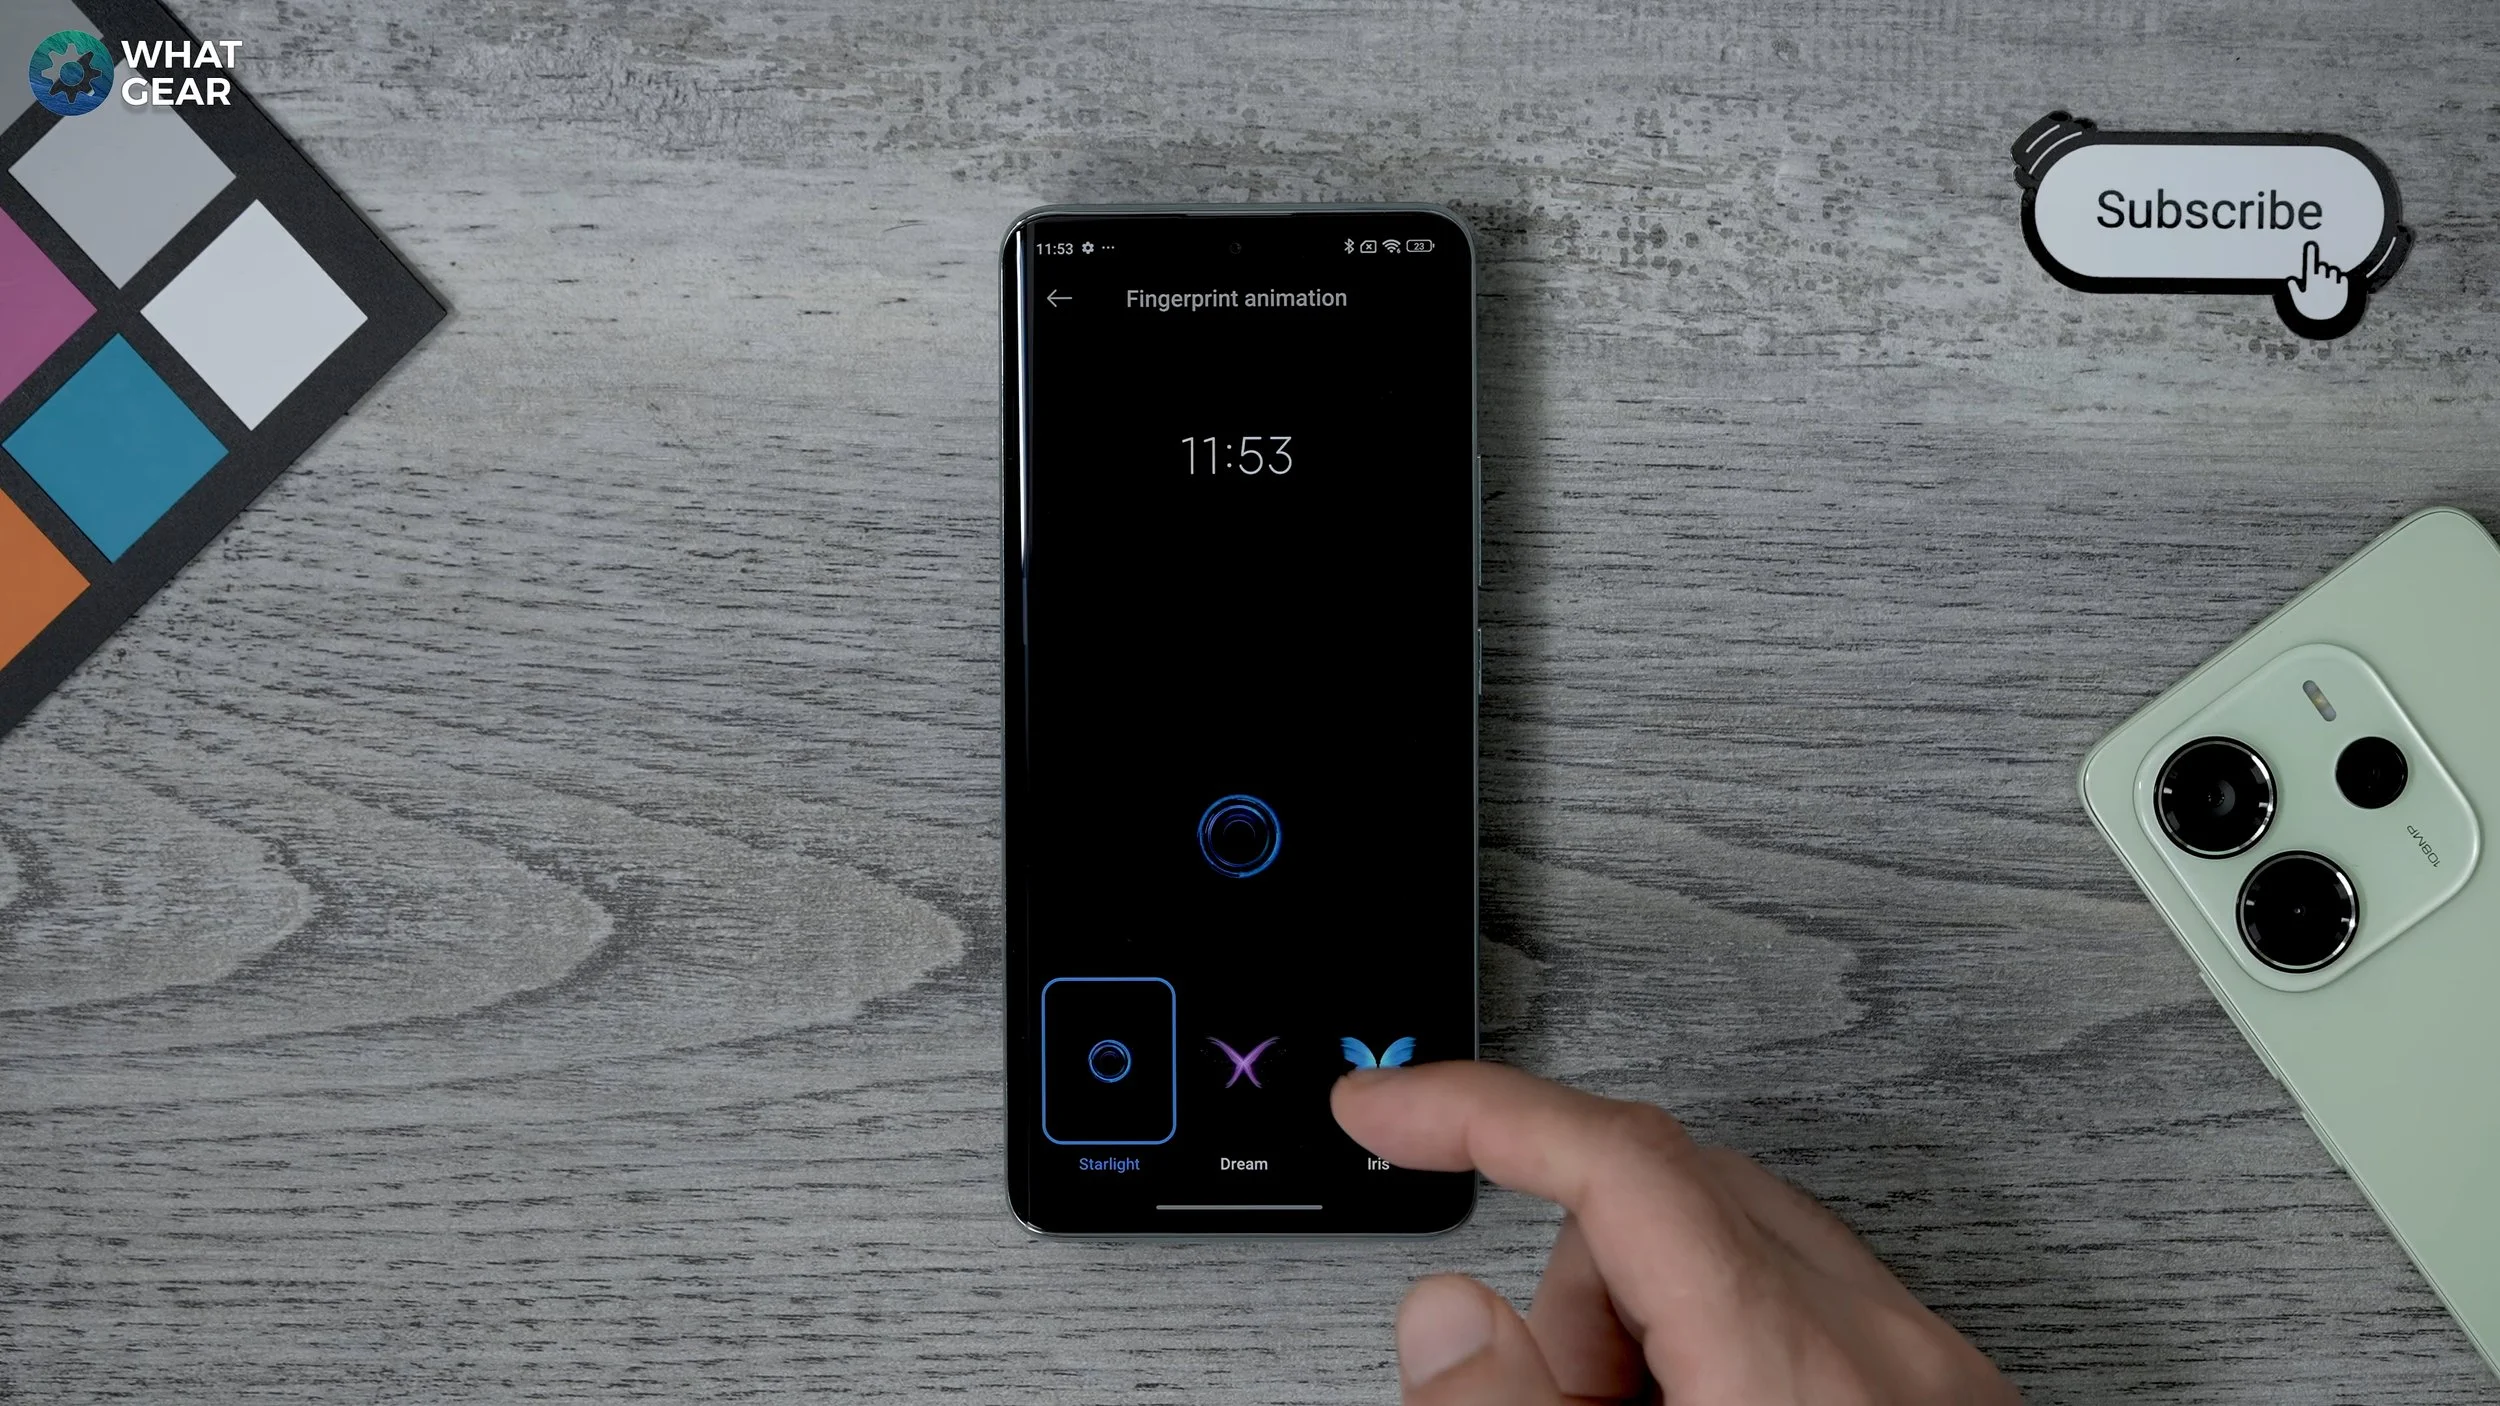
Again, Stay within the wallpaper and personalization section here you can go to the fingerprint effect. So this changes the default effect on the fingerprint scanner unlock.
There are only a couple to choose from right now, but it's worth checking back here because you never know when Xiaomi might add some more.
Lock Style
Staying on the wallpaper personalization section. If you go to Lock Style here, you can swipe up and down and choose between different styles of lock screens. And then you can also customize these as well. So I'm just going to choose one with the person in it. Hit customize and you'll notice you have the depth effect.
You can apply your wallpapers and add the depth effect. So that just brings the person to the front and gives you that kind of 3D image. So you have your time behind the person in the foreground. So you can play around with that with your own photos. It works sometimes, but not all the time. It depends on how clear the person is in the image.
And this is kind of the effect that you can expect. Also when you're just customizing the lock screen, if you hit customize, you can tap on the clock itself and you can change the font, then the layout. You can also change various things like the date on this one, and you can add different widgets and you can add your own signature and of course, you can change the font and the colours of the text as well if you want to.
Wallpaper Carousel
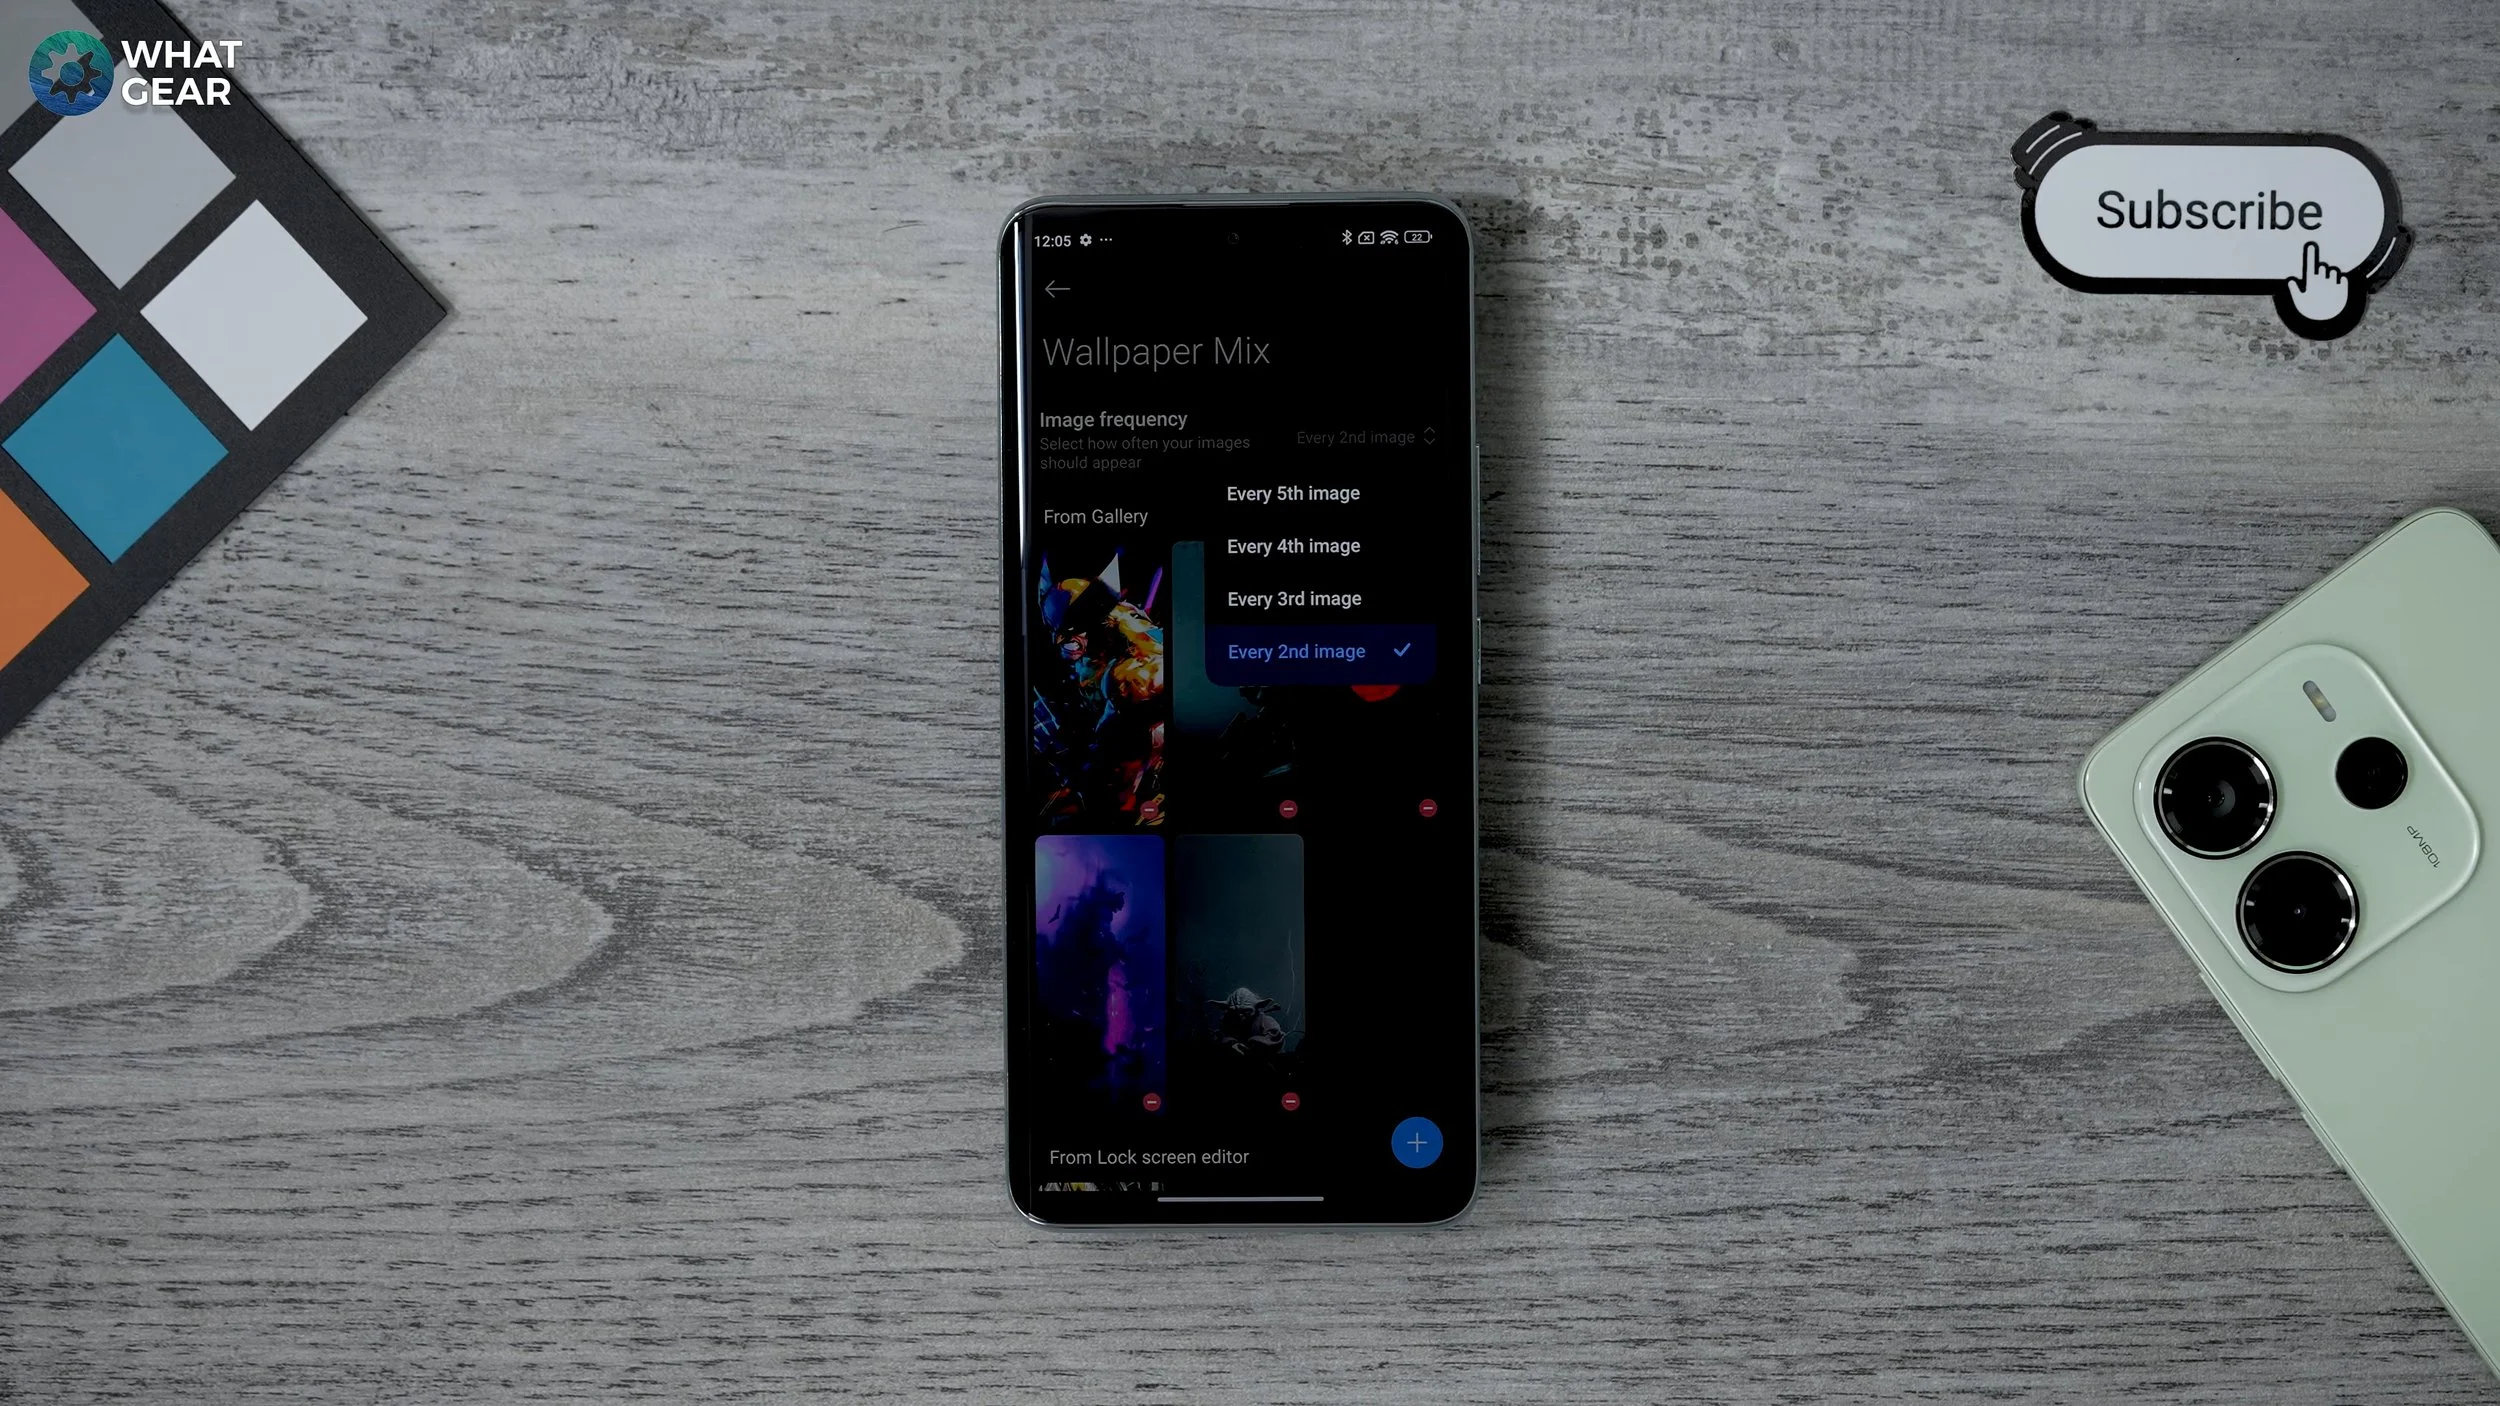
Within the wallpaper and personalization section, there is a feature here called Wallpaper Carousel. This will override the depth effects and things like that. So just keep that in mind if you're going to use this. If you go to wallpaper mix you can hit the plus down here and add a bunch of photos from your photo gallery.
Once you've done that, they should appear here. Now here you can choose the frequency at which you want these to show up in the carousel. With this enabled, the phone will actually grab images from the internet that it thinks you might like and make sure photos are in with those, and you can choose how often you want your photos to show up.
So if every second image should be one of yours, you can set it to a second image. Now, when you close the phone and open it again, you will have a different wallpaper each time.
Icon Colours
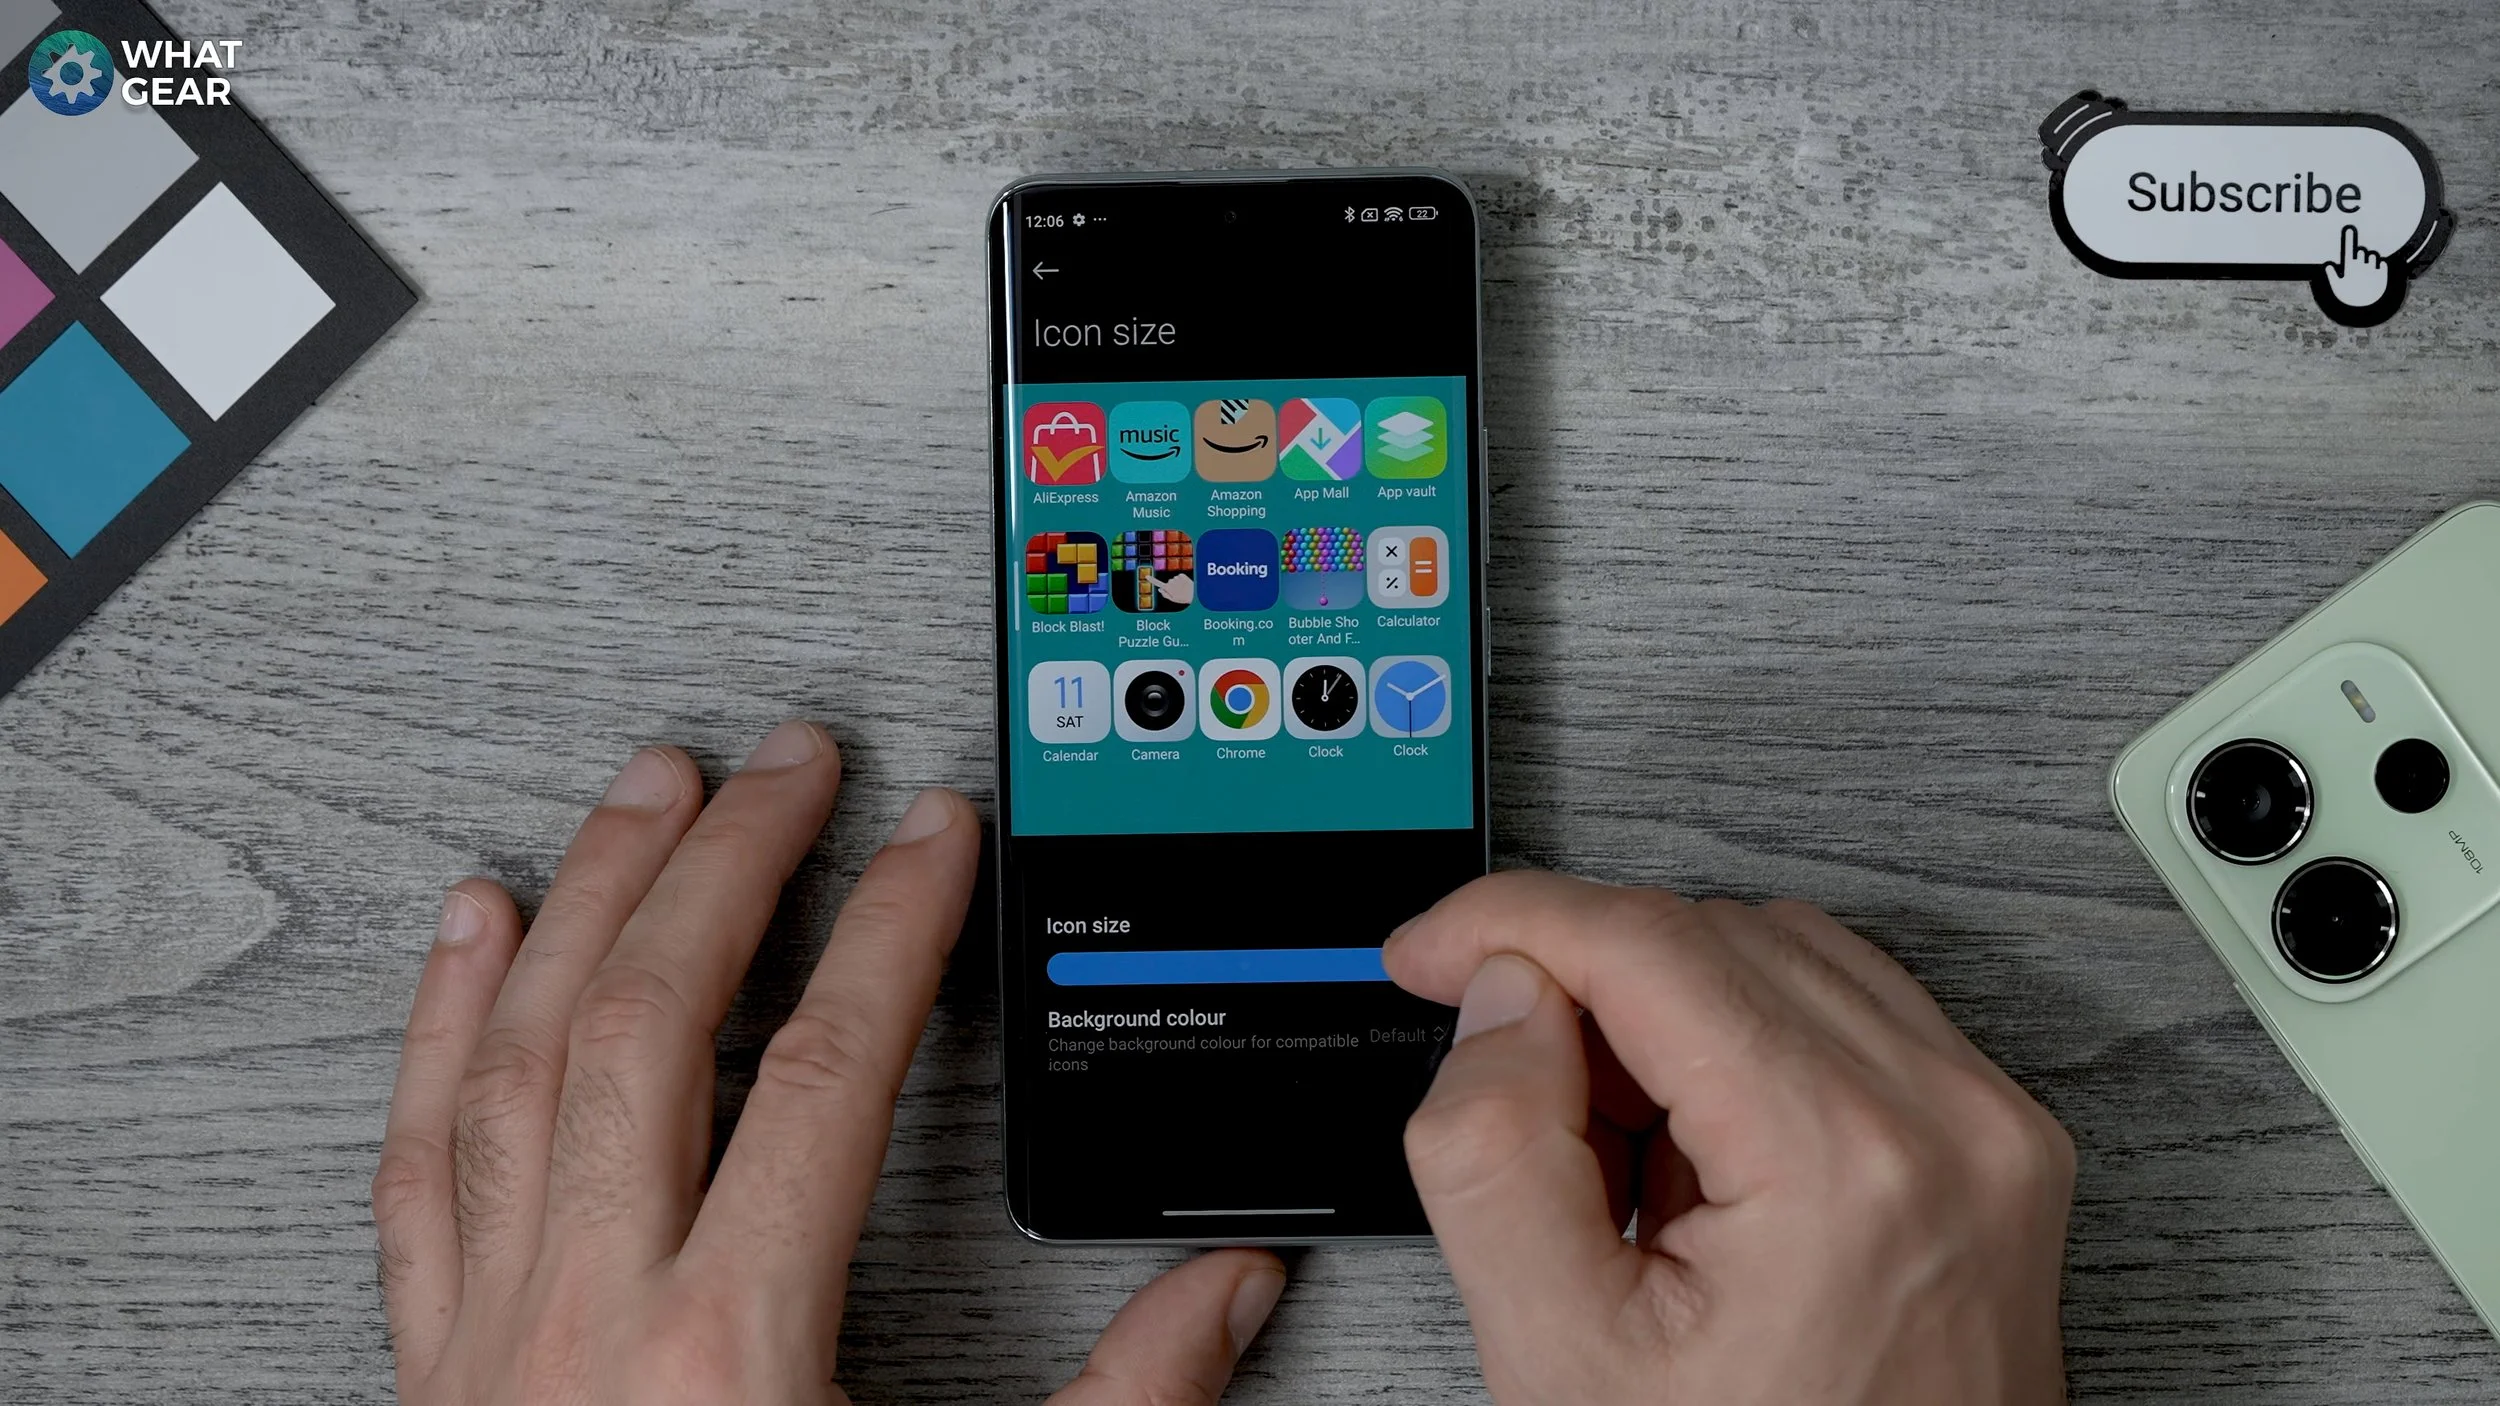
The last thing to show you are within the same settings menu Wallpaper and personalization, are the icons. So one of the cool things you can do here is adjust the size with a lot of control, so you can really fill up the space on the home screen and make them as big or small as you want them to be.
Then with the system apps, you can change those particular apps' background colour. You don't see it every time here, which is unusual, but if you want them to be more purple or green, you can do that. You'll notice in particular, that the Google apps will have these colors applied to the backgrounds.
Faster Charging
Now let's get into some performance tweaks. So if you go into your settings, and scroll down to the battery, if you want your phone to charge up faster, then I highly recommend going to the Charging options. And in here changing wired charging mode to top speed. That way you get the fastest charging possible on the phone.
However, if you're on the flip side of that and you want your phone to last as long as possible in the long run, if you go to battery protection, you can enable the battery protection mode. That means the phone will only charge to 80% and the battery degradation over time will be much slower.
More Cache
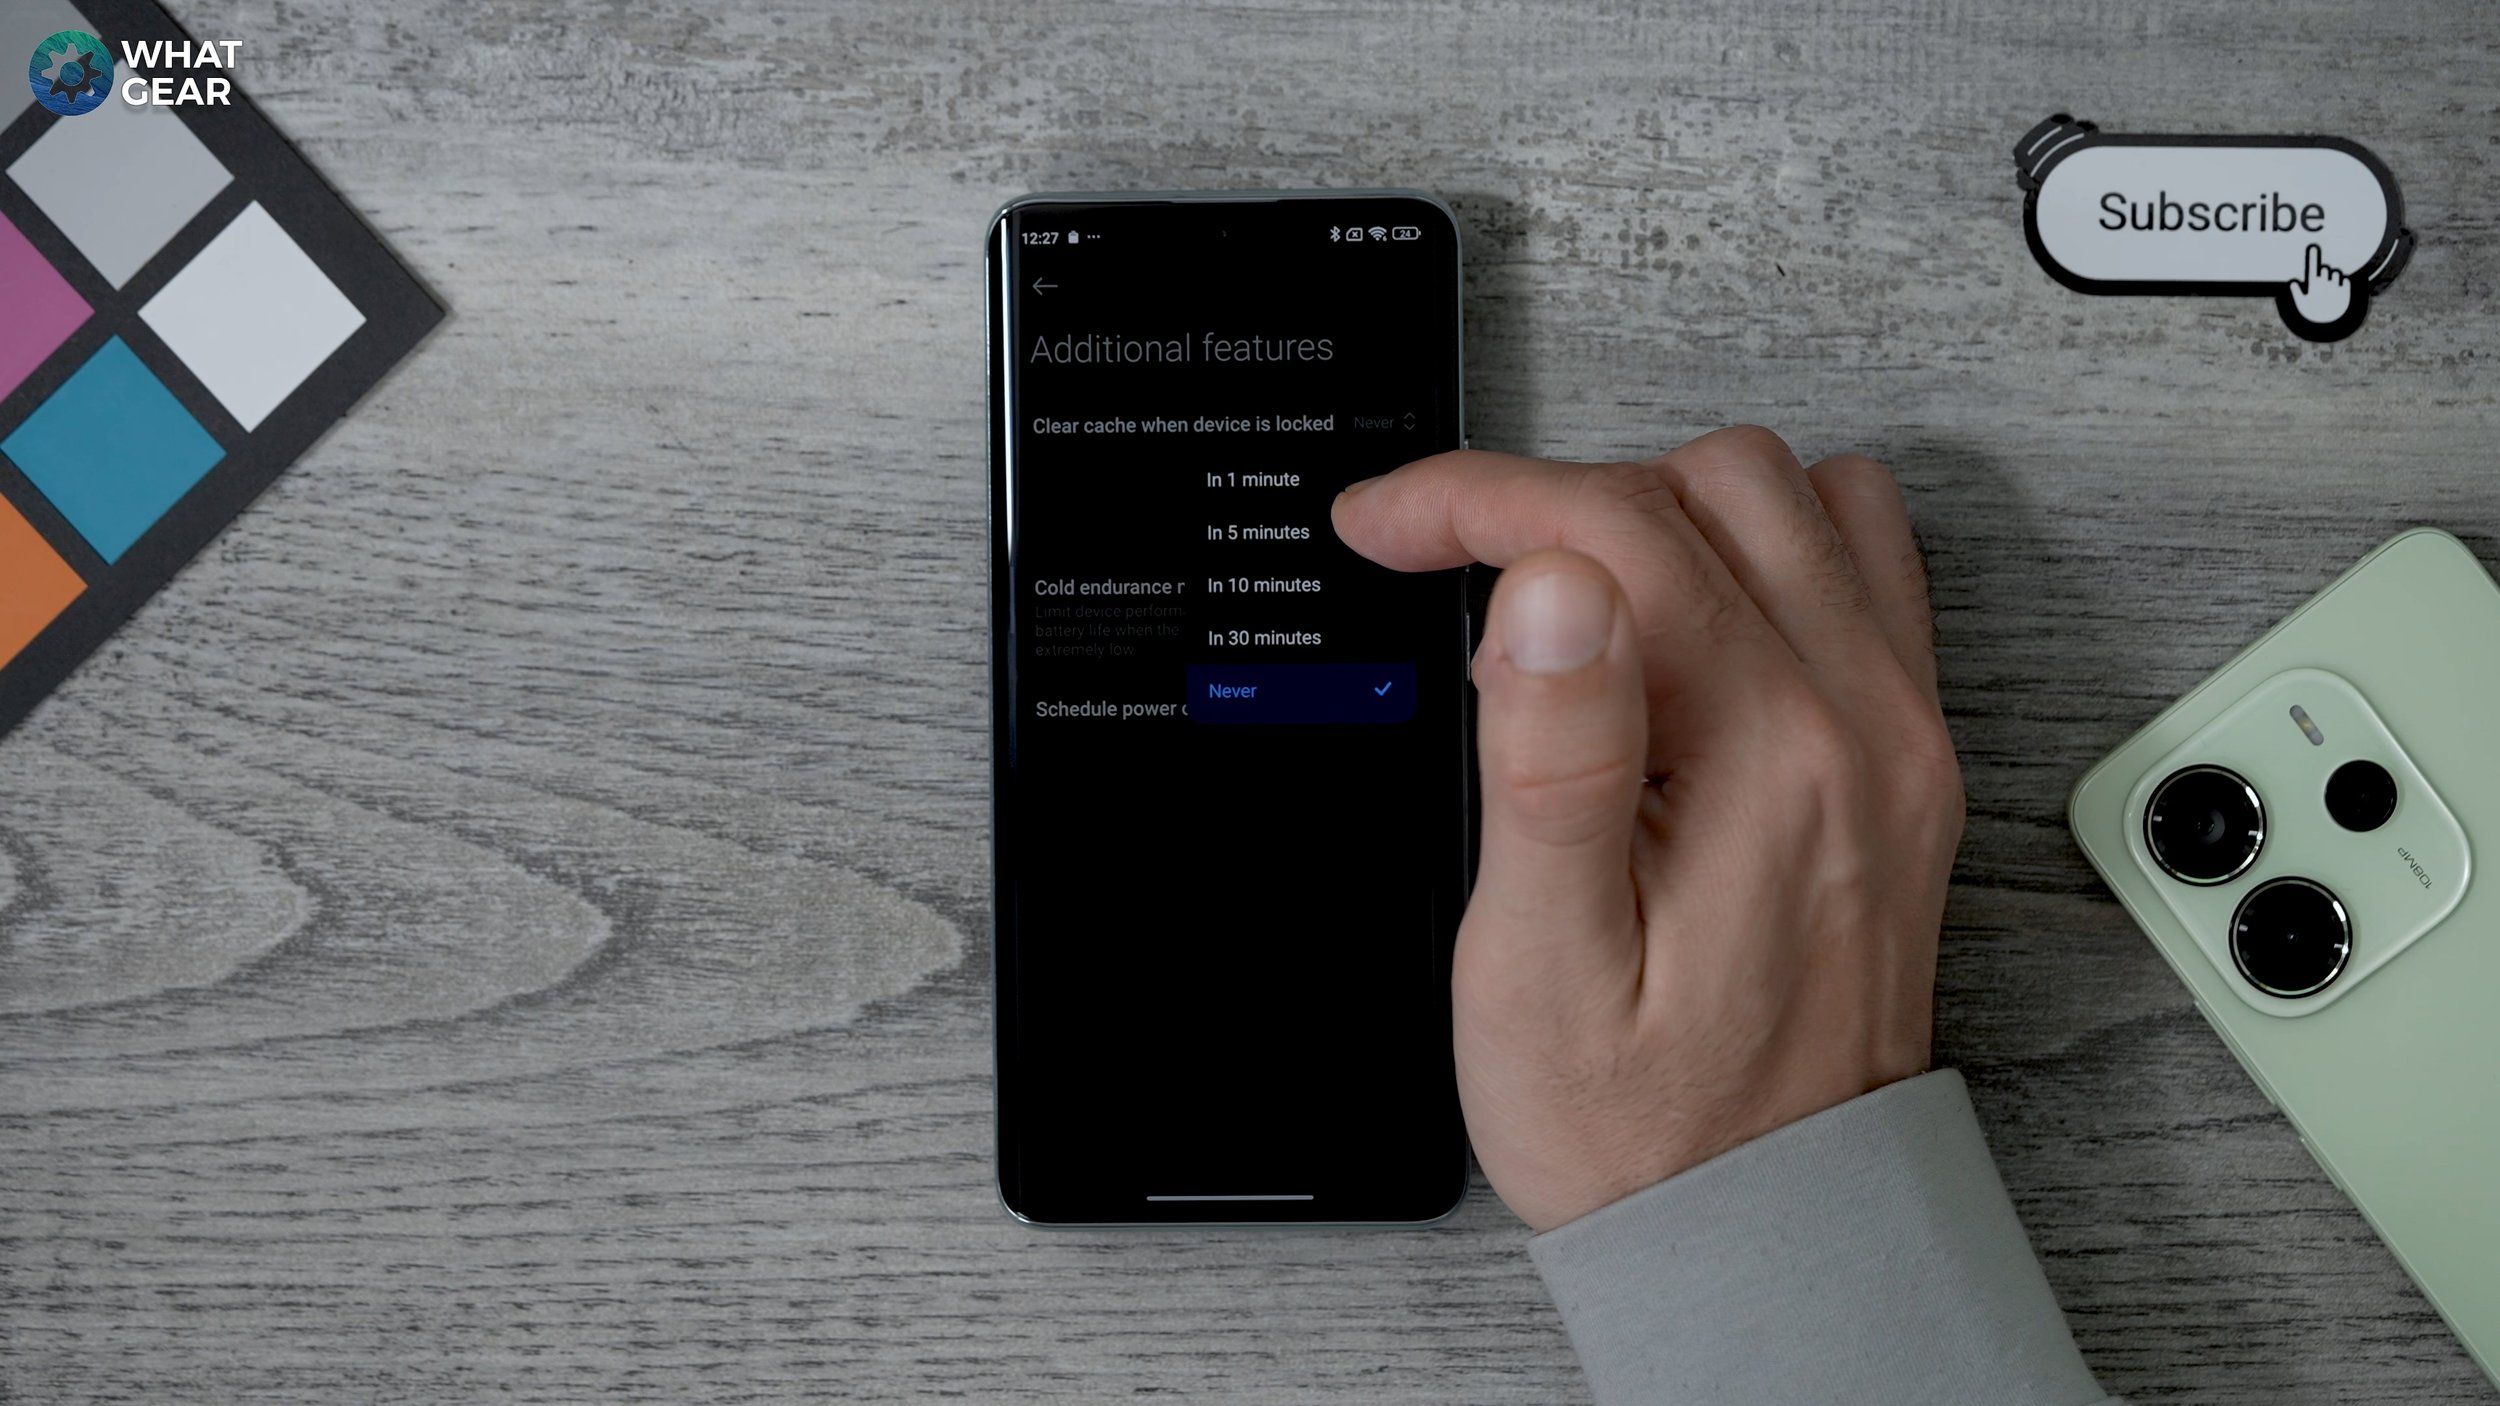
Now, this next one is a feature that I wish more Android phones have. If you go to settings, go to battery and then here if you go to additional features. This little trick right here clear cache when the device is locked is fantastic.
So if you want to make sure your phone's running at its optimal speed on a regular basis with minimum effort, you could literally set this to five minutes. So every time your phone is off for five minutes in your pocket, it will clear everything that's going on in the background. I do think this is a brilliant setting, so it's definitely worth switching this on now.
Security Tools
It's well known that Xiaomi preloads a lot of apps which is kind of unnecessary. I'm going to show you how to easily clear all of those up, but a couple of the tools here which are very useful are these two: security and cleaner. So I've barely used this device, It's pretty much brand new at this point.
But if we go to security, you'll see straight away there's an option to boost the speed. It will run through everything just going on your phone and clear it up nicely for you. Then you can just hit boost speed, and the first time you do this, it will give you the option to add an app to your home screen. And that app will look like this.
So you can quickly access it next time without going through the security app. Another very useful tool interestingly, hidden within the security app is this one the deep clean option. So like I said before, I've barely used this phone at this point. But this will scan everything on the phone and it will straightaway tell you what can be cleared up to clean up space.
And most importantly, if you've got a brand new phone, if you go to uninstall apps, you can see all of the preloaded stuff. I'm just going to go for it now and get rid of everything that I'm never going to use. Straight away out of the box. 2.22 gigs of apps uninstalled in an instant.
Brighter Display
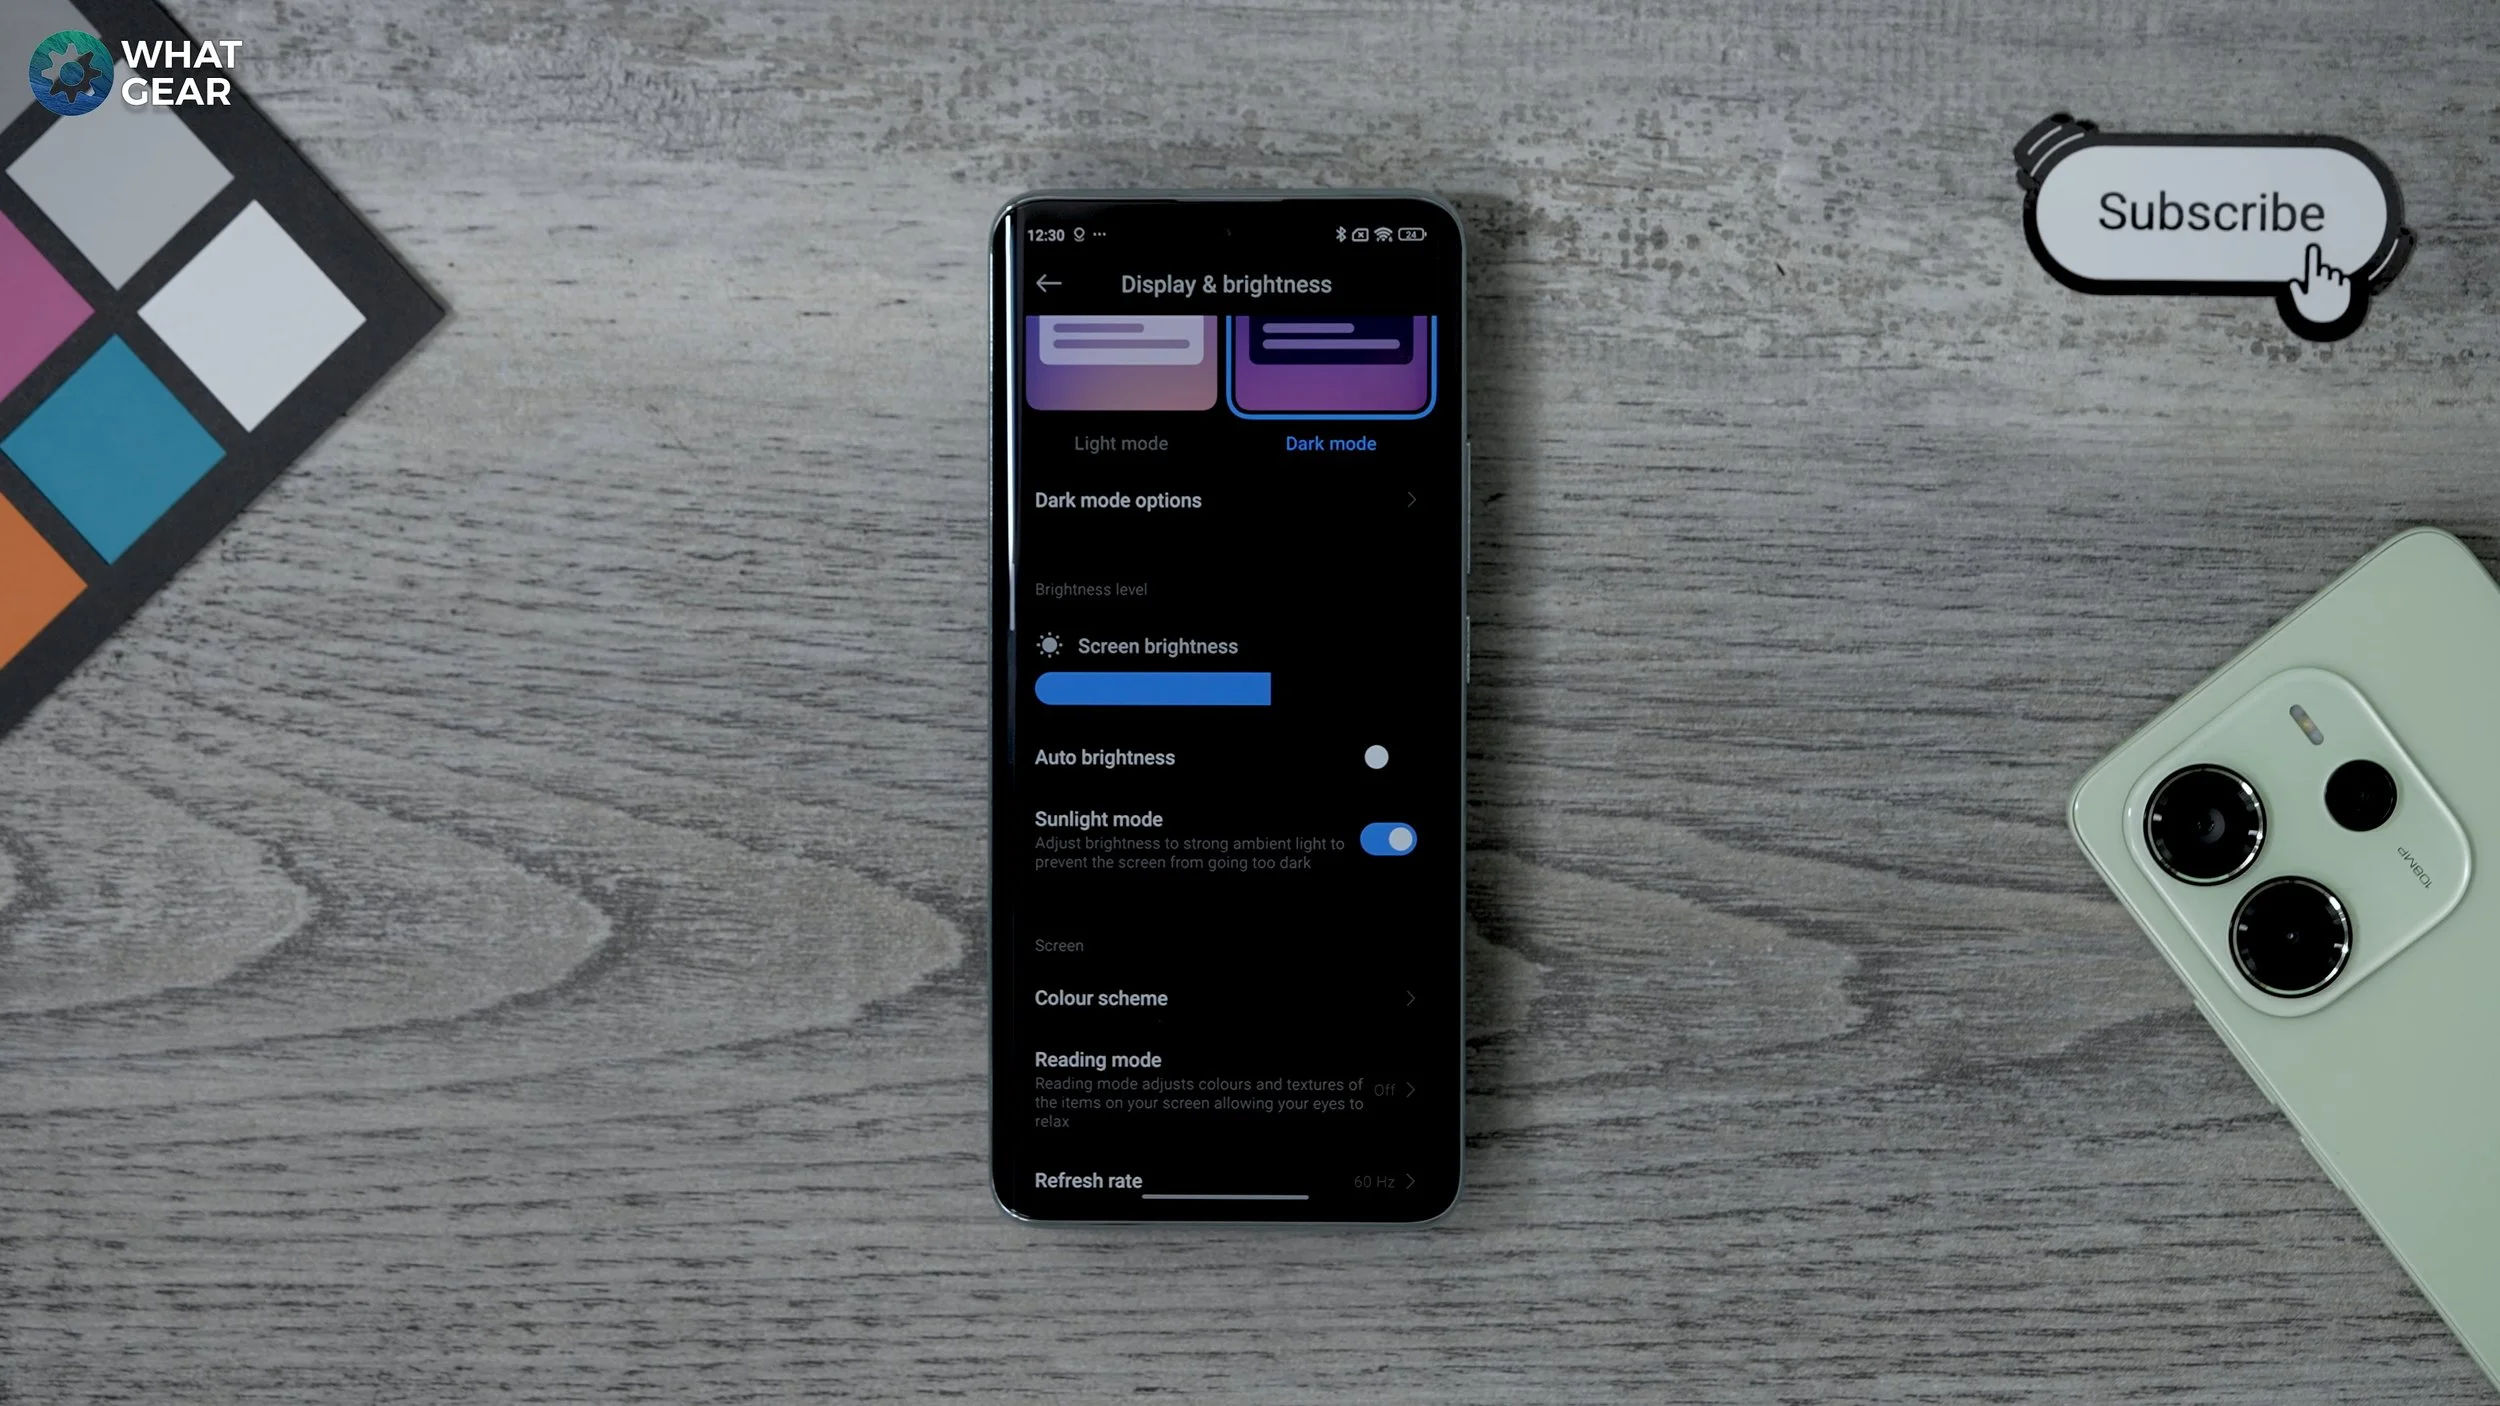
Now here's a setting that you should switch on on day one that will improve your display. If you go to settings, scroll down to Display and Brightness. Here you'll see sunlight mode, enable this. That way, whenever it's a sunny day when your phone screen might be typically hard to see, the phone will automatically use the sensors and brighten up the display, making it more visible.
This, of course, will use a bit more power, but I do think this one is a useful setting and also you should have auto brightness on. I've switched it off for this video so it's not constantly shifting.
Custom Refresh Rates
Now while we're here, there's a little bonus tip. The refresh rate on the phone will likely be set to default, which means it will switch back and forth between 60 and 120Hz. If you set it to 120Hz, you can actually choose specific apps that will use the 120Hz, and then you can turn off the ones where it's not needed.
So if you want to fine-tune the refresh rates on your phone and make sure that they're hitting that 120Hz when you're gaming and stuff like that, just make sure that those games are switched on here within this list.
The Cleaner
The second app that I mentioned earlier was the cleaner tool. So if you go into that, it's great to use from time to time because it will clear the cache for you. The memory is already 180 MB of files, which are taking up space, which I have no idea what they are. So we can just hit clean up and there we go.
It does give you a nice overview of the storage on the phone as well, and also within this app, you do have a security scan. So if you've installed an unknown app from a third-party source, you might want to scan it in. Check if it is not a virus.
Transition
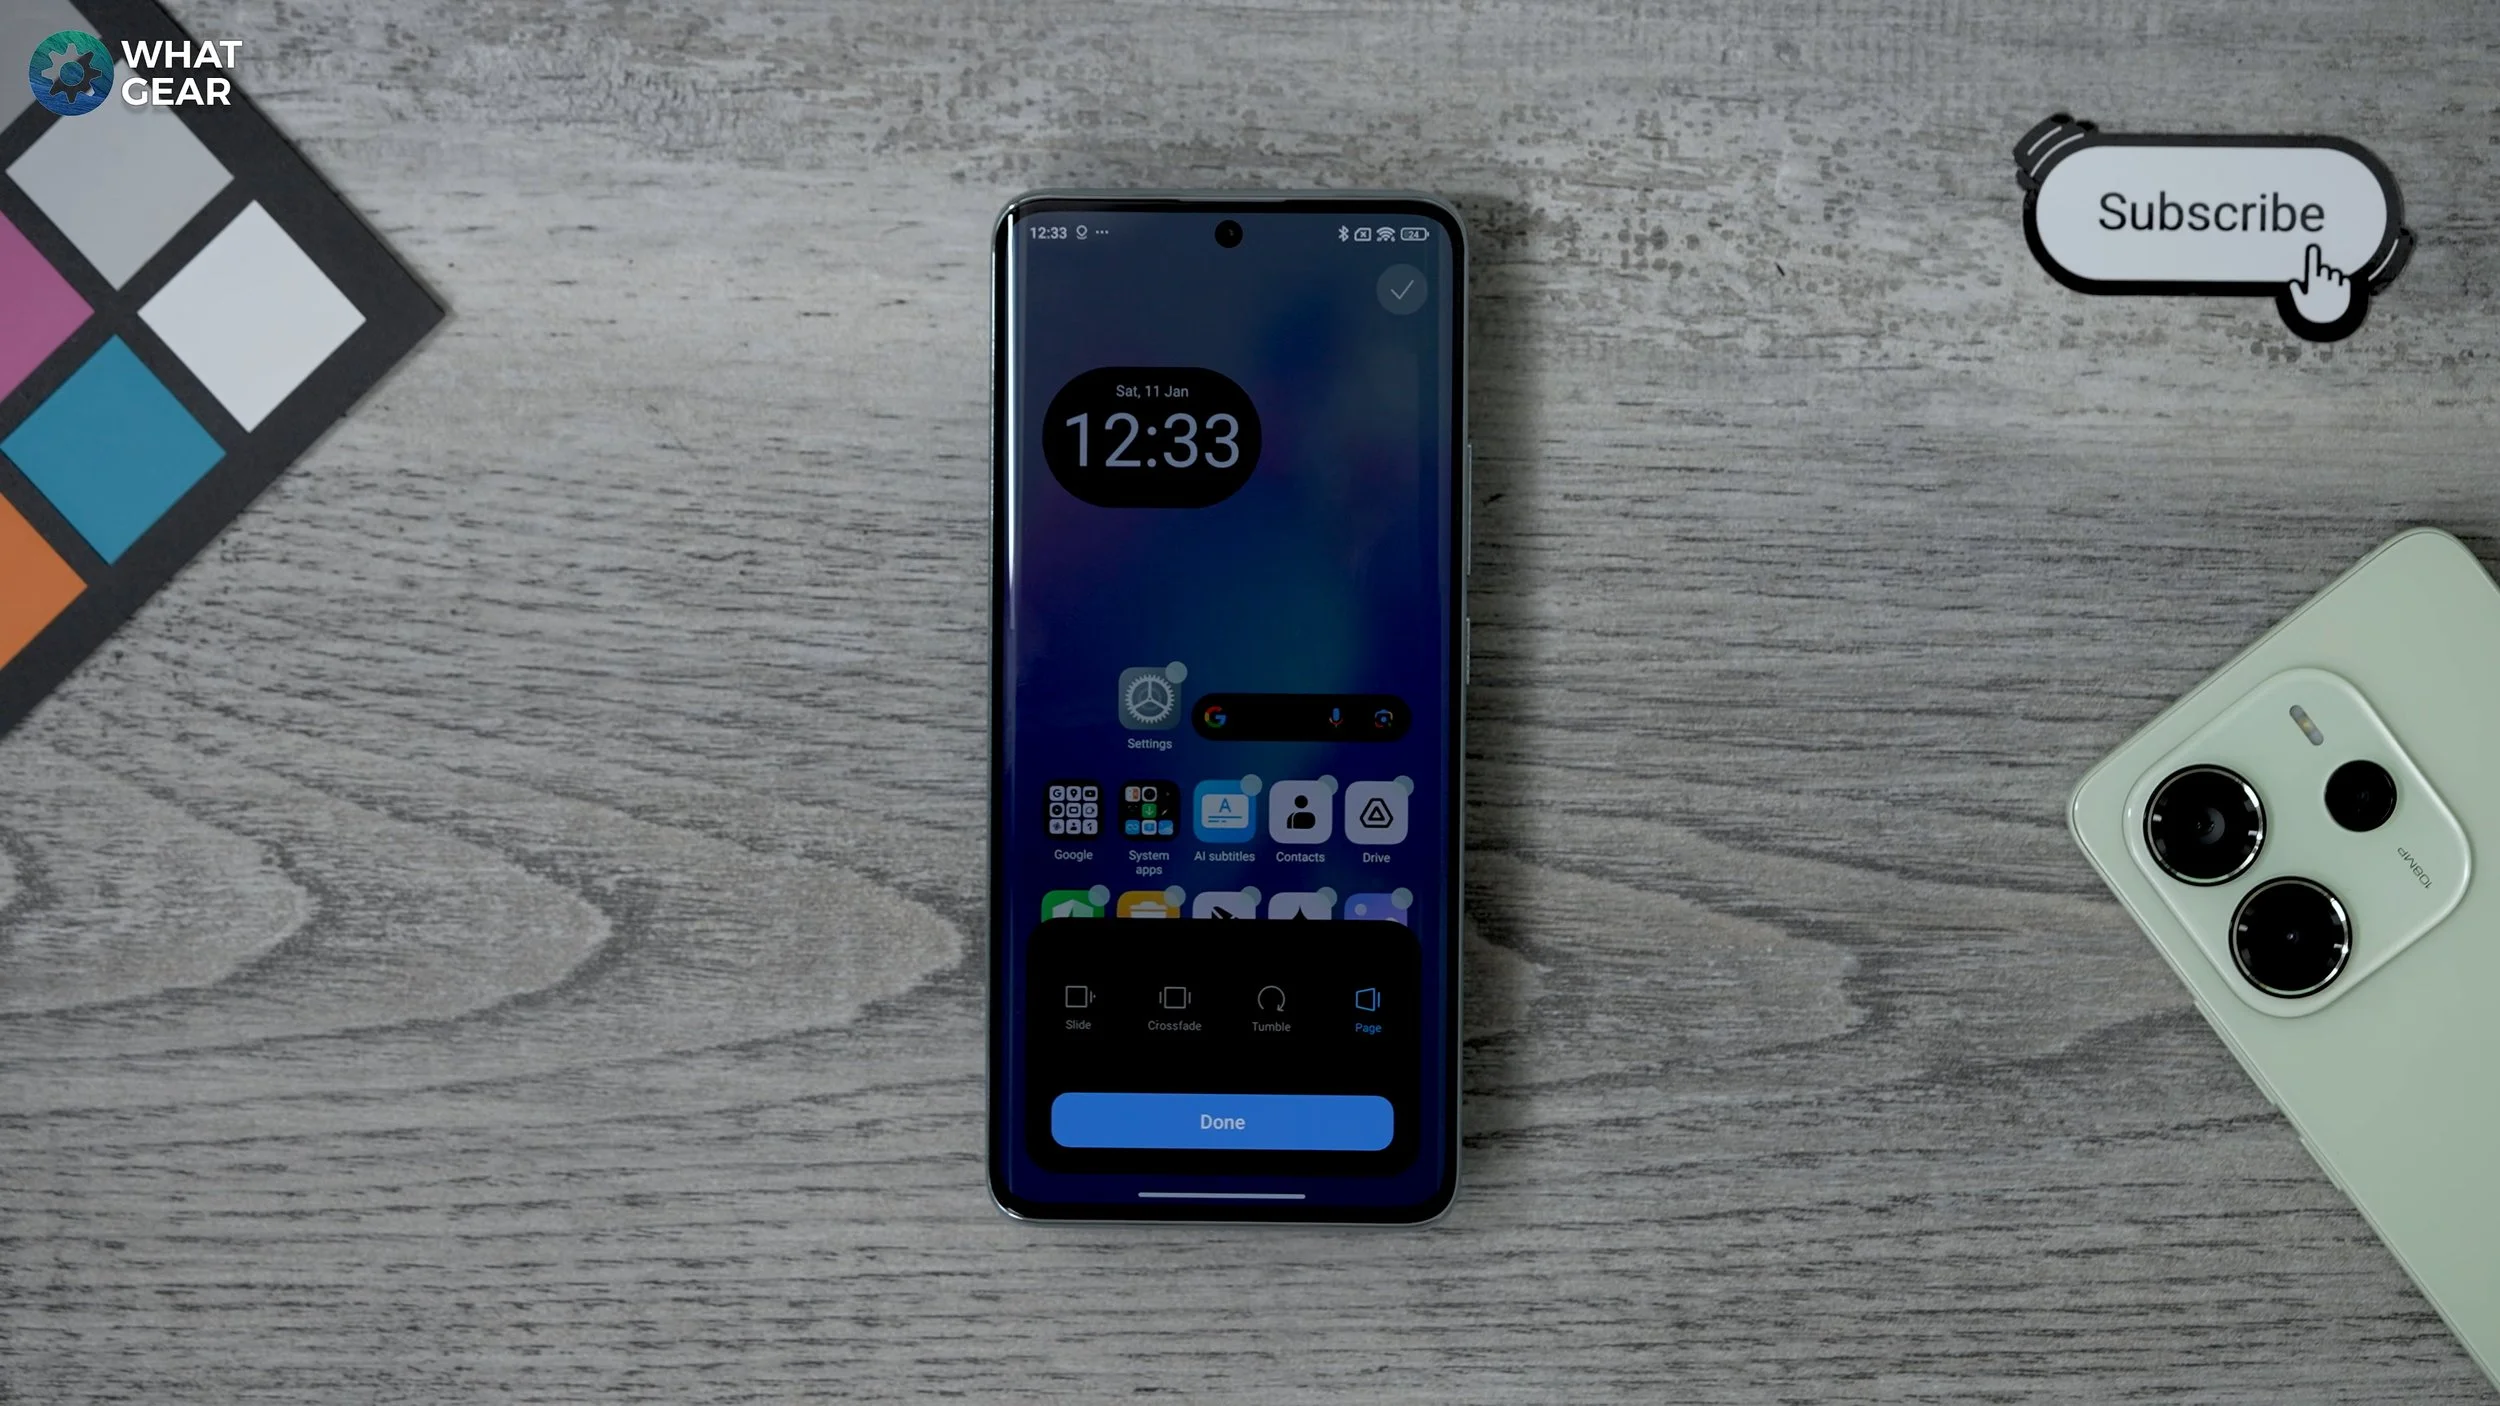
Now let's dive into a couple more customization tweaks. So if you pinch the home screen you can then customize what is on the screen. But what we're going to do is go to settings here, bottom right corner. At the top of this list, you'll see transition effects. The default one is slight, but you do have some nice other options here to play around with. I do like this page one is pretty unique.
It makes it quite unlike any other Android phone, so you might want to play around with those.
Grid Size
Now once again, if we pinch the home screen, go to the settings bottom right corner. Here you can change the size of the home screen layout. It can be 4 by 6 or 5 by 6. I prefer five by six because that way you could have more stuff on each page.
So I do recommend customizing that for whatever feels right to you.
Custom App Drawer
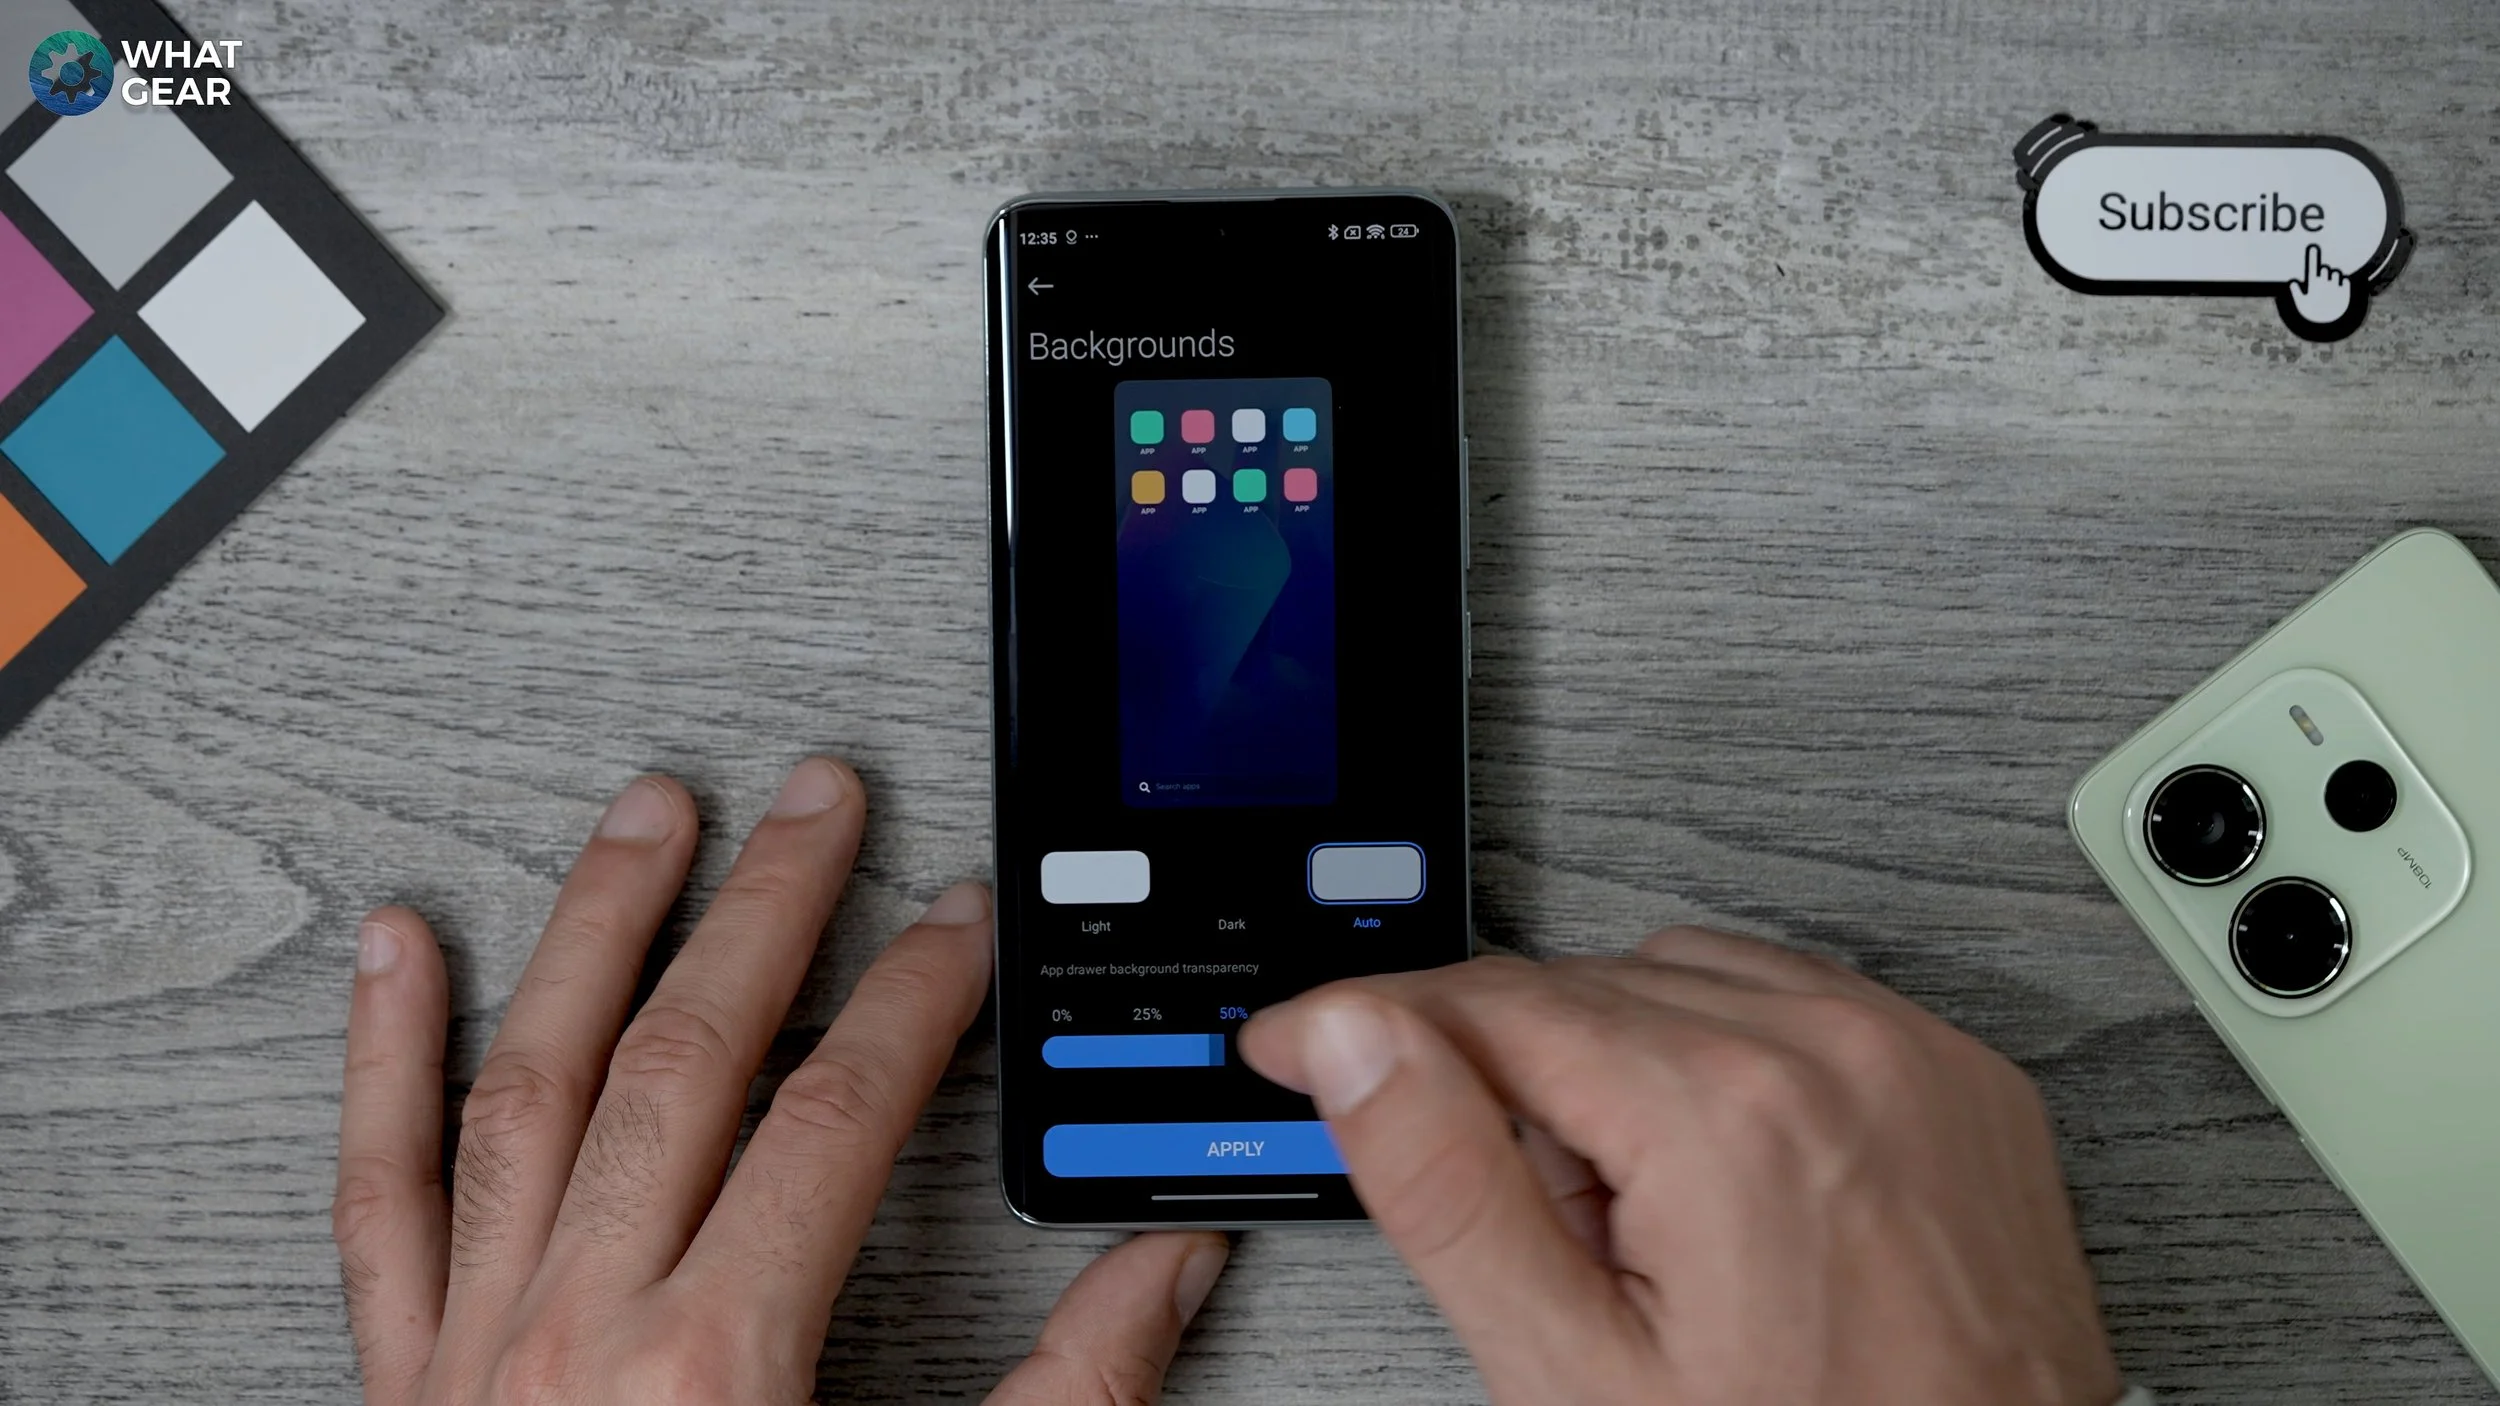
Now, something else is pretty cool. If you're using the app drawer like I am, where you swipe up and you get all of your apps is this, if you pinch the home screen, go to settings here, go to more and you can switch between the different options here, if you want to. But what I want to show you is this, if you go to backgrounds, this is the background of the app drawer. So it doesn't have to be fully black or fully transparent.
If you don't want it to be, it can be somewhere in the middle. You have full control over this. So it's kind of dark. And then you can also change to dark mode, or light mode or keep it on auto. So switch depending on the time of the day.
App Colour Filter
This is an interesting little trick with the app draw open. If you go to settings up here, there is the option to group by colour. So as long as you haven't changed the colour of the apps as I did earlier, when you open your app drawer, it will categorize them based on the color of those apps.
So this might make things easier for you to find more quickly. And then you've also got the search option down here as well.
Animation Speeds
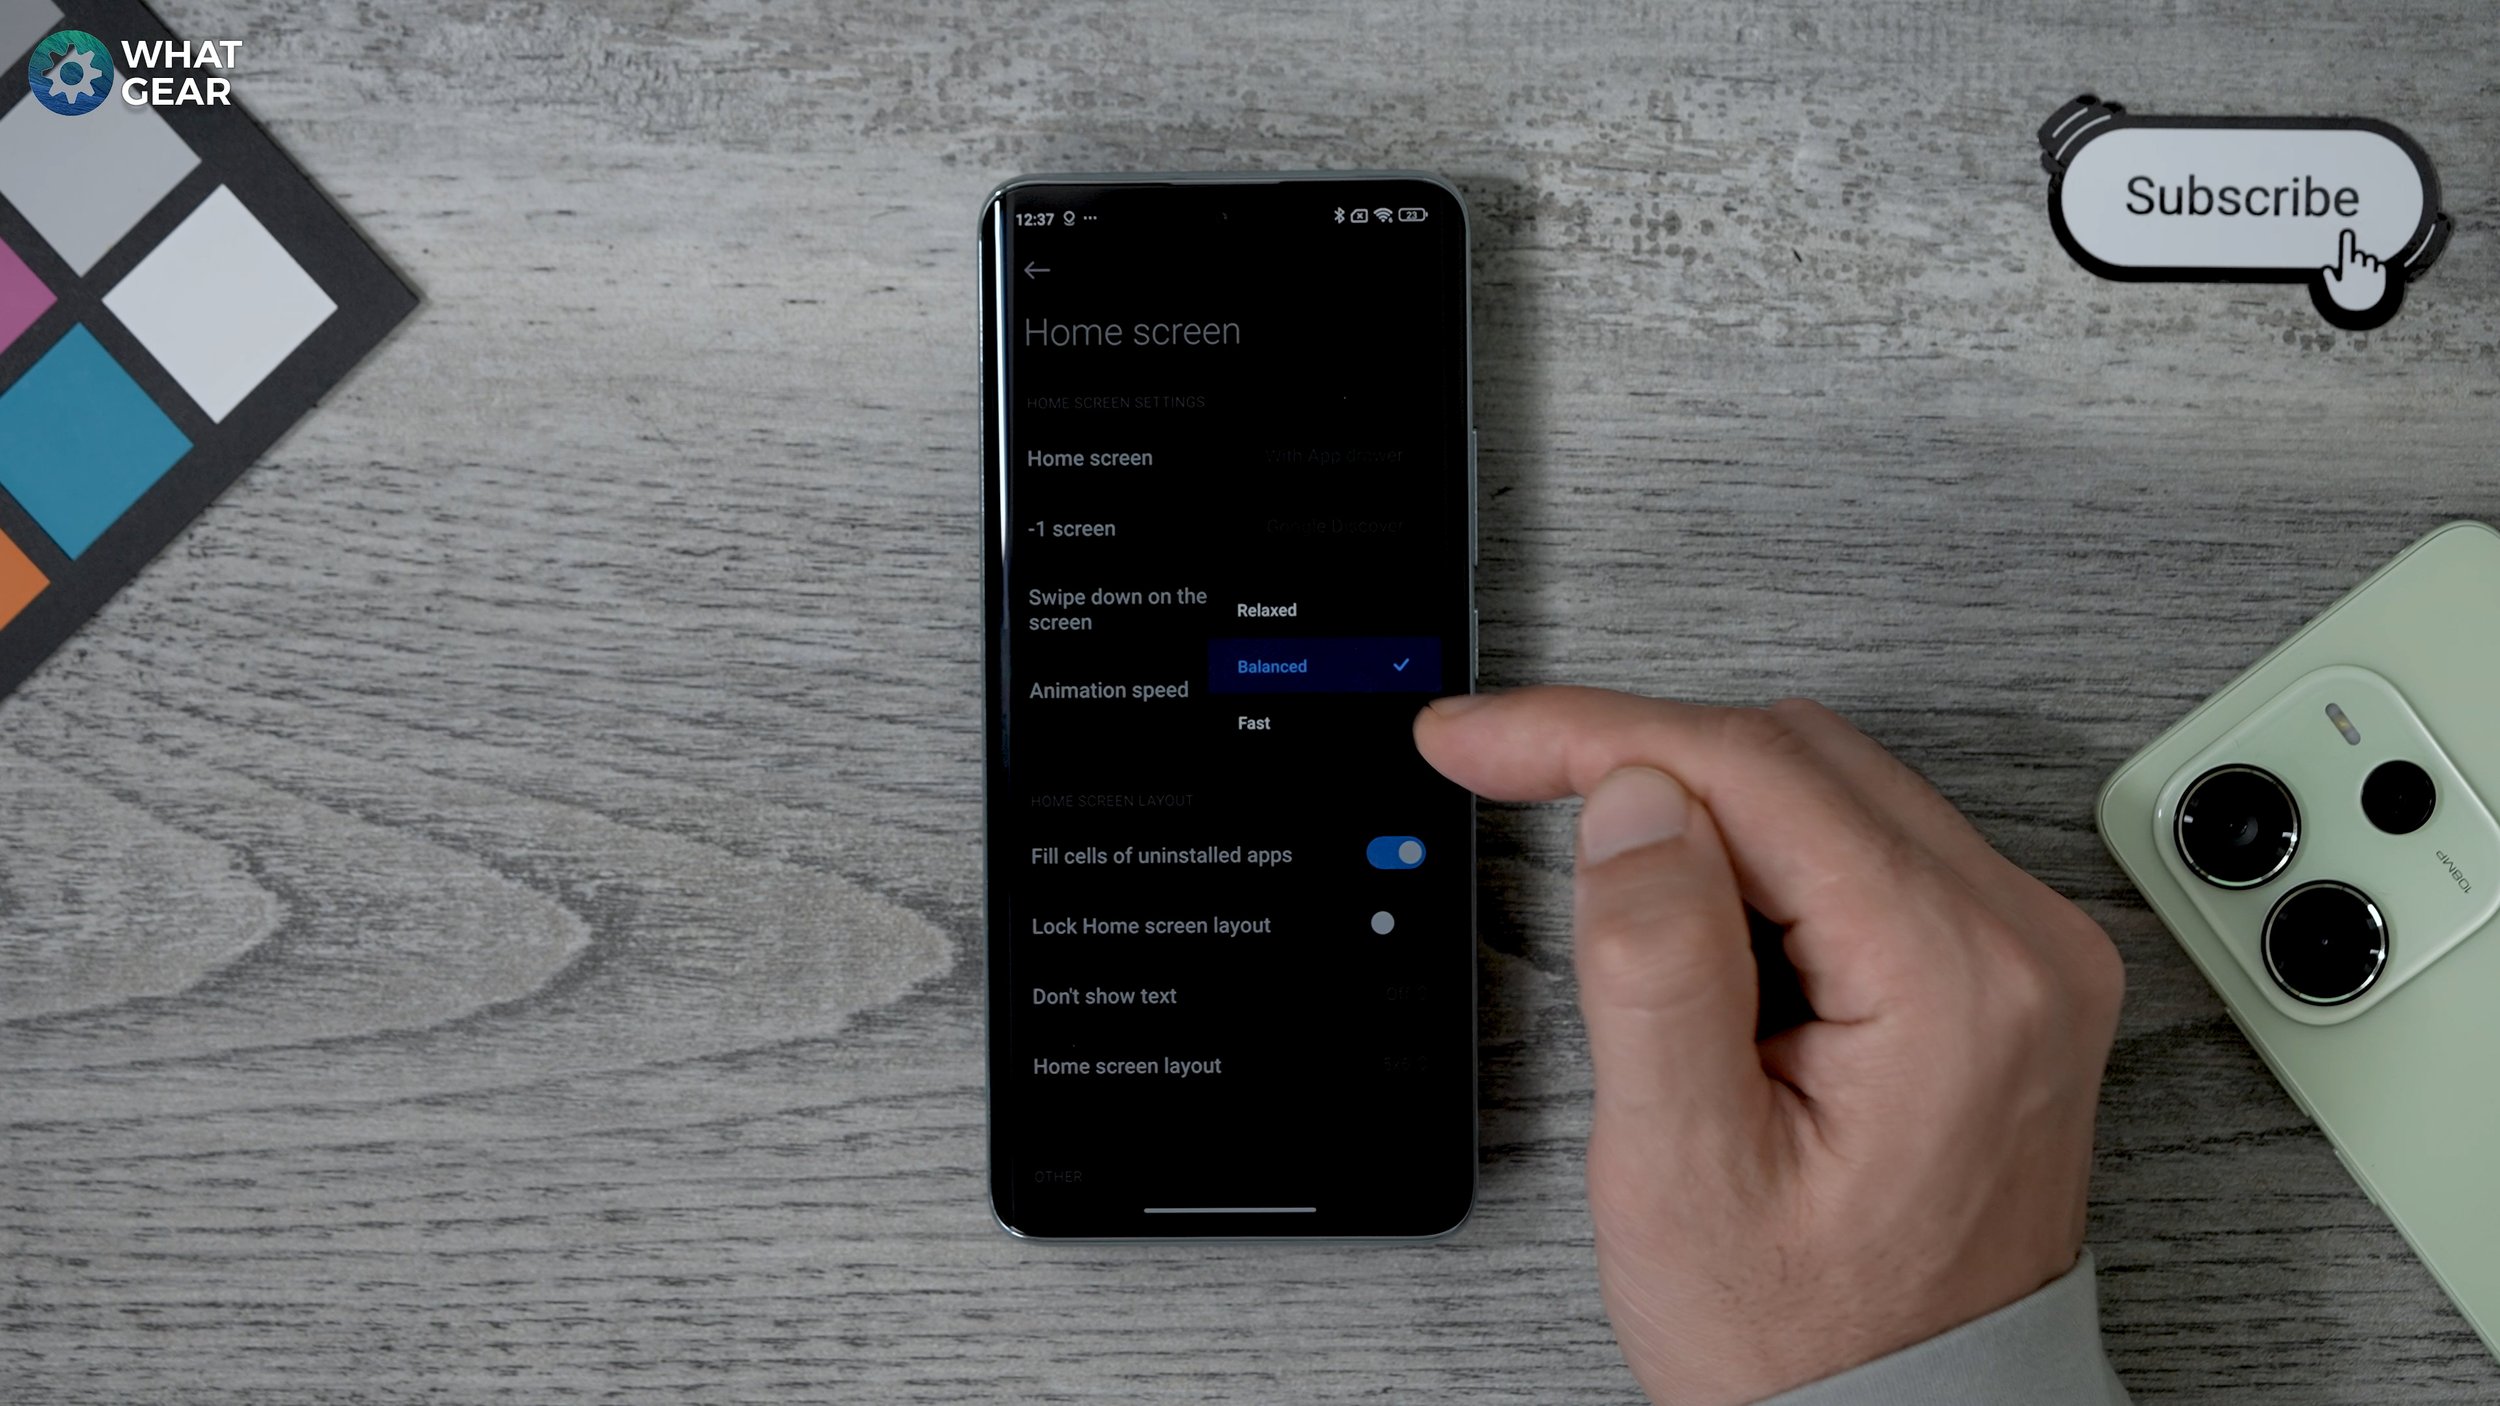
Another nice little feature. If you pinch the home screen go to settings again. Go to more settings. You'll see Animation speed. So if you go to this you can actually make the animations of the phone even faster.
So that way when you're navigating around the device, things will just happen a little bit quicker. I do have another trick for you guys that will make it even quicker than the fast setting, so stick around for that.
Unlock The Vault
All right, this one once again pinch the home screen. Go to your settings again bottom right corner. Go to more and you'll see this: the minus one screen.
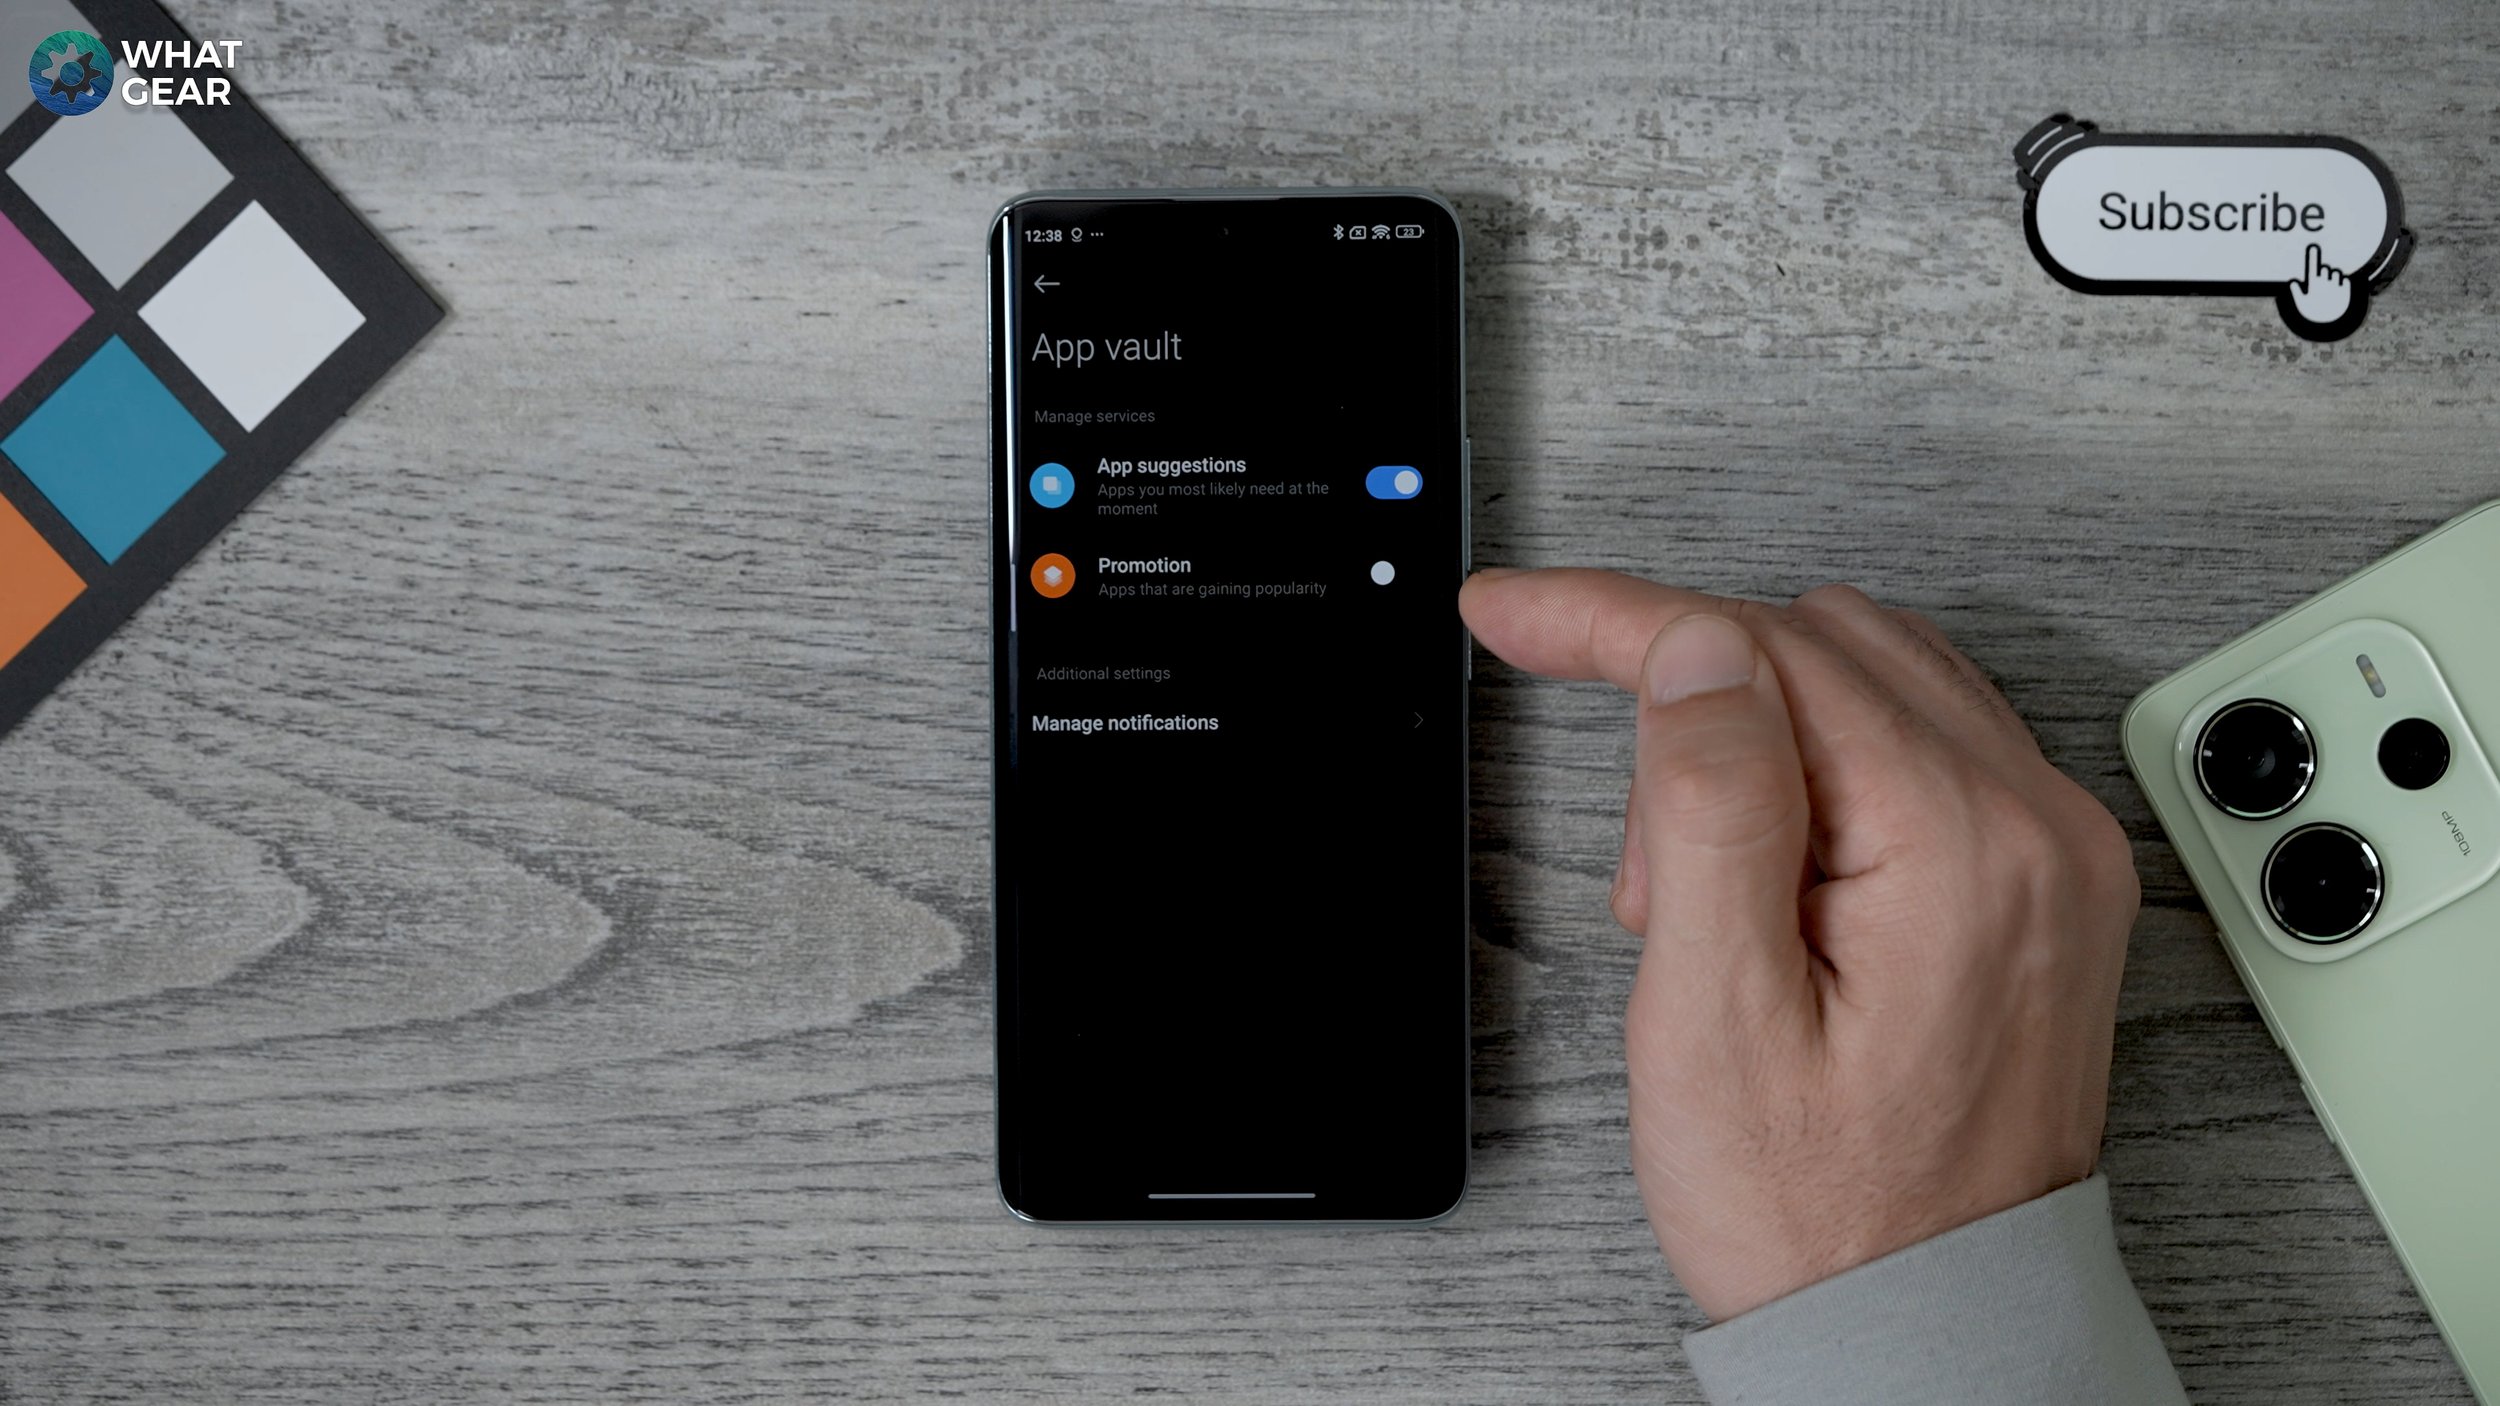
So that's the screen when you swipe from the left inwards and is set to the Google Discover page by default. But if you prefer, you can set this to App Vault. So this essentially acts as a widgets page where you can customize what's on here. So to customize the vault, all you need to do is hit the little icon at the top, and then you can choose what you want to add to it.
There might be some advertising on there by default, so if there is and you want to change that, just go to the three dots at the top, manage services and turn off the promotion switch. And if you want to, you can turn off the app suggestions as well.
Blur Background Apps
Here's a little privacy tweak you might want to do, particularly with your bank apps and things like that that hold more sensitive information.
So if you pinch the home screen, go to Settings. Again, go to more, go to arrange items in recent. So there are two styles: The default style, and the vertically aligned. So everything pops up like this is quite nice. The other option is horizontal. This is more like what we see on iPhones and some other Androids.
And there's a cool little feature here. If you switch on show memory status when you do bring up the background on the phone. So that's quite a nice feature because you can see how much RAM is being used, and if it is too much, you can go to the cleaner and sort that out. But that security tip that I was talking about is this: the blur app previews.
So here you can go through the apps on your phone that you don't want to be fully visible when you bring up Backgrounding. So by default, the gallery is blurred. It's recommended that that's blurred. So if you do have the gallery open in the background, when you open your background, the apps you'll see are blurred out like that.
So you can't fully see it, but you can still see that it's running.
Custom Swipe Down
Another nice little customization tweak is this pinch the home screen again, go to your settings, go to more and you'll notice the swipe down on the home screen is set to App Finder. So that means when you swipe down in the middle of the screen, it brings up this page which has your apps, some news articles, and a search bar.
A better use for this in my opinion, if we just go back to that very quickly, is to switch this to the notification shade and control centre. So you don't have to reach to the top to bring down your quick settings.
And just so you know, if you swipe on the right side, you get your quick settings. And if you swipe on the left side, you get your notification shade. I do think that's a better use of the swipe-down gesture.
Bigger Folder
So this is a nice new addition to Hyper OS and it is the folder customization option. So right here I have the Google folder. If I hold my finger down on this go to edit folder, I can change it to the enlarged style. So now it looks like this. And the great thing about these folders is you can launch apps directly from the folder without having to open the folder first. The other version of the folder is the XXL.
So you have three rows, three columns. And again, the same thing applies if you tap on any of those apps except for the bottom right one, it will launch the app. If you do want to expand a folder, you hit the bottom right corner and it expands that way. And if you have more apps in the folder as well, you can scroll across within the folder.
So it's a nice little addition to hyper OS. And yes, you can get third-party themes and third-party icon packs, but I'm not going to go into all of that. Let me know in the comments if you'd like to see a video like that.
Easily Resize Widgets
Anyway, let's move on to the next one. Now, something you might noticed is I do have the Google search bar shortened here by default, your one will likely be quite a bit longer like this.
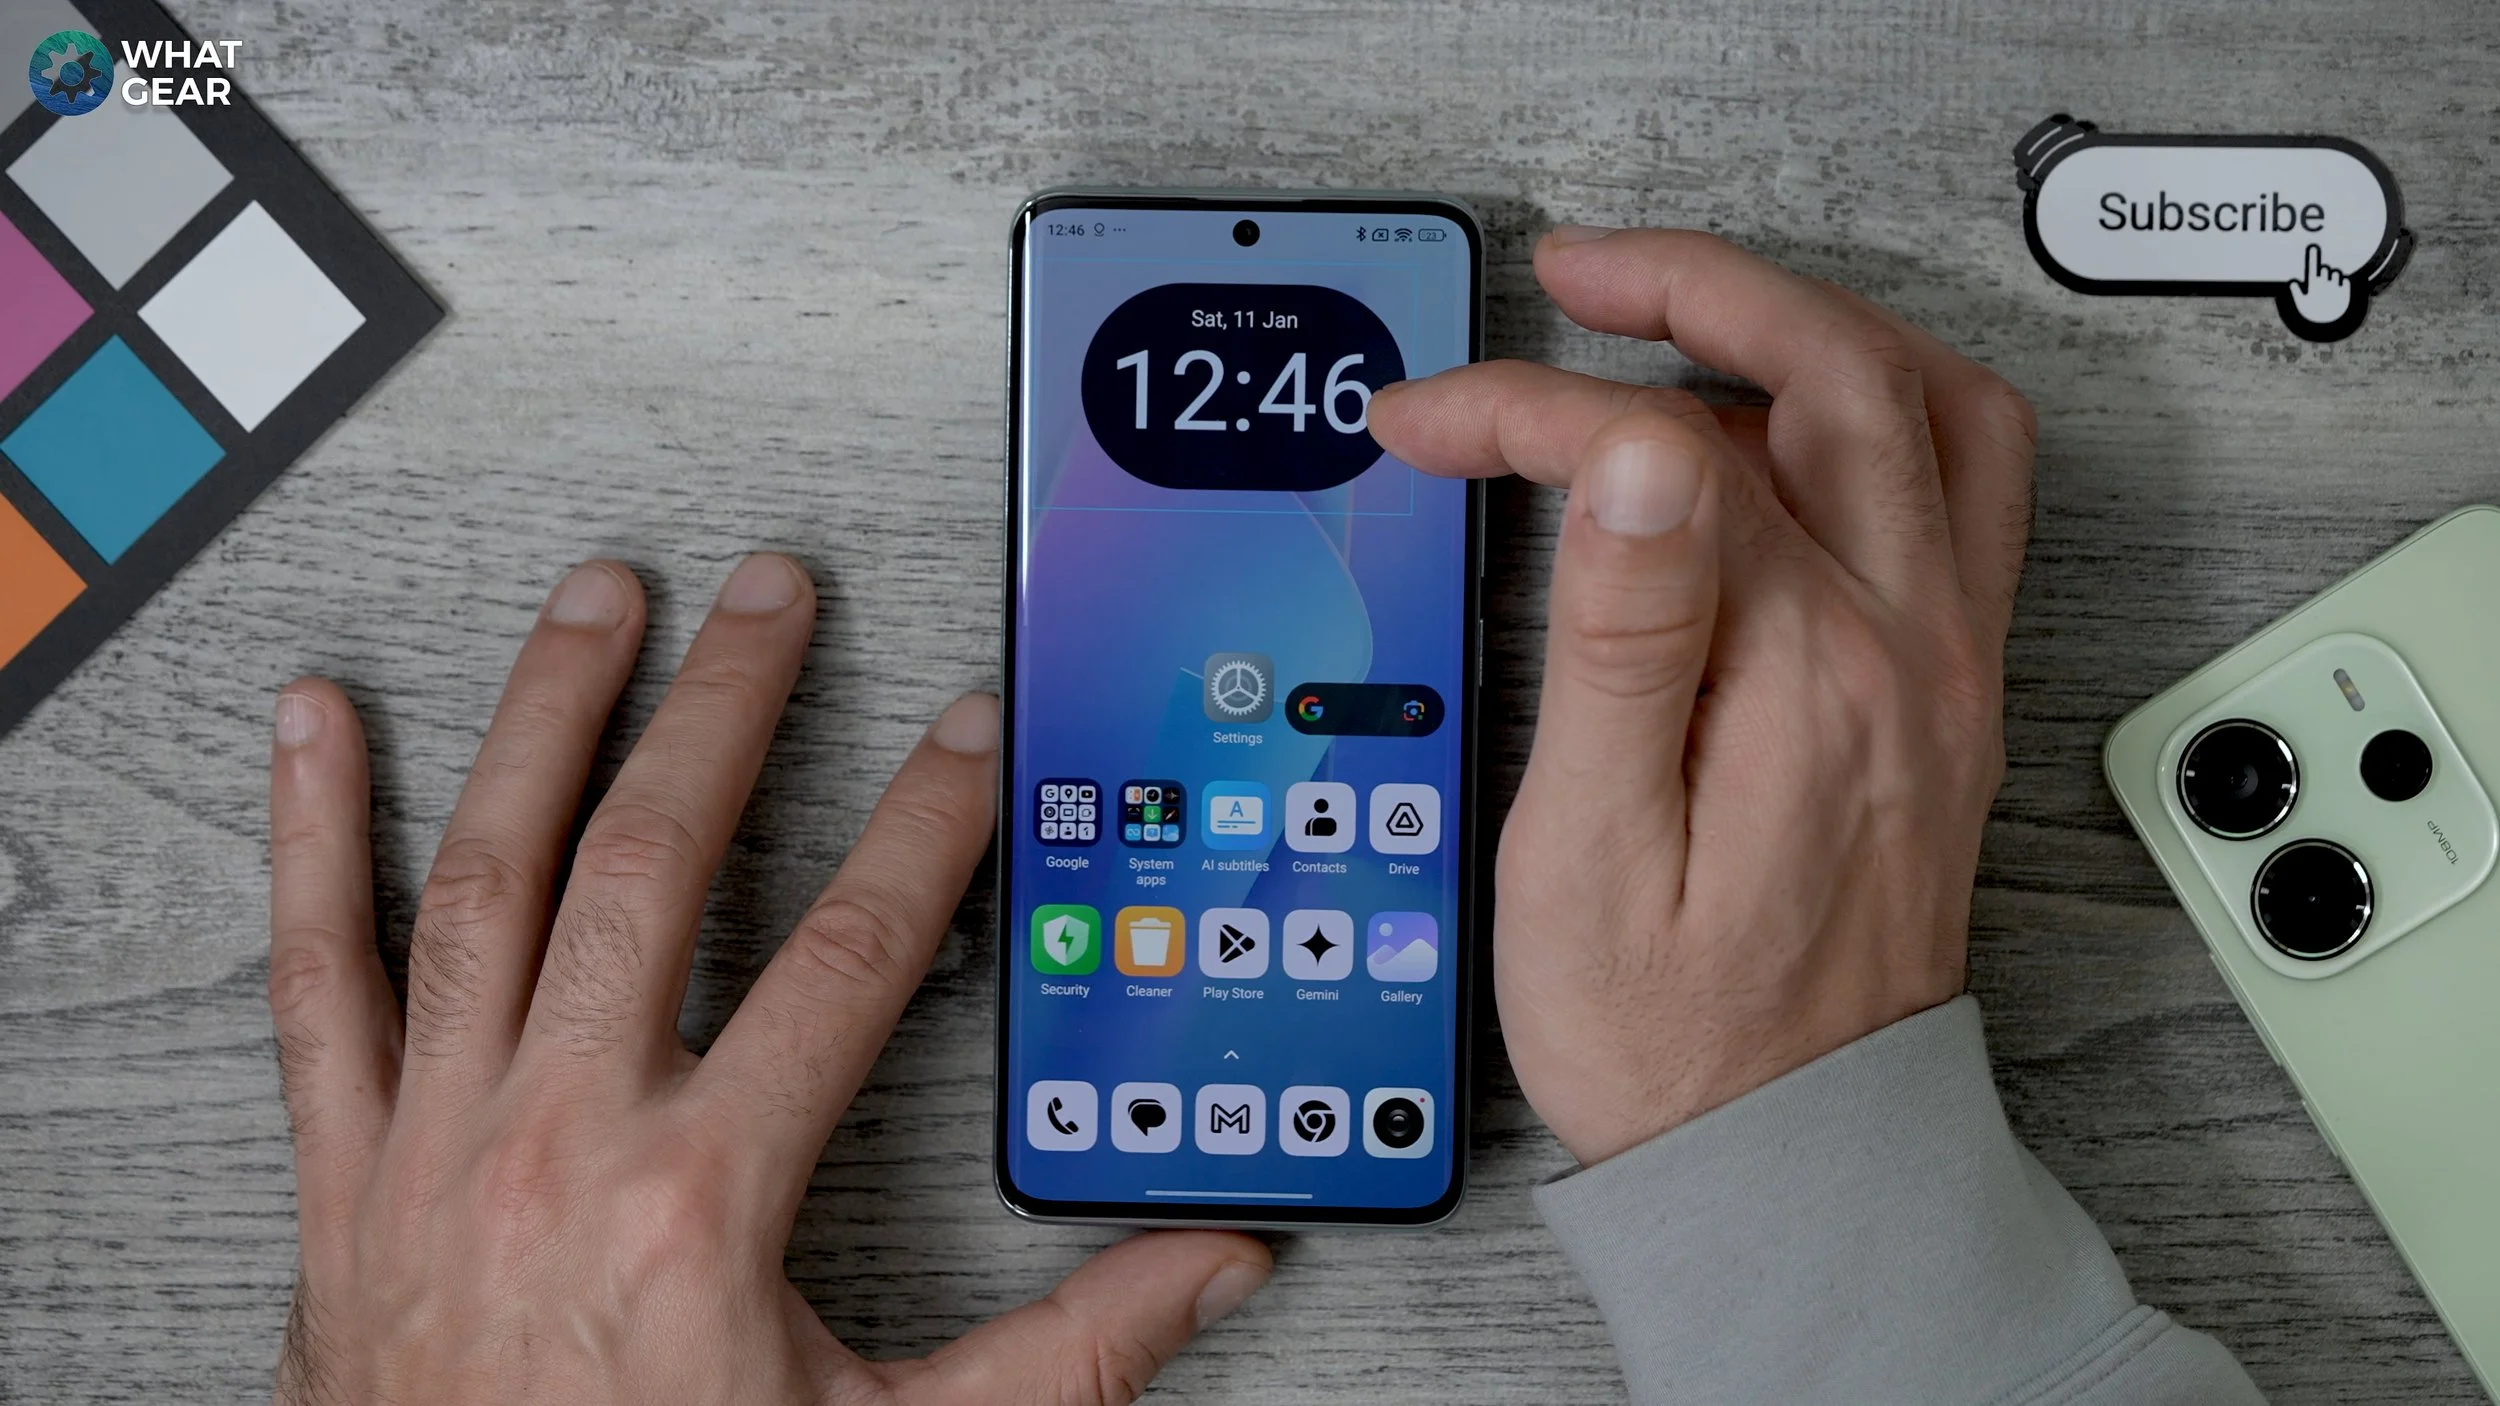
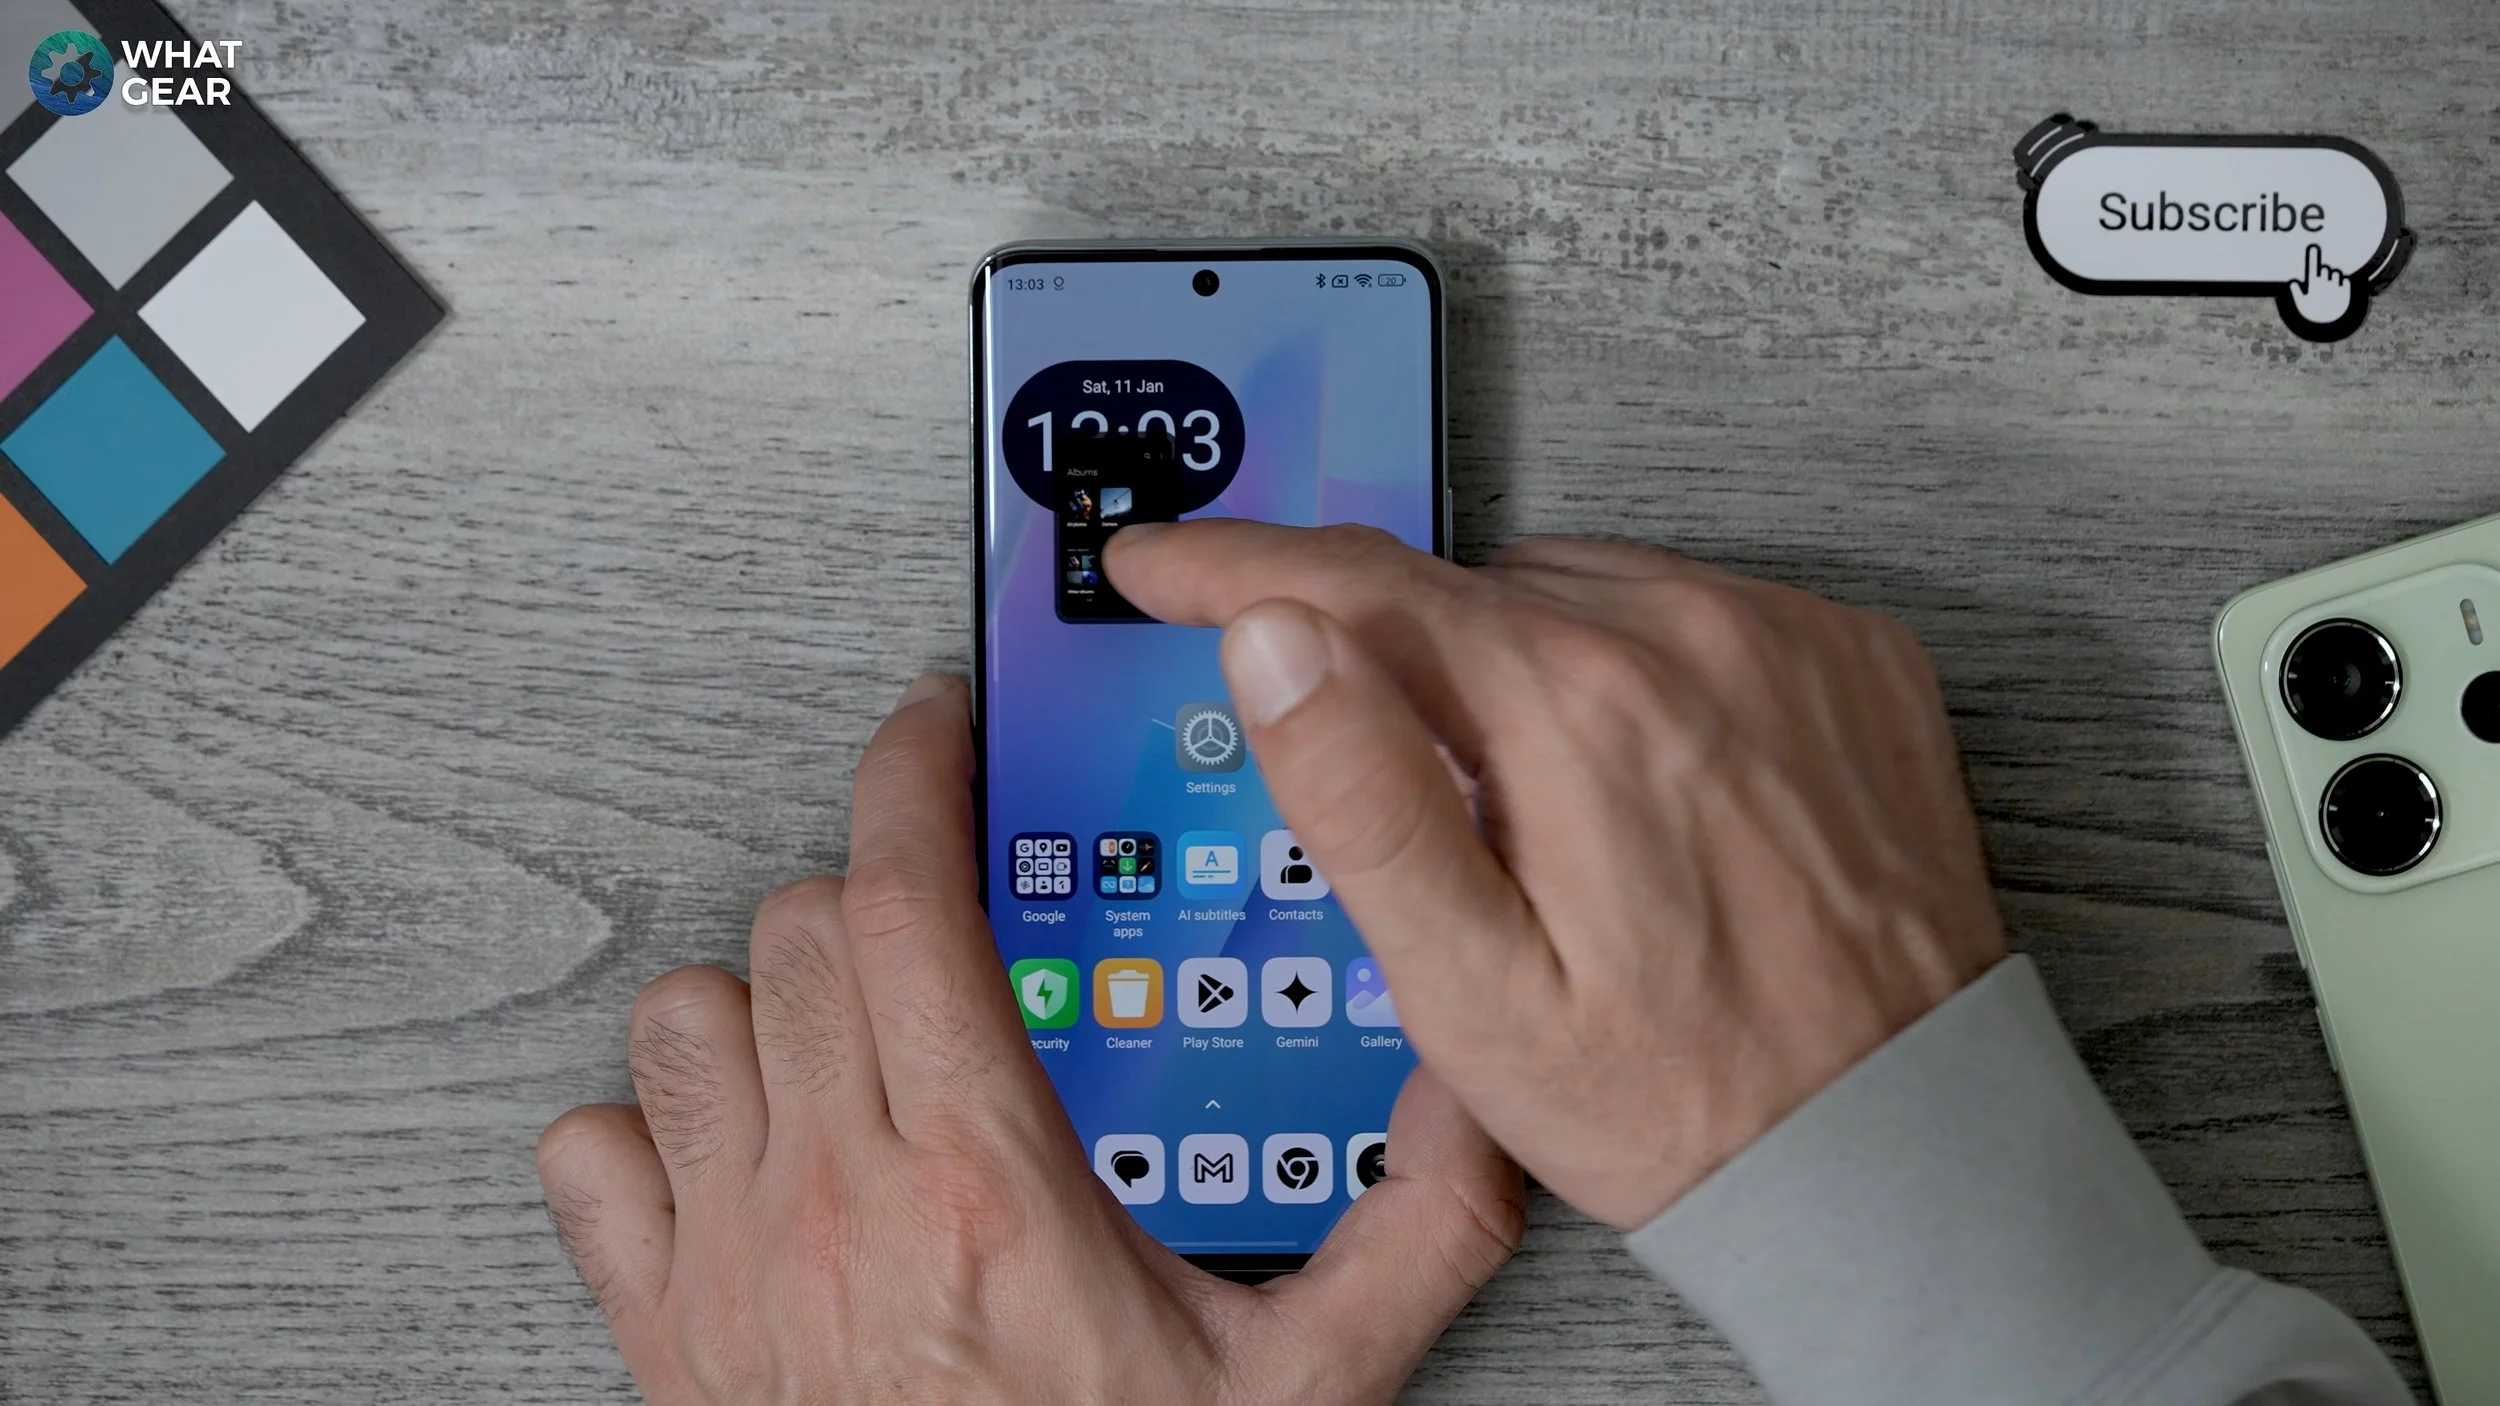
And when you go to customize this, you hold your finger down on it. You might think this is how you change the size of it, but it isn't the way to change the size of a widget on Hyper OS. It's this: hold your finger down, keep it held down, drag it around a little bit, and then place it back down, and then you get the resizing options pop up.
So if you do want a shorter search bar like I had there, that's how you do it. And that same technique applies to other widgets as well. So if you want to resize a widget, you just grab it, move it around a little bit, and then you can just resize it.
Custom Quick Settings
So there are a few settings that I recommend you add and customize on day one.
If you swipe down the top right corner for your quick settings, hit the edit button. There are a few quick settings which aren't up here yet, so the ones that I recommend you add are these: Dolby Atmos, Song search. - This is handy, when is the song playing and you want to know what it is. - The me remote because this phone does have an IR blaster built in, which can be very handy when you lose your TV remote, for example.
Once you've chosen the ones that work best for you, you can customize where they are in this list just by holding down and dragging them around. So put them in an order that makes sense to you.
Nice Gestures
All right, here's a page you should definitely take a look at. If you go into your settings, additional settings, and gesture shortcuts, a lot of these will be on by default.
So launching Digital Assistant by pushing and holding the power button, three-finger swipe down for screenshot or volume down and power button for screenshot. Then you've got the three-finger push and hold for partial screenshot. So here you can just use the selection tool up here to grab a bit of the image that you're looking at, and then you have different shapes as well to play around with.
But a nice one that's not on by default is the launch camera. So you can set the power button, and double push the launch to the camera. That can be pretty handy. Or you can use the double push to open the torch, but I'm going to leave it as the camera. And then there's this one here, the custom gesture. So this is a tap on the back of the device.
Now there are limitations to this. I do wish this could be set up as the Google Wallet, for example, but these are the options you have here for the double tap on the back. And the same ones apply to the triple tap on the back. So if you do want to add a bit of extra input functionality to your phone, set this up.
Top Notch Trick
So this next one's not going to be for everyone, but it might be for some of you who find the selfie camera very distracting. So if you go to your settings, go to notifications here. If you scroll down you can go to Hide Notch. This is quite nice because it makes the notification area at the top stand out a bit more clearly.
Still, you do lose a bit of that height on the device, and if you go back into your settings again and back to notifications again if you go back to hide the notch and then back again, you can choose what apps this effect applies to. So you can go through this list and choose any of them. Just hit the little auto next to it and then go to Always Show Notch or leave it on auto.
Performance Tweak
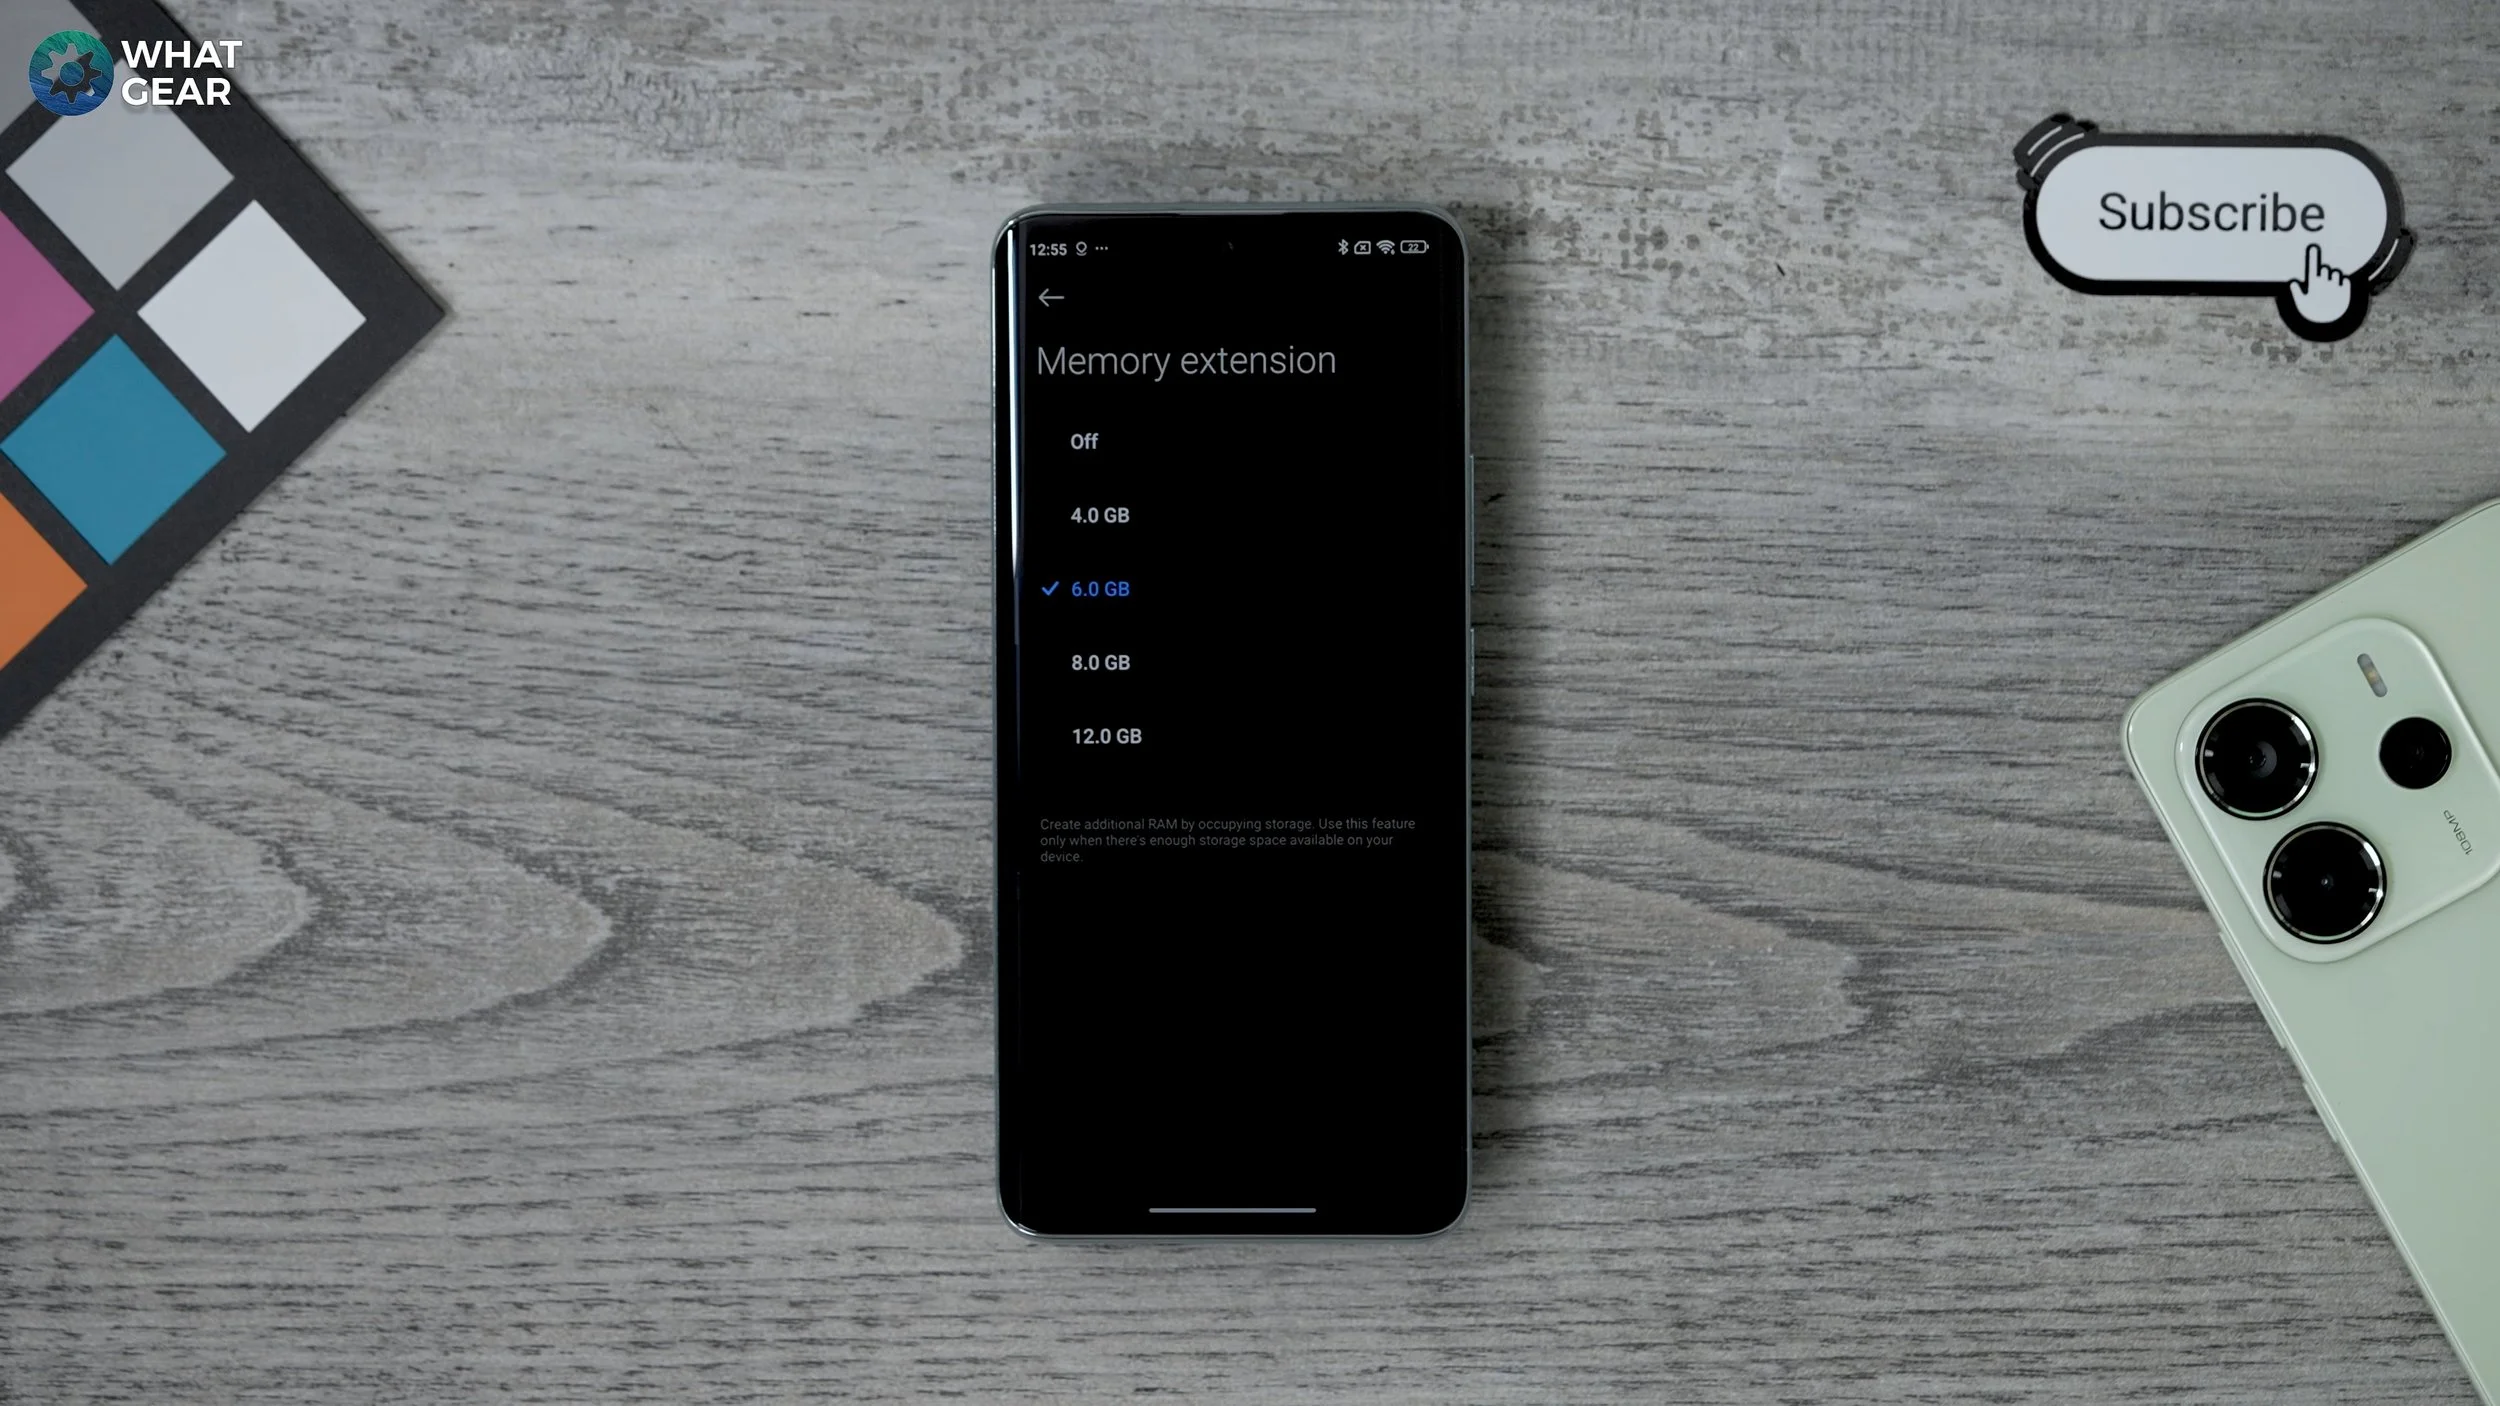
Okay, so here's another little performance tweak and only use this one if you're not running low on storage. So if you go to your settings, additional settings, and memory expansion by default, the Note Pro Plus is actually set to six gigs of memory expansion.
But if you've got loads of space available, there's nothing stopping you from setting it to 12, and this will just help with backgrounding and multitasking. And because you now have more RAM available to the phone when it comes to gaming and things like that, it can improve the performance there too.
Reach The Top
So the Redmi Note phones are big and so are a lot of the other Xiaomi phones, and this setting is very useful. It is switched off by default. So if you go into your settings, additional settings and one-handed mode.
Now with this enabled, if you need to reach the top of the device, a little swipe down across the little bar at the bottom brings the top of the screen closer, and if you tap the top, it just goes back.
Power Bar
This next one is such a good feature, and I do think it should be switched on straight away out of the box, but it isn't. Go to your settings - additional settings - Floating Windows. And then here very discreetly you see the option for the sidebar. So if you go to this and switch it on that brings a little bar up on the left side of the phone.
Now you might want to switch on all of these because you do get contextual tools on the sidebar when you're watching a video. For example one of the great things about having this sidebar enabled is that you can create floating windows very quickly, and you can do split screening very quickly. So if you want a floating window, just grab an app, bring it onto the home screen, and there you go. You got your floating window.
If you hit the three dots, you can then expand it, and pin it to the top half, or lower half. You can leave it floating or you can close it. If you want to do a split screen, you can hold your finger on the app and then straight away you get the option to do a split screen.
Then you can choose the second app that you want to use like that. If you hit the three dots on the split screen, the same options pop up so you can turn something into a floating window. If you want to, you can expand it, or close it.
Minimize Floating Windows
A little floating window technique that you need to know, and it's not that obvious, is how to minimize and kind of pin the floating window just off the screen.
So the way you do this is if you kind of shrink the screen down, it goes grey like that. And then if you swipe to the side, it kind of throws it to the side. Don't hold your finger and drag it to the side because that won't work. You literally have to throw it to the side like that.
From The Heart
Now I'm going to tell you something you already know you have a fingerprint scanner on your phone, but did you know you can use that fingerprint scanner to read your heartbeat? Here's how you do that. Go to your settings, go to additional settings and here you see heart rate. Now you can just place your thumb or your finger on the fingerprint scanner, and it will read your heart rate at that particular point in time.
AI Setting
I do have some bonus tips and tricks for you guys to check out. Here's an AI setting that is switched off by default. If you go into your settings, go to additional settings and go to AI subtitles. Here you can switch this on.
You can choose whether you want it to listen to the system audio or the microphone on your phone. You can choose your source language and your target language. You can change the text size of the AI translator. You can also change the floating window that pops up to transparent If you want . And as you can see, that works really nicely.
AI Services
Something else to look at on your phone is this. If you go into your settings, and services, here are the features that should be available on your device. Not all of them are available globally yet, so you need to test these out and see which ones do work.
The voice recorder is good because you can summarize the recording. If you're in a meeting or at a class, you can record all of that audio and get it to summarize it for you. And then of course you've got gallery features. Not all of these are available in the UK yet, but I'll show you a couple of them.
So if we go to this photo to access the AI editor features, just hit edit and then you should see the AI section bottom left corner. If you go to that, you have the erase feature. You can object erase, remove lines, remove people, or you can manually colour over things. So there's a bit of a lens flare here in this image I'm just going to draw over that.
And you get this nice little magnification area up here. you can be really precise. That part of the image is gone and we can save it. And then we've also got the sky replacement feature as well. So if I want to change how the sky looks just choose one of these and there we go. It completely transforms the picture. And it's even added a bit of a lens flare down here, which is quite nice. So you can play around with these things. You could even change it to evening. There we go. So you get the idea of how that works.
Circle to Search
Another AI feature is super useful whenever you're browsing the internet, or you find anything on your phone that you like the look of, and you want to learn more about.
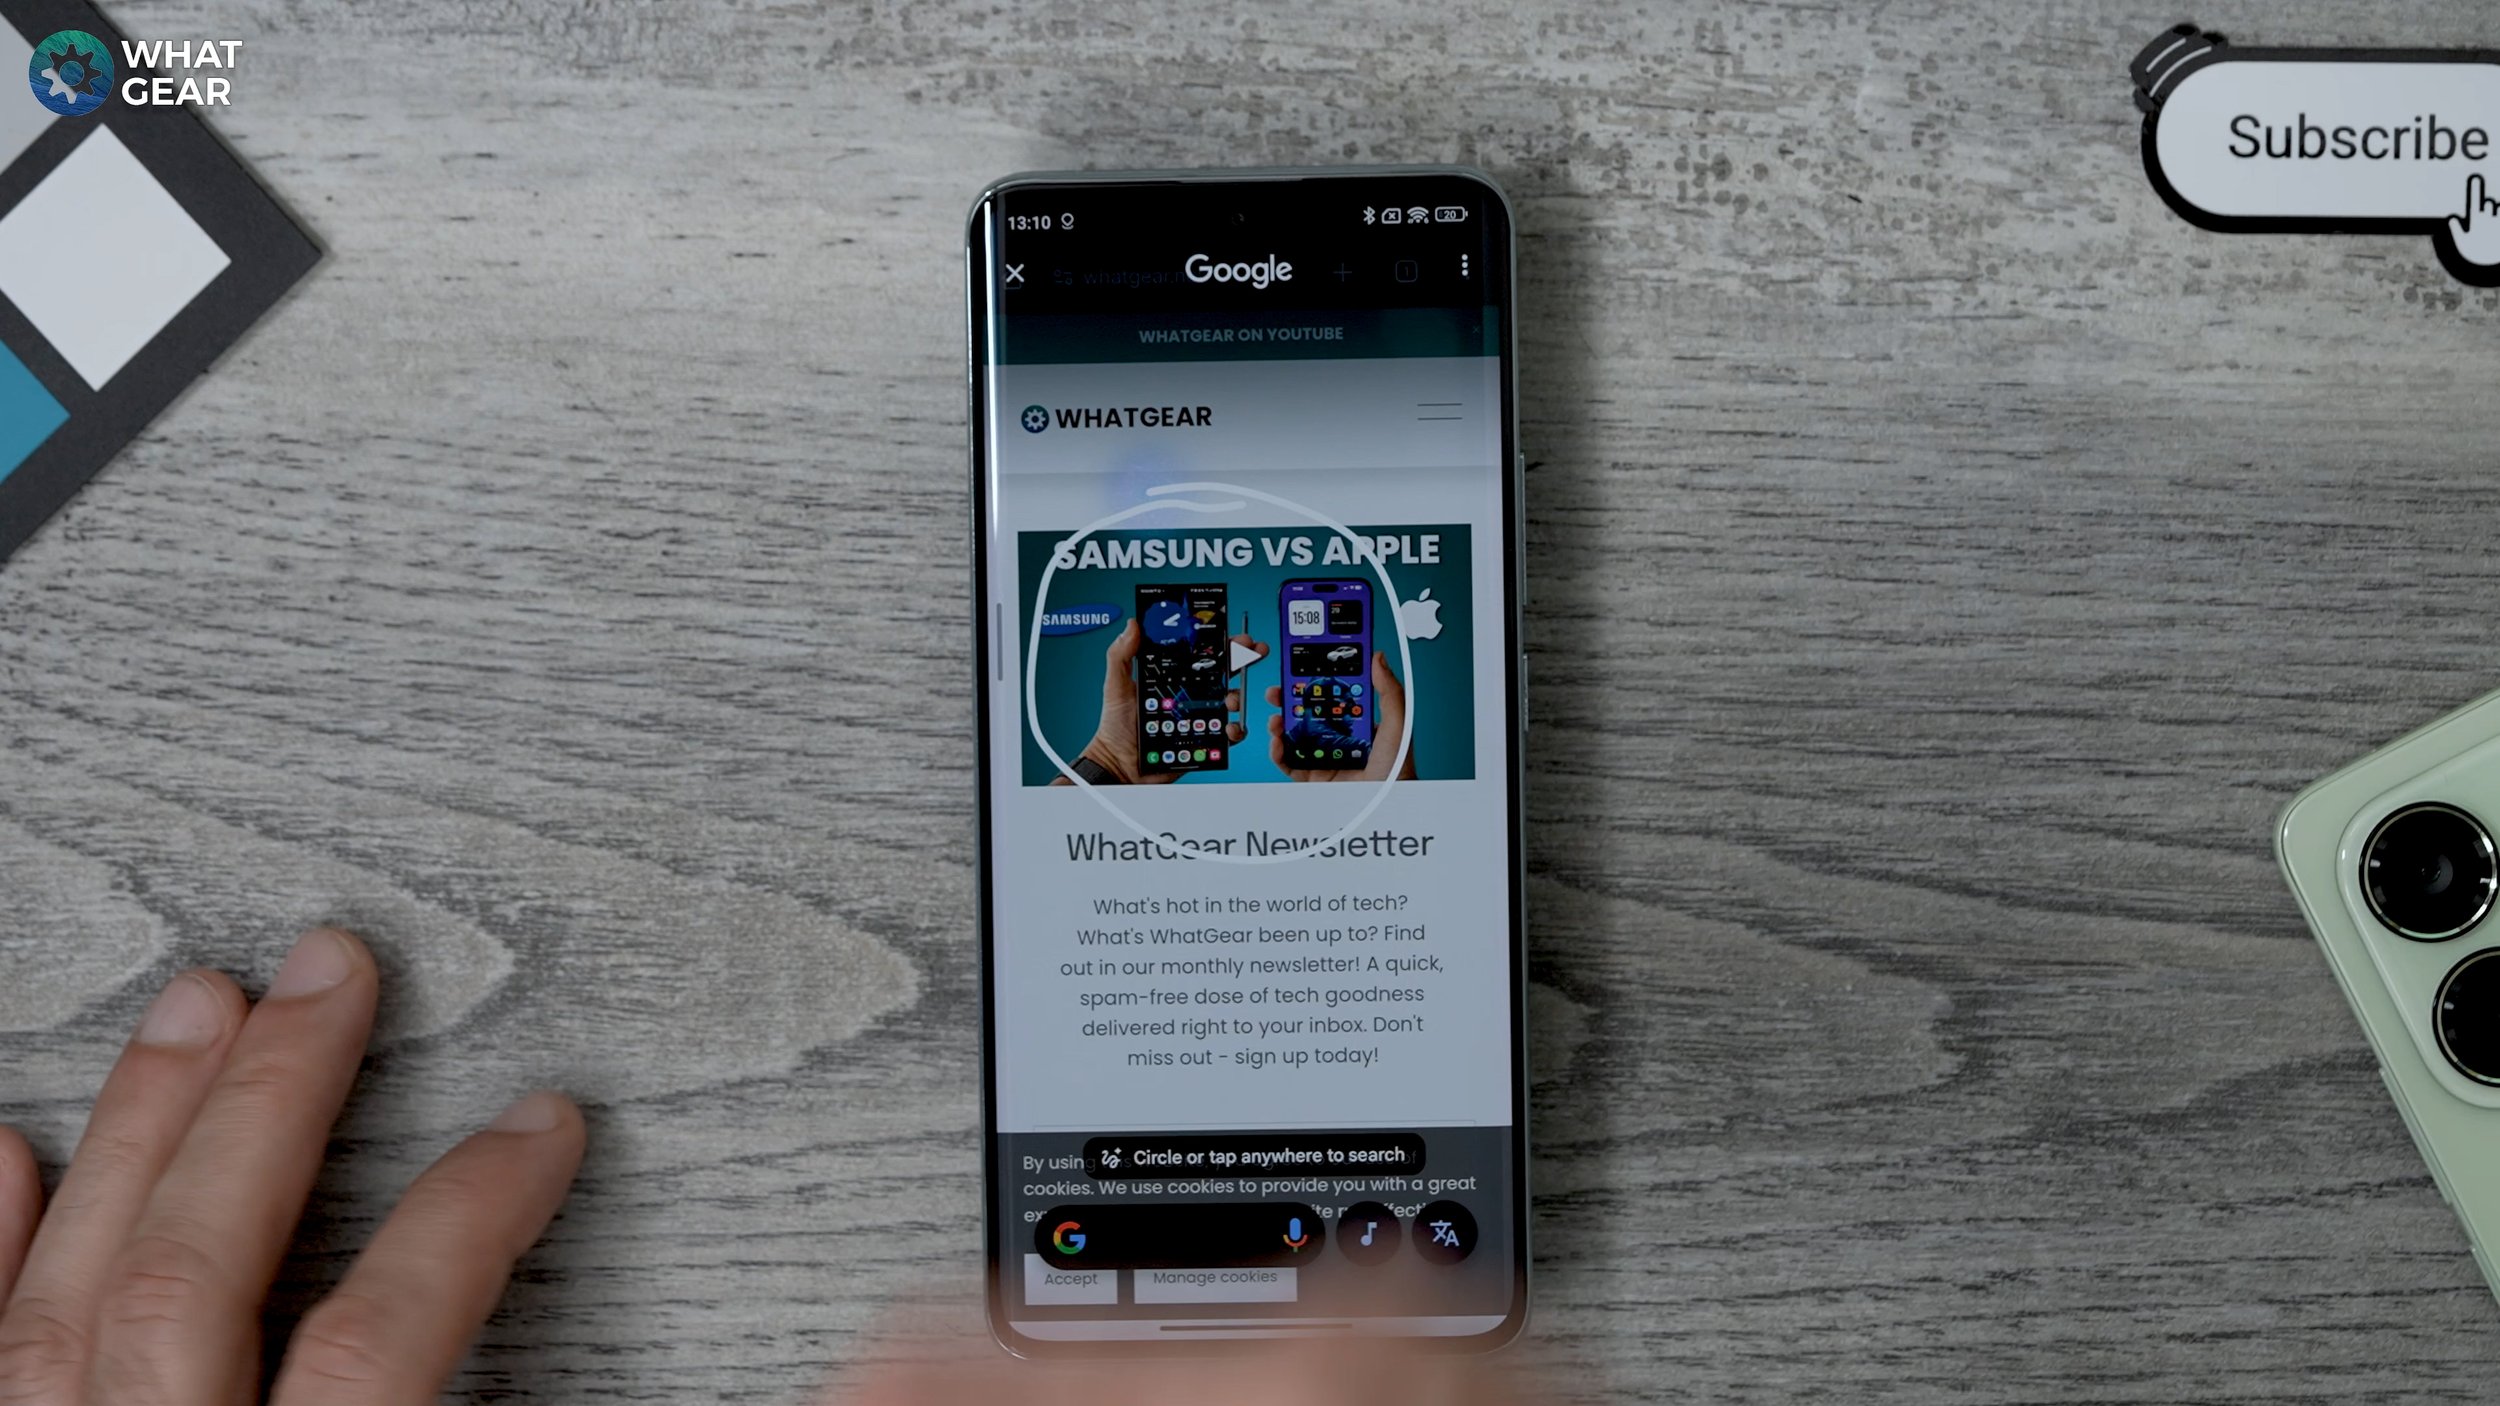
If you hold your finger down on the little bar at the bottom, this activates the circle to search so we can just like draw around anything pretty much, and it will assess what you've drawn around and then give you information about that.
Pro Users Only
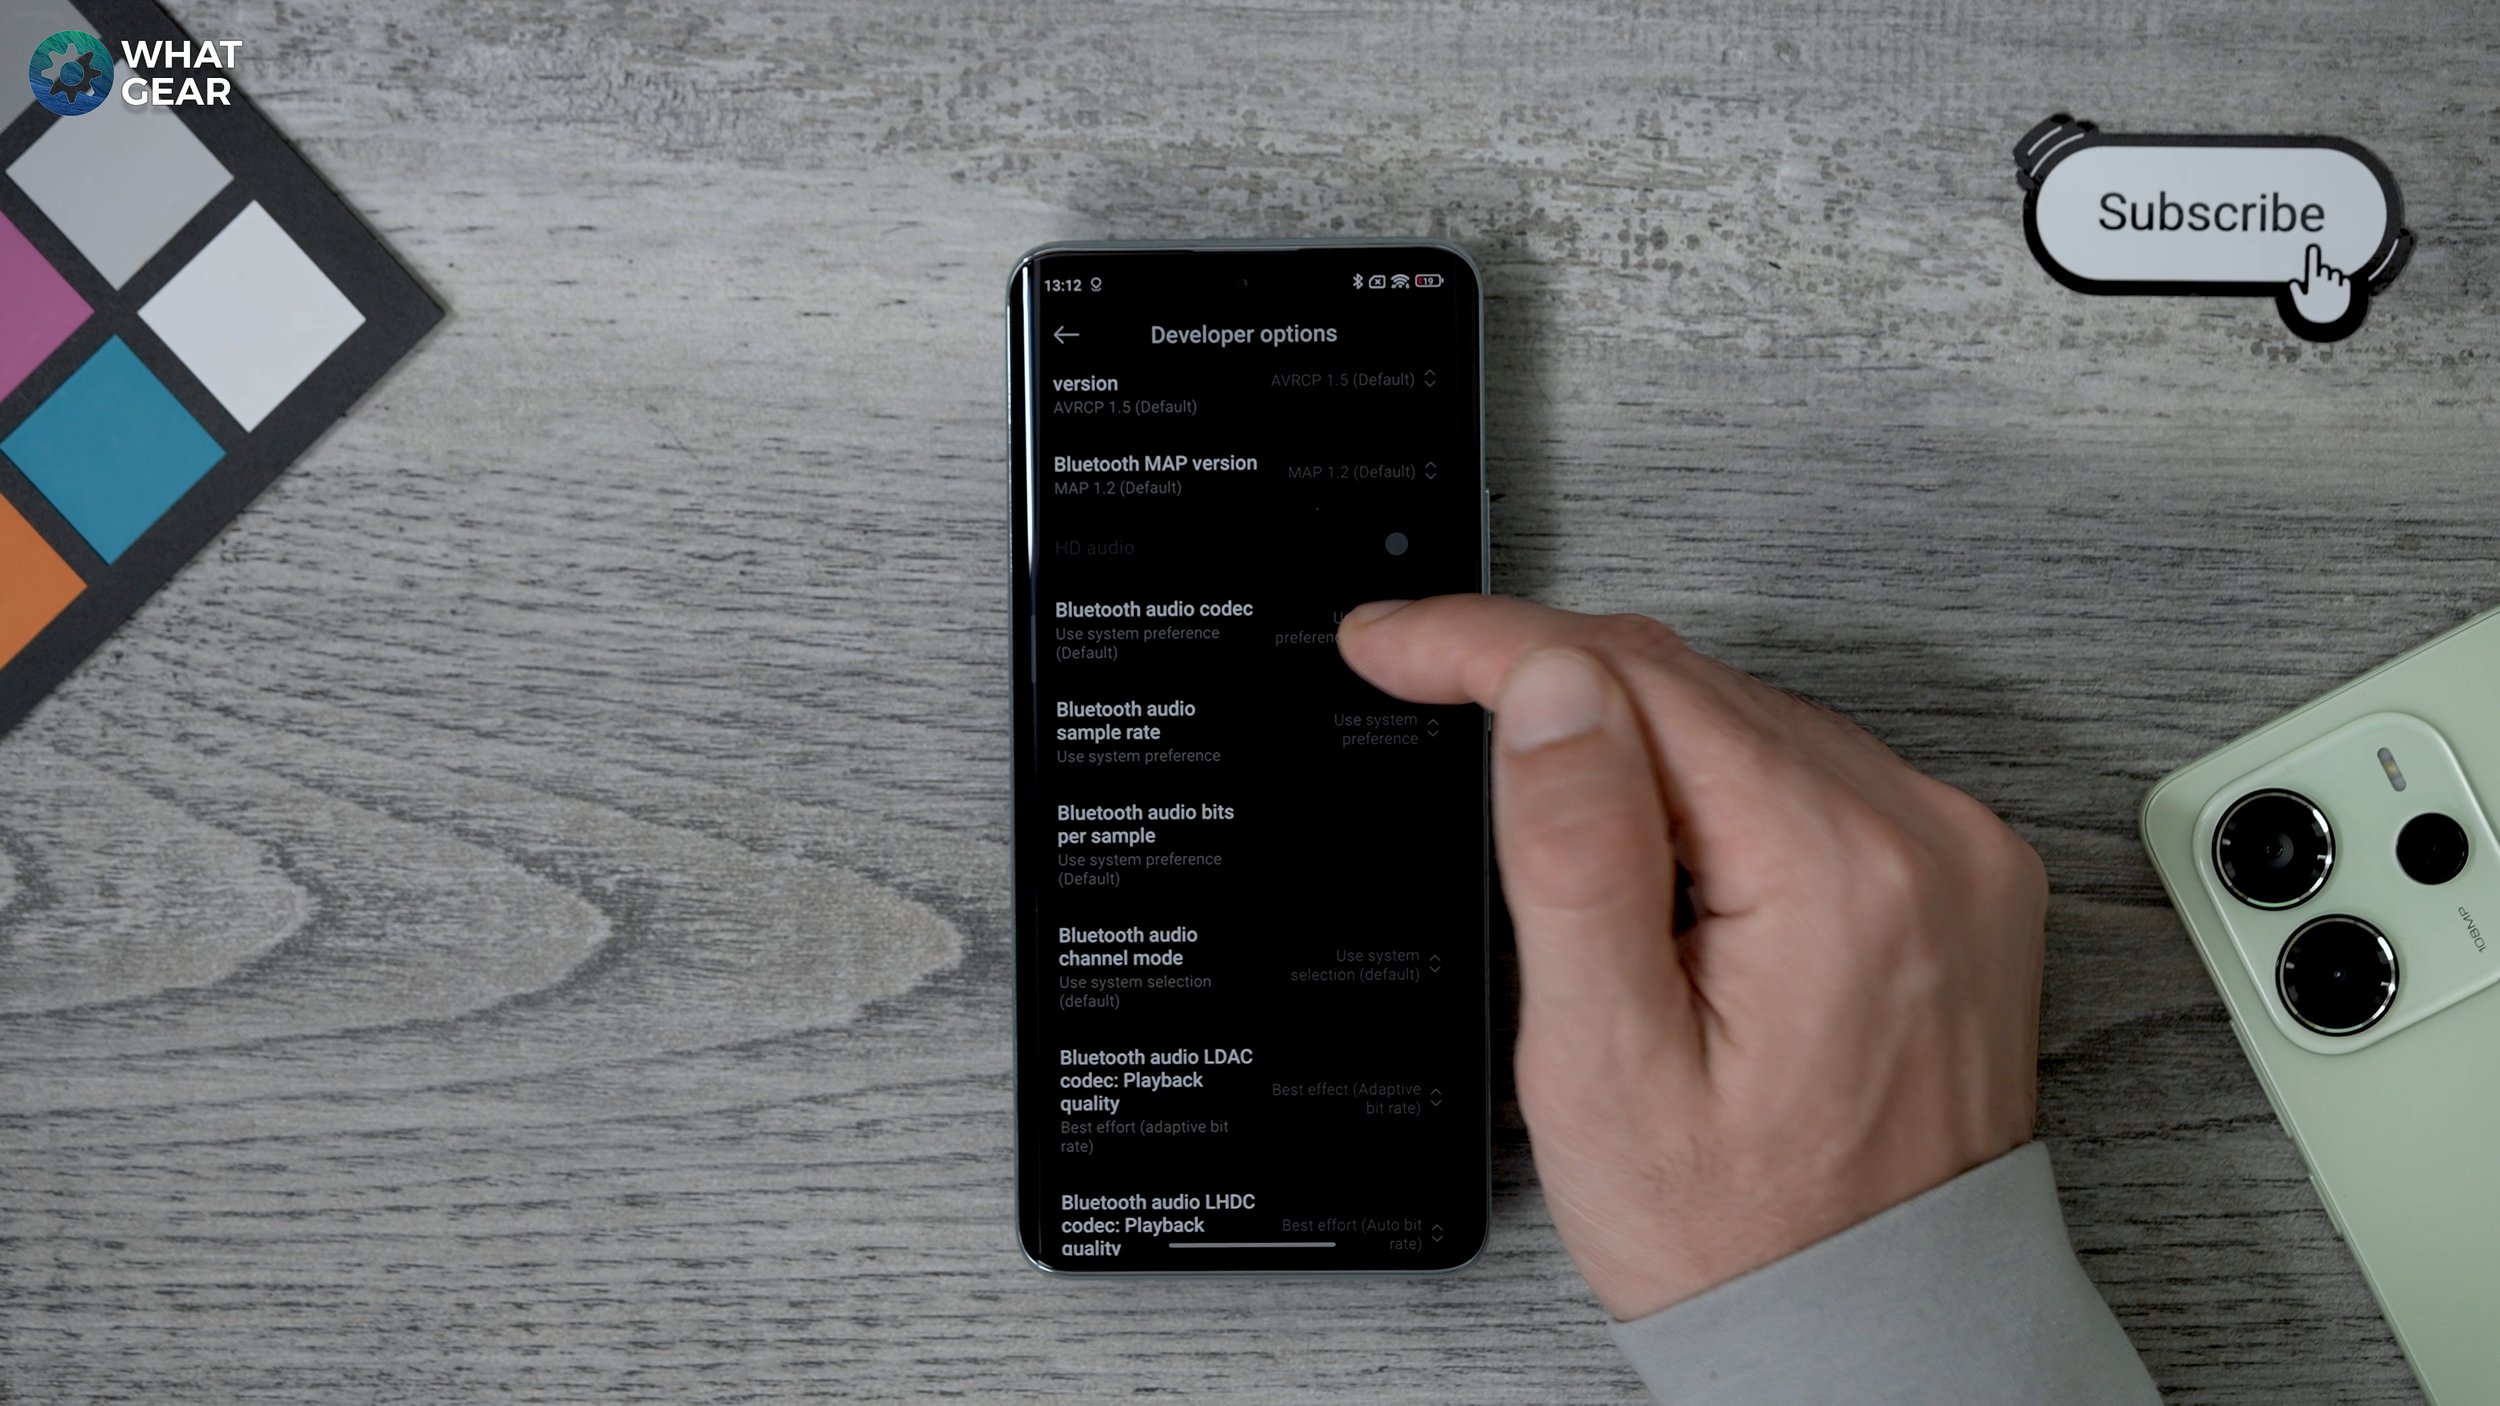
This one's only for you power users out there who know what they're doing. Go to settings go to About phone and then here on the OS version keep tapping this I believe seven times. And that opens to developer mode. Now if you go back go to additional settings. Scroll to the bottom and you'll see developer options. So if we scroll down here, there are some settings which are very, very useful if you care about your audio and assist the Bluetooth audio codec. So this particular phone does have some very good codecs.
And let's say, for example, you do have earbuds that support Ldac or AptX adaptive. And let's say you don't want your phone to just default to AAC or SBC every time. You can actually set the preference to that codec. So for example, with Sony earbuds, you'd want to set it to LDAC. Or if you have Snapdragon Sound earbuds, you might want to set them to AptX Adaptive.
And then once you set one of these, you can change the bitrate as well. So you can set it to prioritize a much higher bitrate. You can set it to 32-bit here. And then if you want to, you can change the sample rate. So you can set it to a higher sample rate so you get better audio quality.
Again this depends on the streaming service you're using and things like that as well. So keep that in mind. These are just the preferred settings, so that doesn't mean it's locking them in at these higher settings. If it's not available it will go back to the more stable option.
Make Your Phone Faster
So here's the final tip. And this is kind of an old technique. A lot of people will know about it, but a lot of people still don't. And if you use it, it will make your phone feel faster than anybody else's who has the same phone as you. So if you go to Developer Options, scroll down, and keep scrolling until you see this: window Animation, scale transition animation, and animation duration. They're all set to one.
That's the standard speed, but if you set them to 0.5, your phone will appear to be twice as quick as your friends.
So I do hope you guys enjoyed this video. I've got some kind of value out of it. If you learned anything new, let me know what that was in the comments. If there was anything that should have been in this video that I didn't mention, make sure you leave that in the comments as well, because I'd love to check that out.
Check out this camera comparison that I did with the Xiaomi 14 Ultra in the Tower of London. You might enjoy that one. Anyway, I'll see you in the next one.

