
Nothing CMF Phone 2 Pro - 17 First Tings To Do! ( Tips & Tricks )
This is the CMF phone 2 Pro, maybe one of the most stylish budget phones I've ever seen. In this video, I'm going to show you 17 tips, tricks and hidden features so that you can turn this already impressive budget phone into an absolute beast. If you haven't got a CMF phone to project yet and you want to see what the phone can do first, well, this video will be an eye-opener for you too. Some of you might not realise this, but the CMF phones are, in fact, the Nothing phones.
Near Field Comms
The first thing I want to show you guys is how to make use of the brand new feature that is available on CMF Phone 2, which was not available on CMF Phone 1. That is, of course, NFC. And the fact that this now has NFC means that you can now do contactless payments with the phone. So, to set this up is quite simple. Just swipe up from the bottom. The first time you swipe up from the bottom, you will have the option to choose between smart, beta and default. I do recommend testing out small pieces. Categorises everything nicely. Anyway, Google Wallet set this up for the first time, and add your bank cards. Now the next step is a bit more advanced, but I highly recommend it.


So if you jump into your settings on your phone, scroll down. You'll see special features. Here you can go to gestures, and then on this page you can change the double push of the power key to the wallet. But you do have to make sure you set up the wallet fully the first time for it to show up here. That way, whenever you want to pay for something, you can literally just double-tap tap power key and the wallet opens. Another way to use the Google Wallet is to swipe down from the top, and you will see the wallet icon. There. You can just tap that, and then you can pay that way
Customize
So if you jump into your settings again, this time you go to customisation. And this is where you can customise your wallpapers, your icon packs, in your layouts. I have set my layout to five. I just prefer to use up more of the space on the screen. But if you want bigger icons, of course, don't change that. Anyway, what I want to show you here is the wallpaper options. So you've got these ones down here, which are the default nothing ones.

The one I have set up right now is this one, which matches the back of the phone, which is a really nice colour, and it does kind of look like glass, even though it's not. So you can choose any of the default wallpapers if you want, but if you jump into more wallpapers, you can use a bit of AI to create something a bit more unique. So if you go to create here, you have two sections. You can change the top and bottom sections here. So let's say iridescence and the bottom section, I'm going to change it to painting and go to create.


There we go. We've got a custom wallpaper, and there are a bunch of different effects you can apply to it. So the atmosphere effect will blur the home screen, but keep the lock screen as the original image. And you can turn that off if you want the full image here behind your app icons. And then you can turn on the glass effect, which is really nice. That looks pretty awesome straight away. Minimum effort, maximum result. We've got a really nice custom wallpaper, and it would be quite unlikely for someone to have exactly the same one as you if you do use this method.


Get Widgets
If you jump back into your settings, go to customize again. And this time we're going to swipe across to the lock screen. You'll notice here that you have the option to add widgets and shortcuts. Let's go to the widgets first. So you can see I've set up a bunch of widgets already. Very easy to do. You just swipe up, choose the ones you like. The look of that would be useful for you on the lock screen. There are different versions of the widgets as well, so this one's pretty cool for the weather.
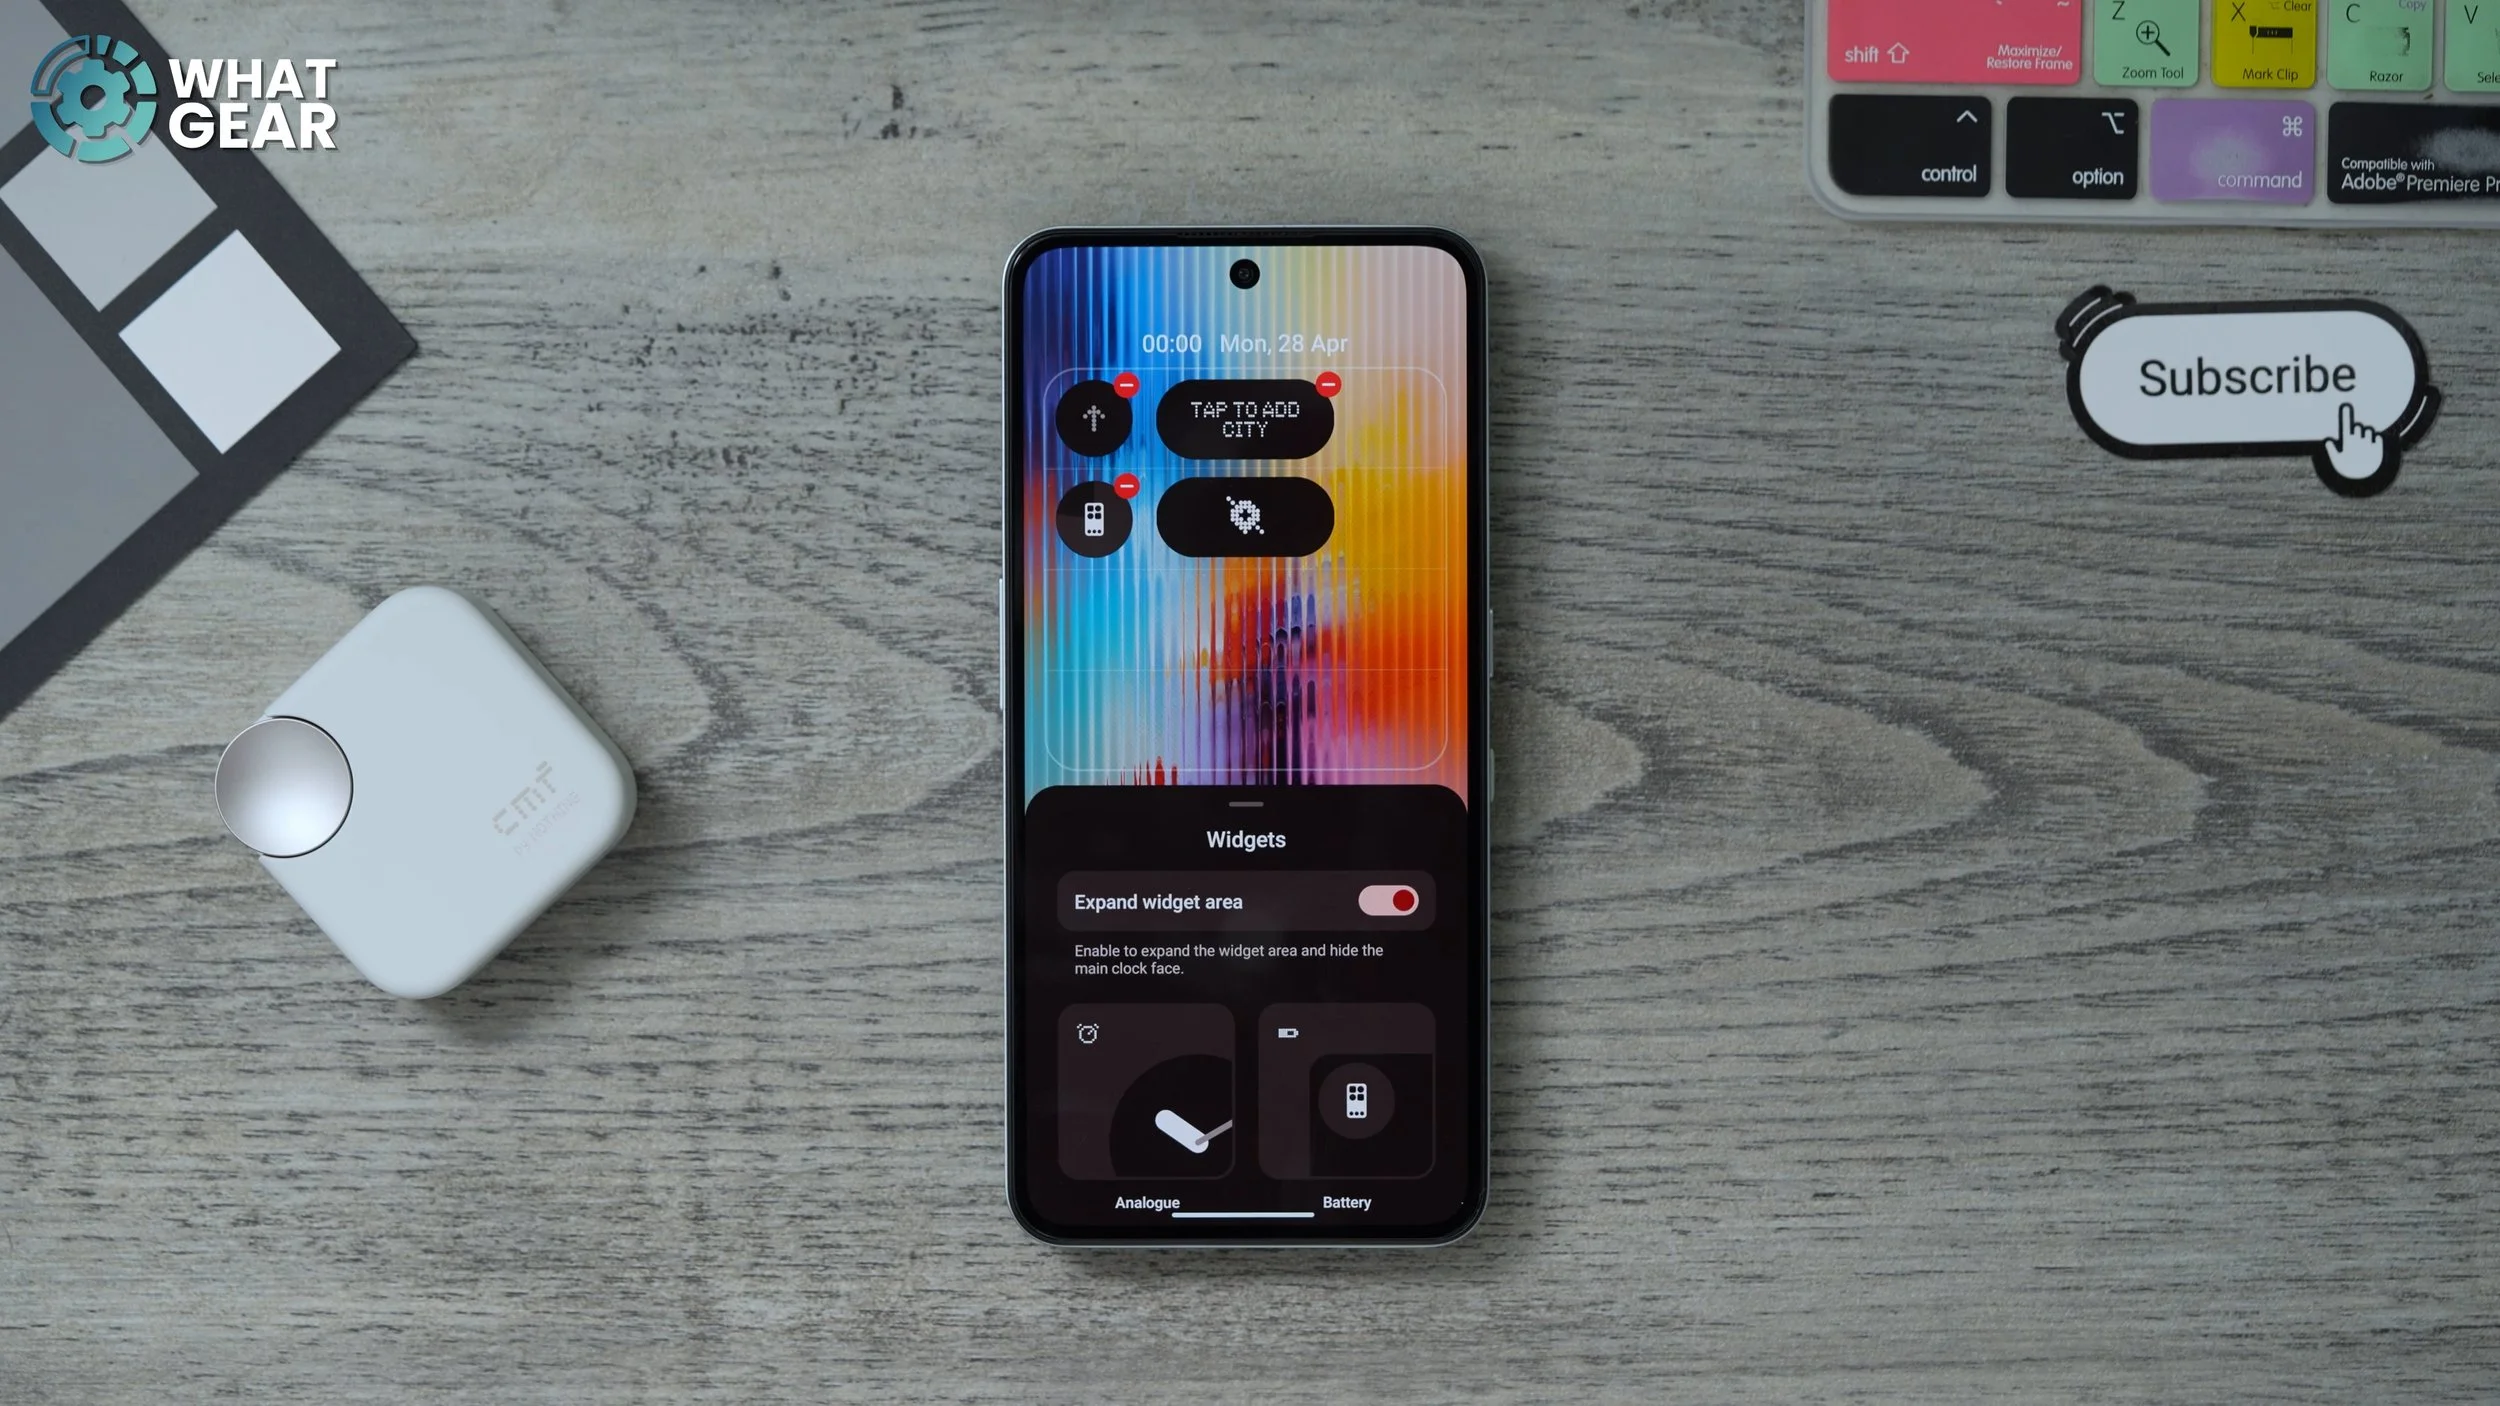
Once you're happy with the widgets that you set up here, you can just go back. Now, let's say you want to add more widgets to that widget area on the lock screen. You can do that if you go back into widgets and tick this box here. Expand area. Now you get two more rows to fill with more widgets for your lock screen. Just make sure that they're useful to you. Don't just add just everything just to fill up the spaces. You don't want to overcomplicate it.
Shortcuts
This is another customisation tip. If we jump back into the settings, we go back to customisation again, and we go back to the lock screen again. This time we're going to customise the shortcuts. So by default, the left side will be your Google Home. If you don't have any Google Home stuff, there's really no point of you having that.
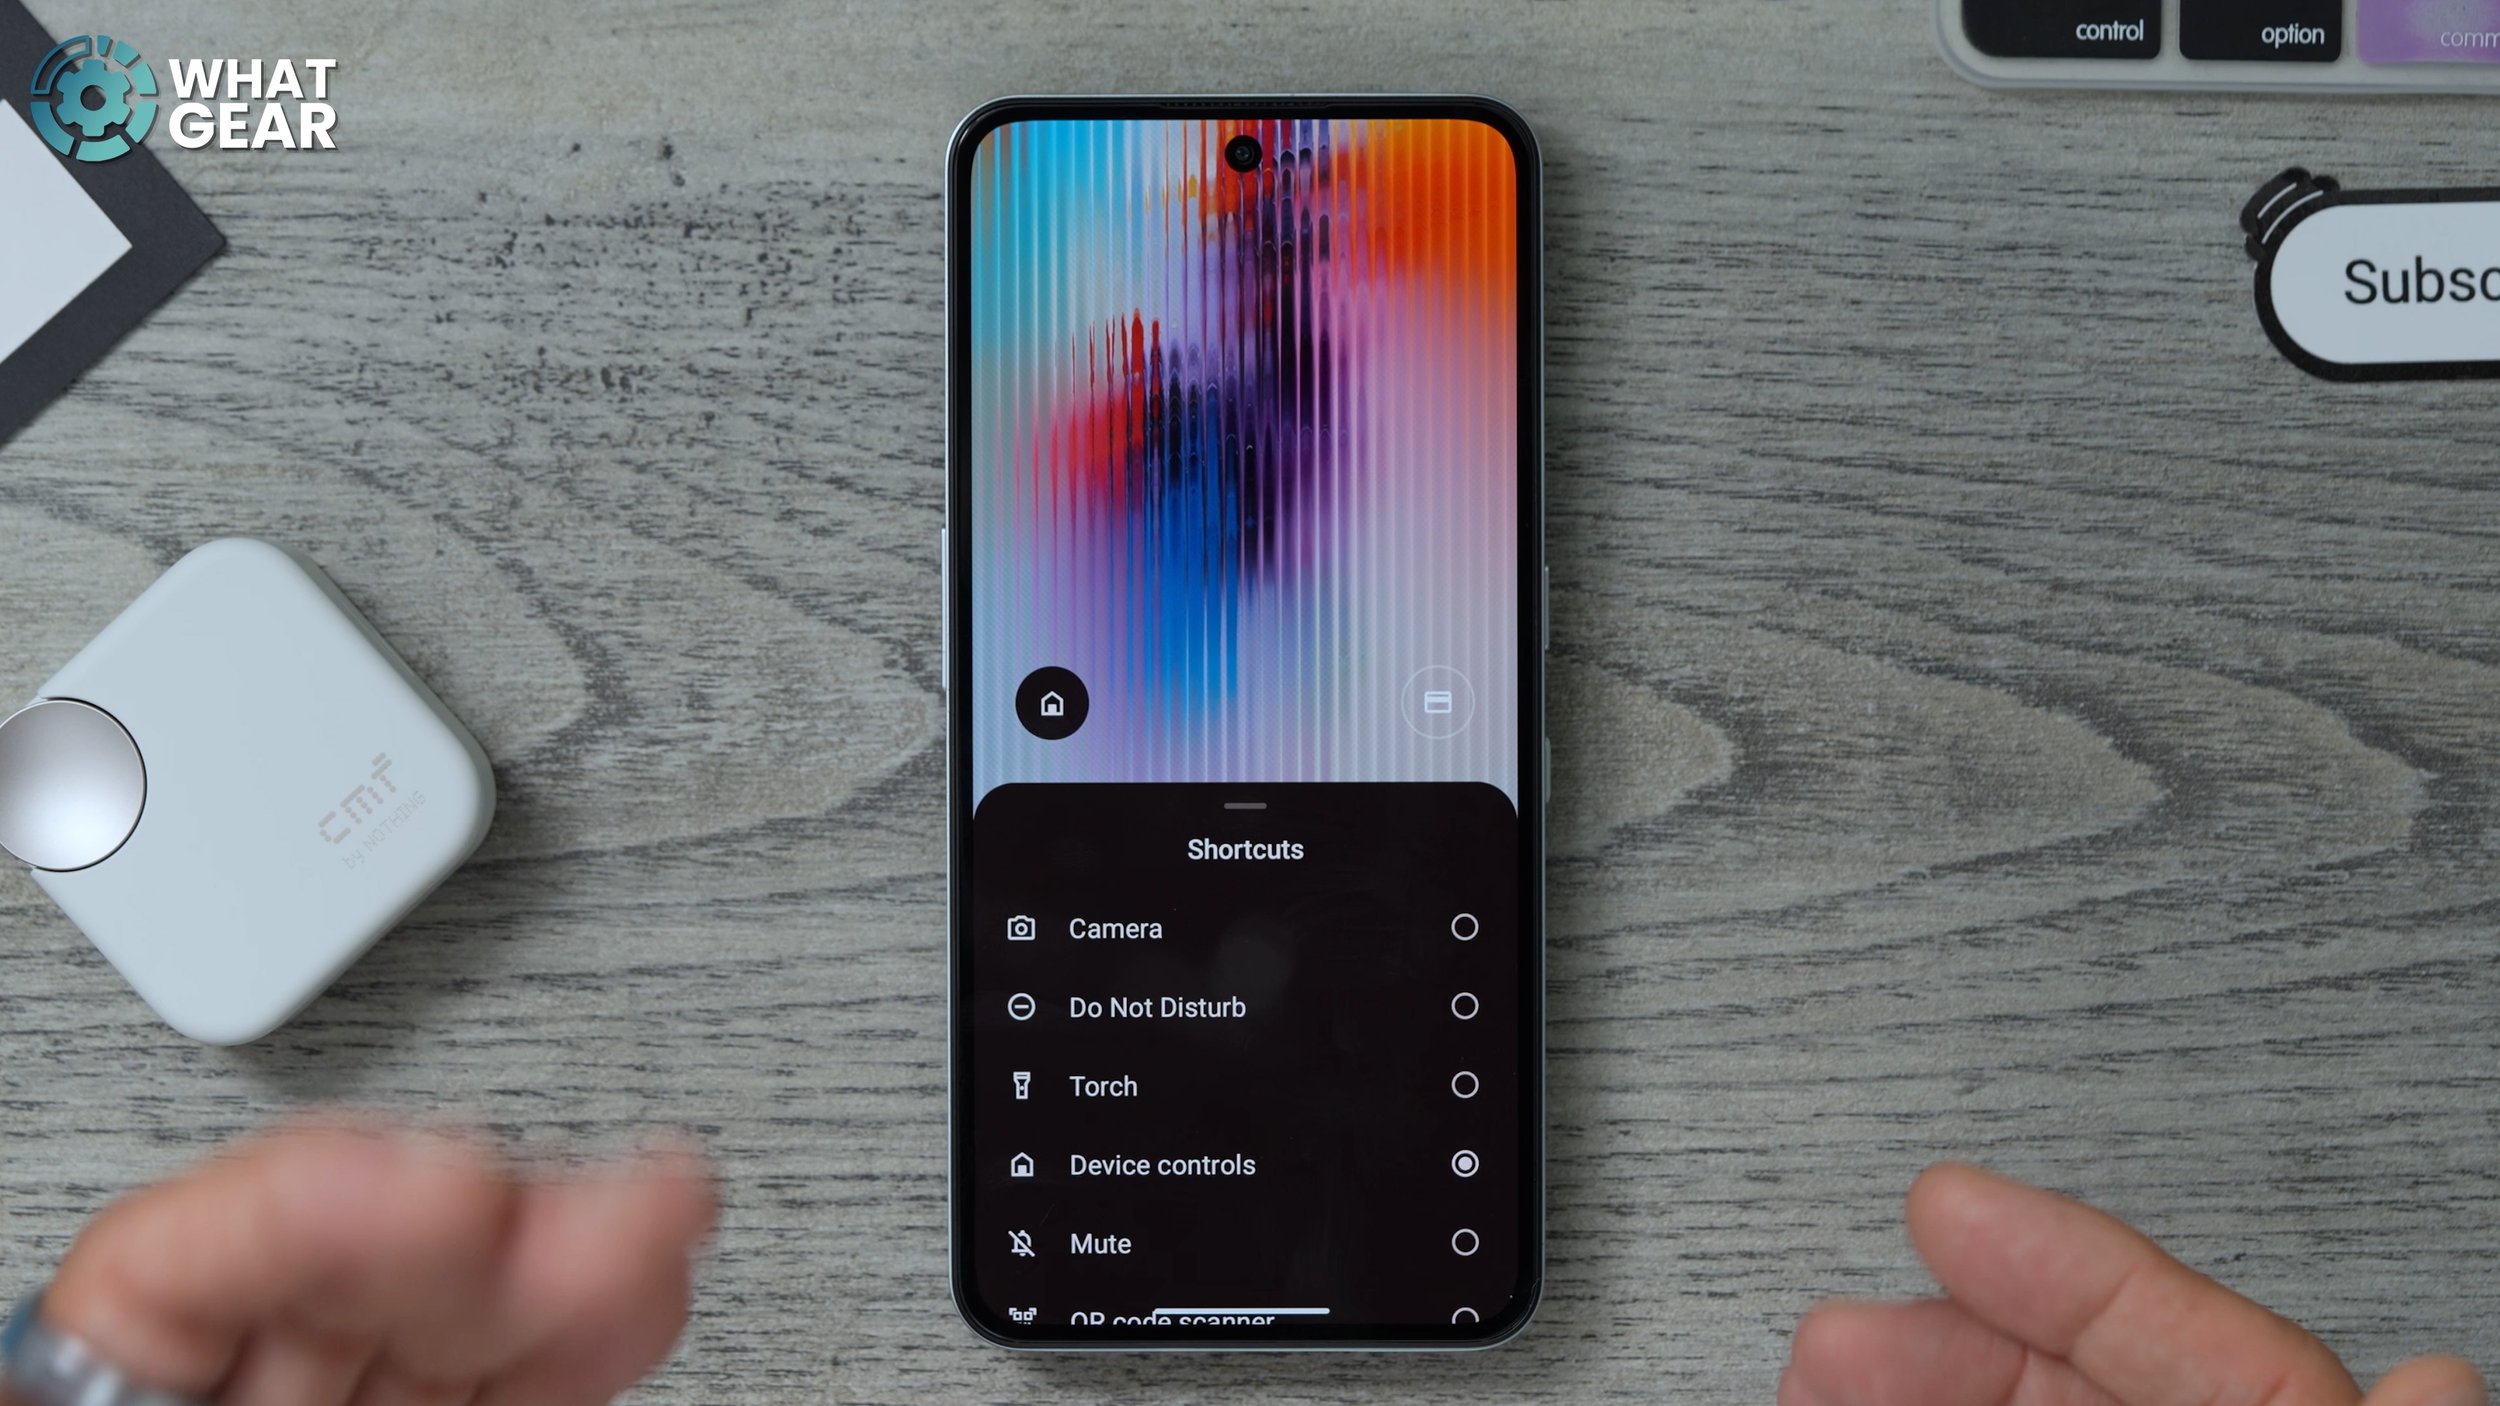
And then the right side is the Google Wallet. If you're not going to use that, you might want to change that as well. So to change one, just tap on it and let's say we want to torch there. And then on the right side, let's say we want the QR code scanner. So now with that set up, you can just switch on the torch by pushing and holding and then switch it off, push and hold and the same thing here for the QR scanner.

That will require a fingerprint because it does open the camera on a device. I definitely recommend you set that up. Now before we move on to the next one is a little bonus one here. If you go back into your settings, go to Lock Screen here. I do recommend you do this just for safety. Add text on the lock screen, so it's a good idea to add a bit of information, like an email address, a second phone number that you might have. Some way for someone to contact you if you happen to lose your phone, because they will be able to read that on the lock screen.

Expand
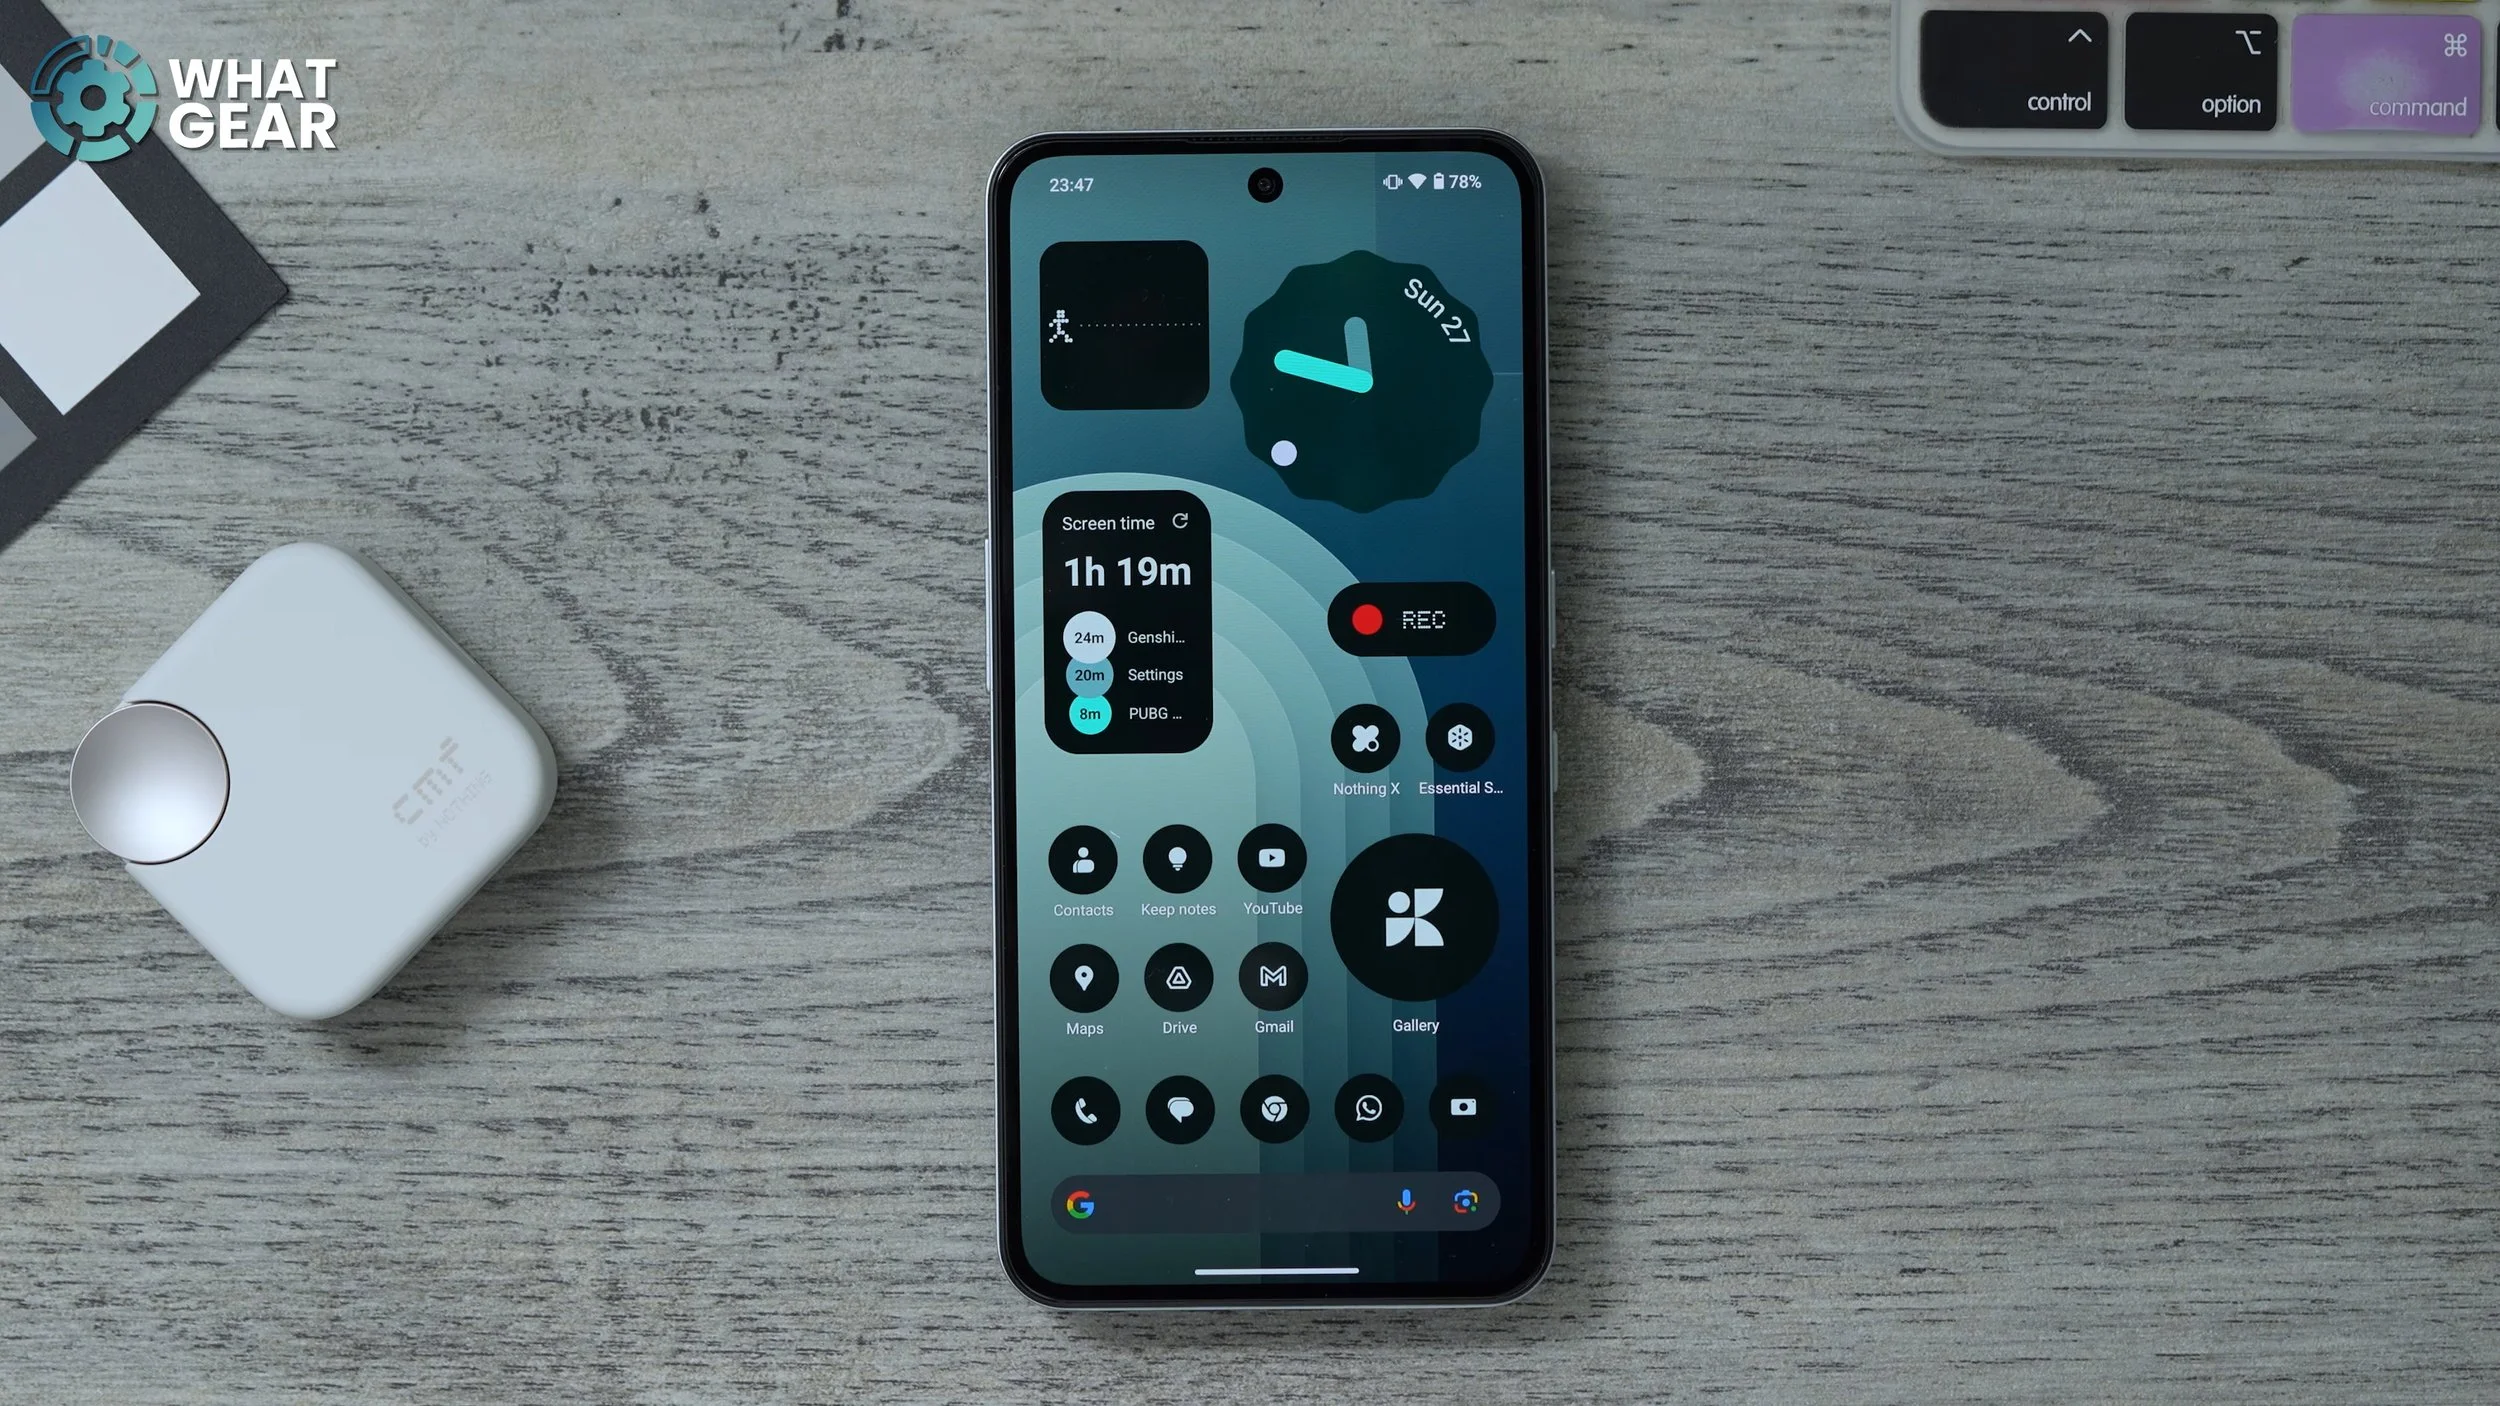
So you can probably tell I spent a little bit of time setting up my home screen here, and you might be wondering, how have I got these bigger app icons for the gallery, for example? Well, it's very easy to do with this phone.

You just choose the app you want to maximise, hold your finger down on it, and then hit the outward arrows that turn it into a large icon. So you might want to consider expanding the size of the apps you use the most on your home screens to be bigger. That way, it's just easier to get to.
Folder Options
So you'll notice on this page I have an app icon here, which is large, but it's not actually an app icon; it is in fact a folder. This is one of the nice features of Nothing OS. You can take a bunch of apps, drag them on top of each other, and they'll stack up in a folder just like pretty much any other Android. You can maximise them, just like with the singular apps, and you can expand them at any time. But here's where it gets a bit more interesting. If you hold your finger down on these, you can go to customise, and you have a bunch of different layouts which you can choose from. The one that I like to use is the covers.
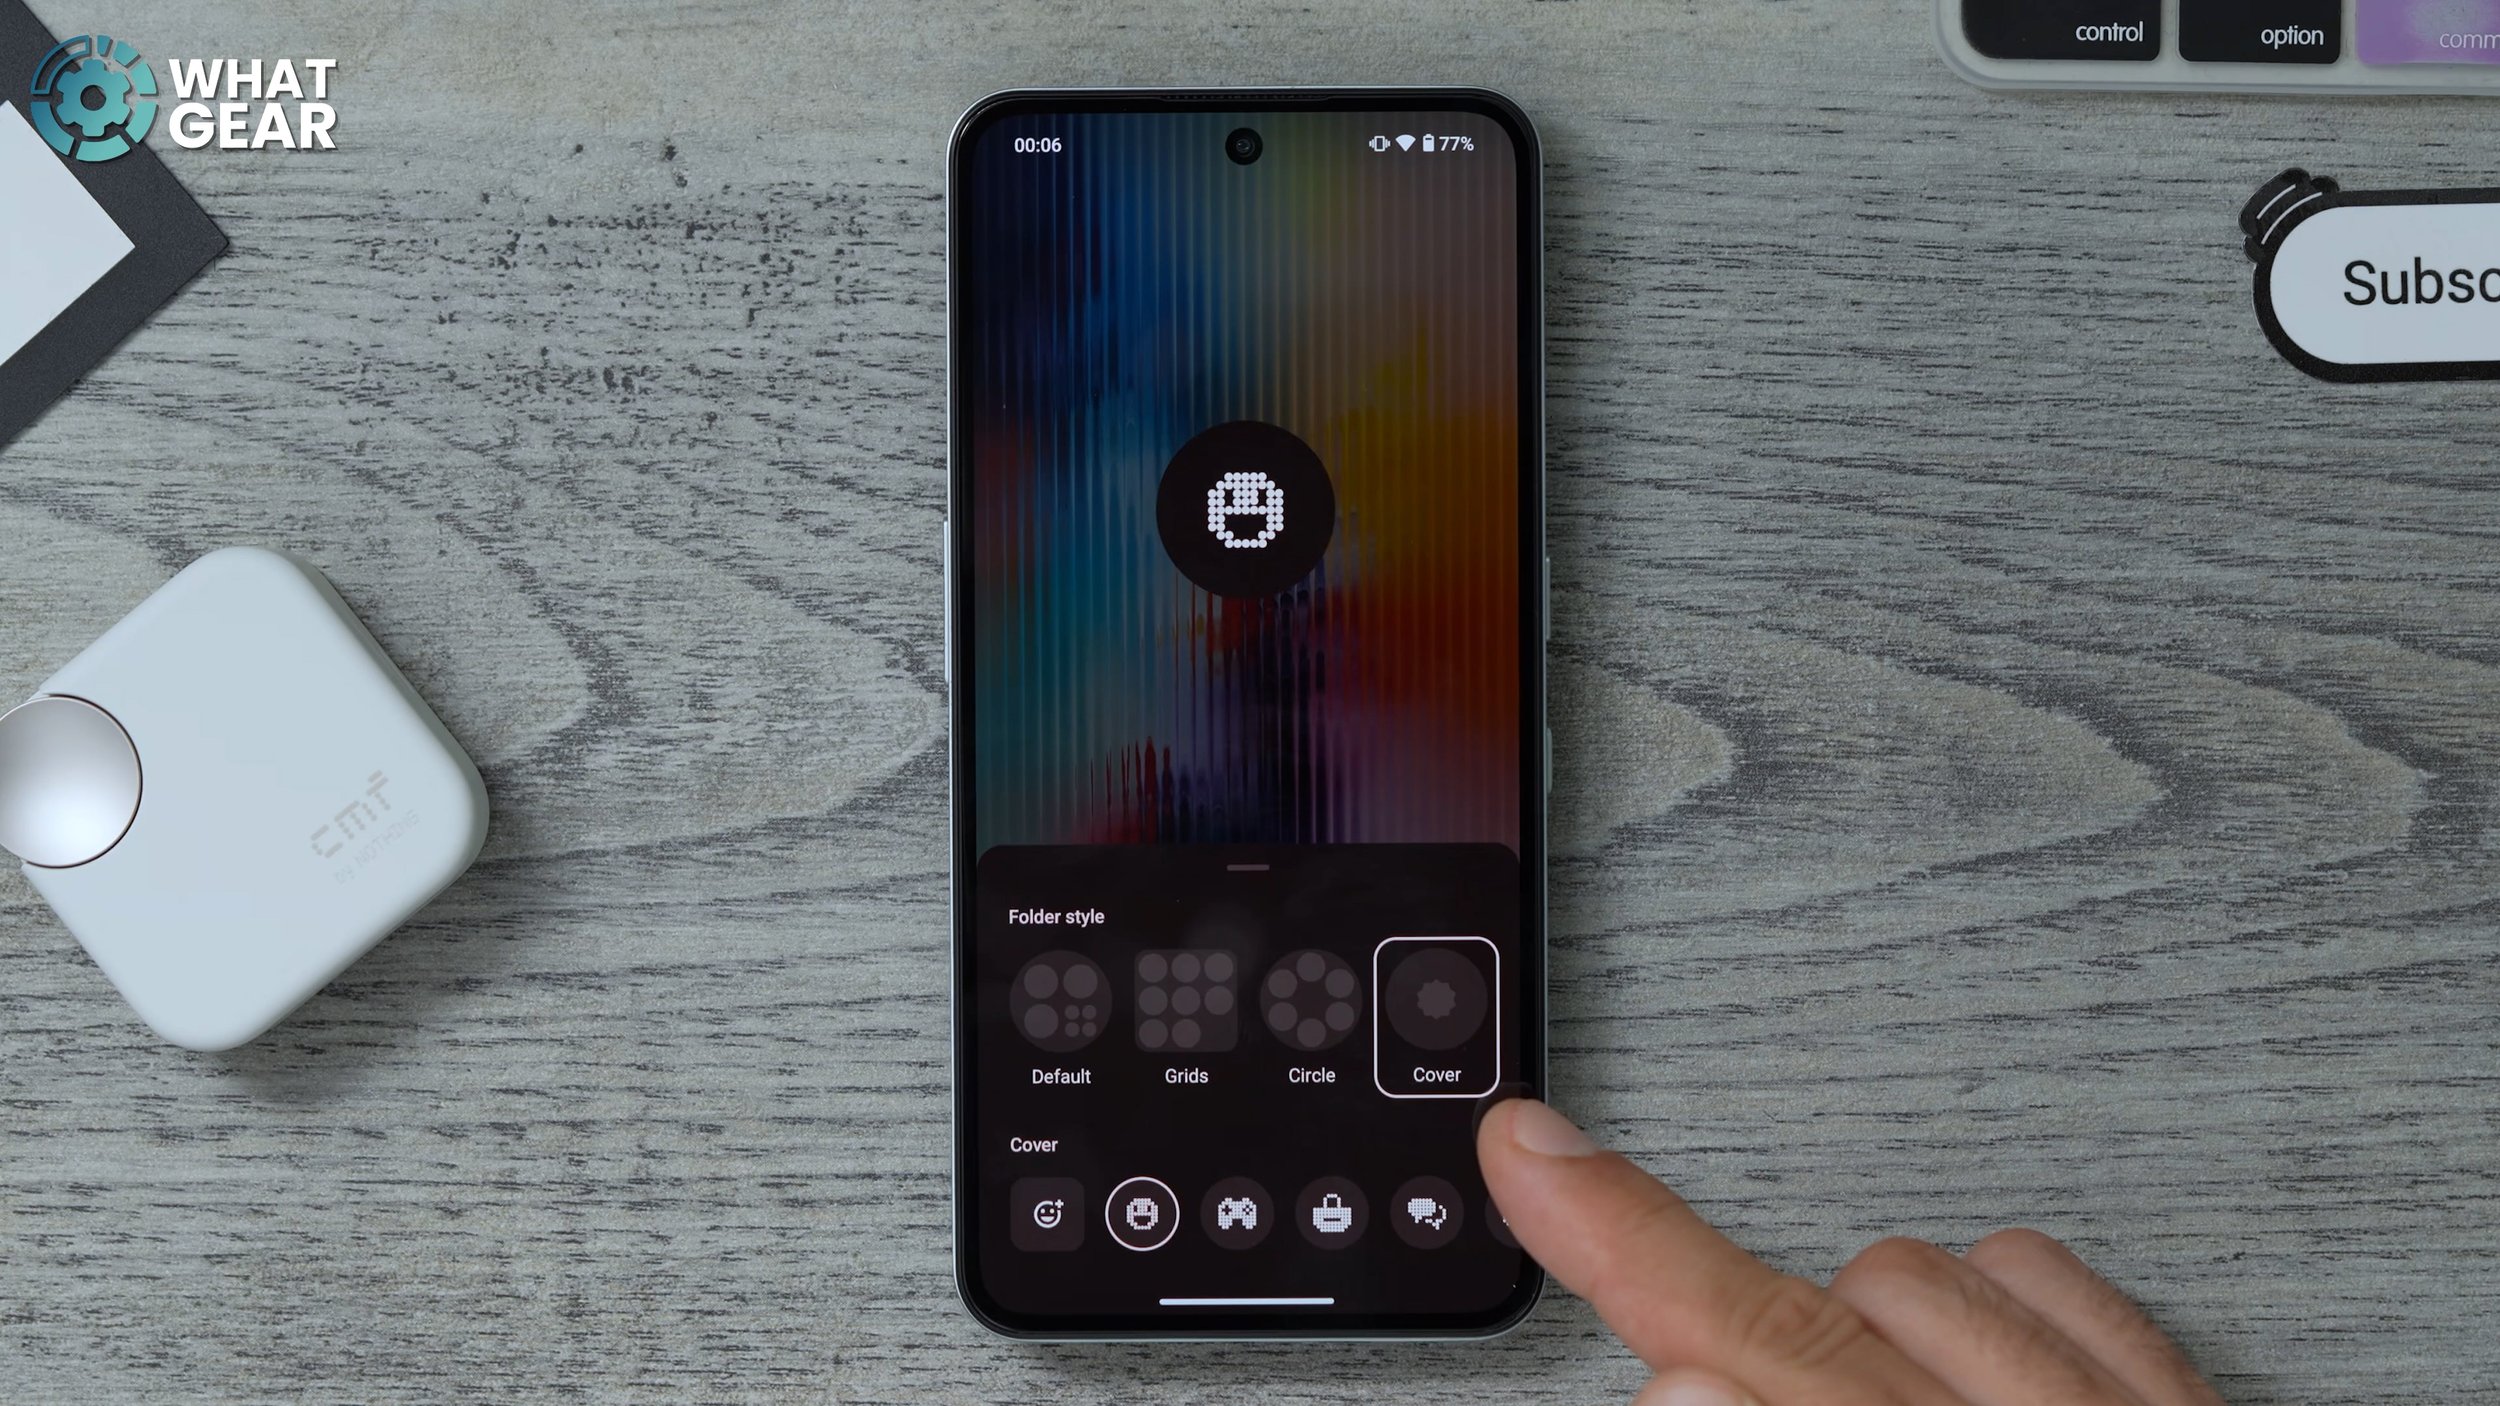
So once you've selected cover, you can hit the little emoji icon here and use any emoji from your emoji library. If you hold your finger down on it again, you can go to rename. You can call that folder whatever you want. This is just a good way to file away apps that you don't use that often is to make sure that distracting apps are not there in your face all the time, so I recommend you make use of the unique nothing app folder options.
Reach The Top
So this screen on this £220 phone is pretty amazing. I can't believe how good it is, in fact, but it is a big screen. So you might want to make use of this hidden feature. If you jump into your settings, scroll all the way down to special features. Go to gestures and enable the one handed mode, so this will work differently depending on the navigation style you're using.
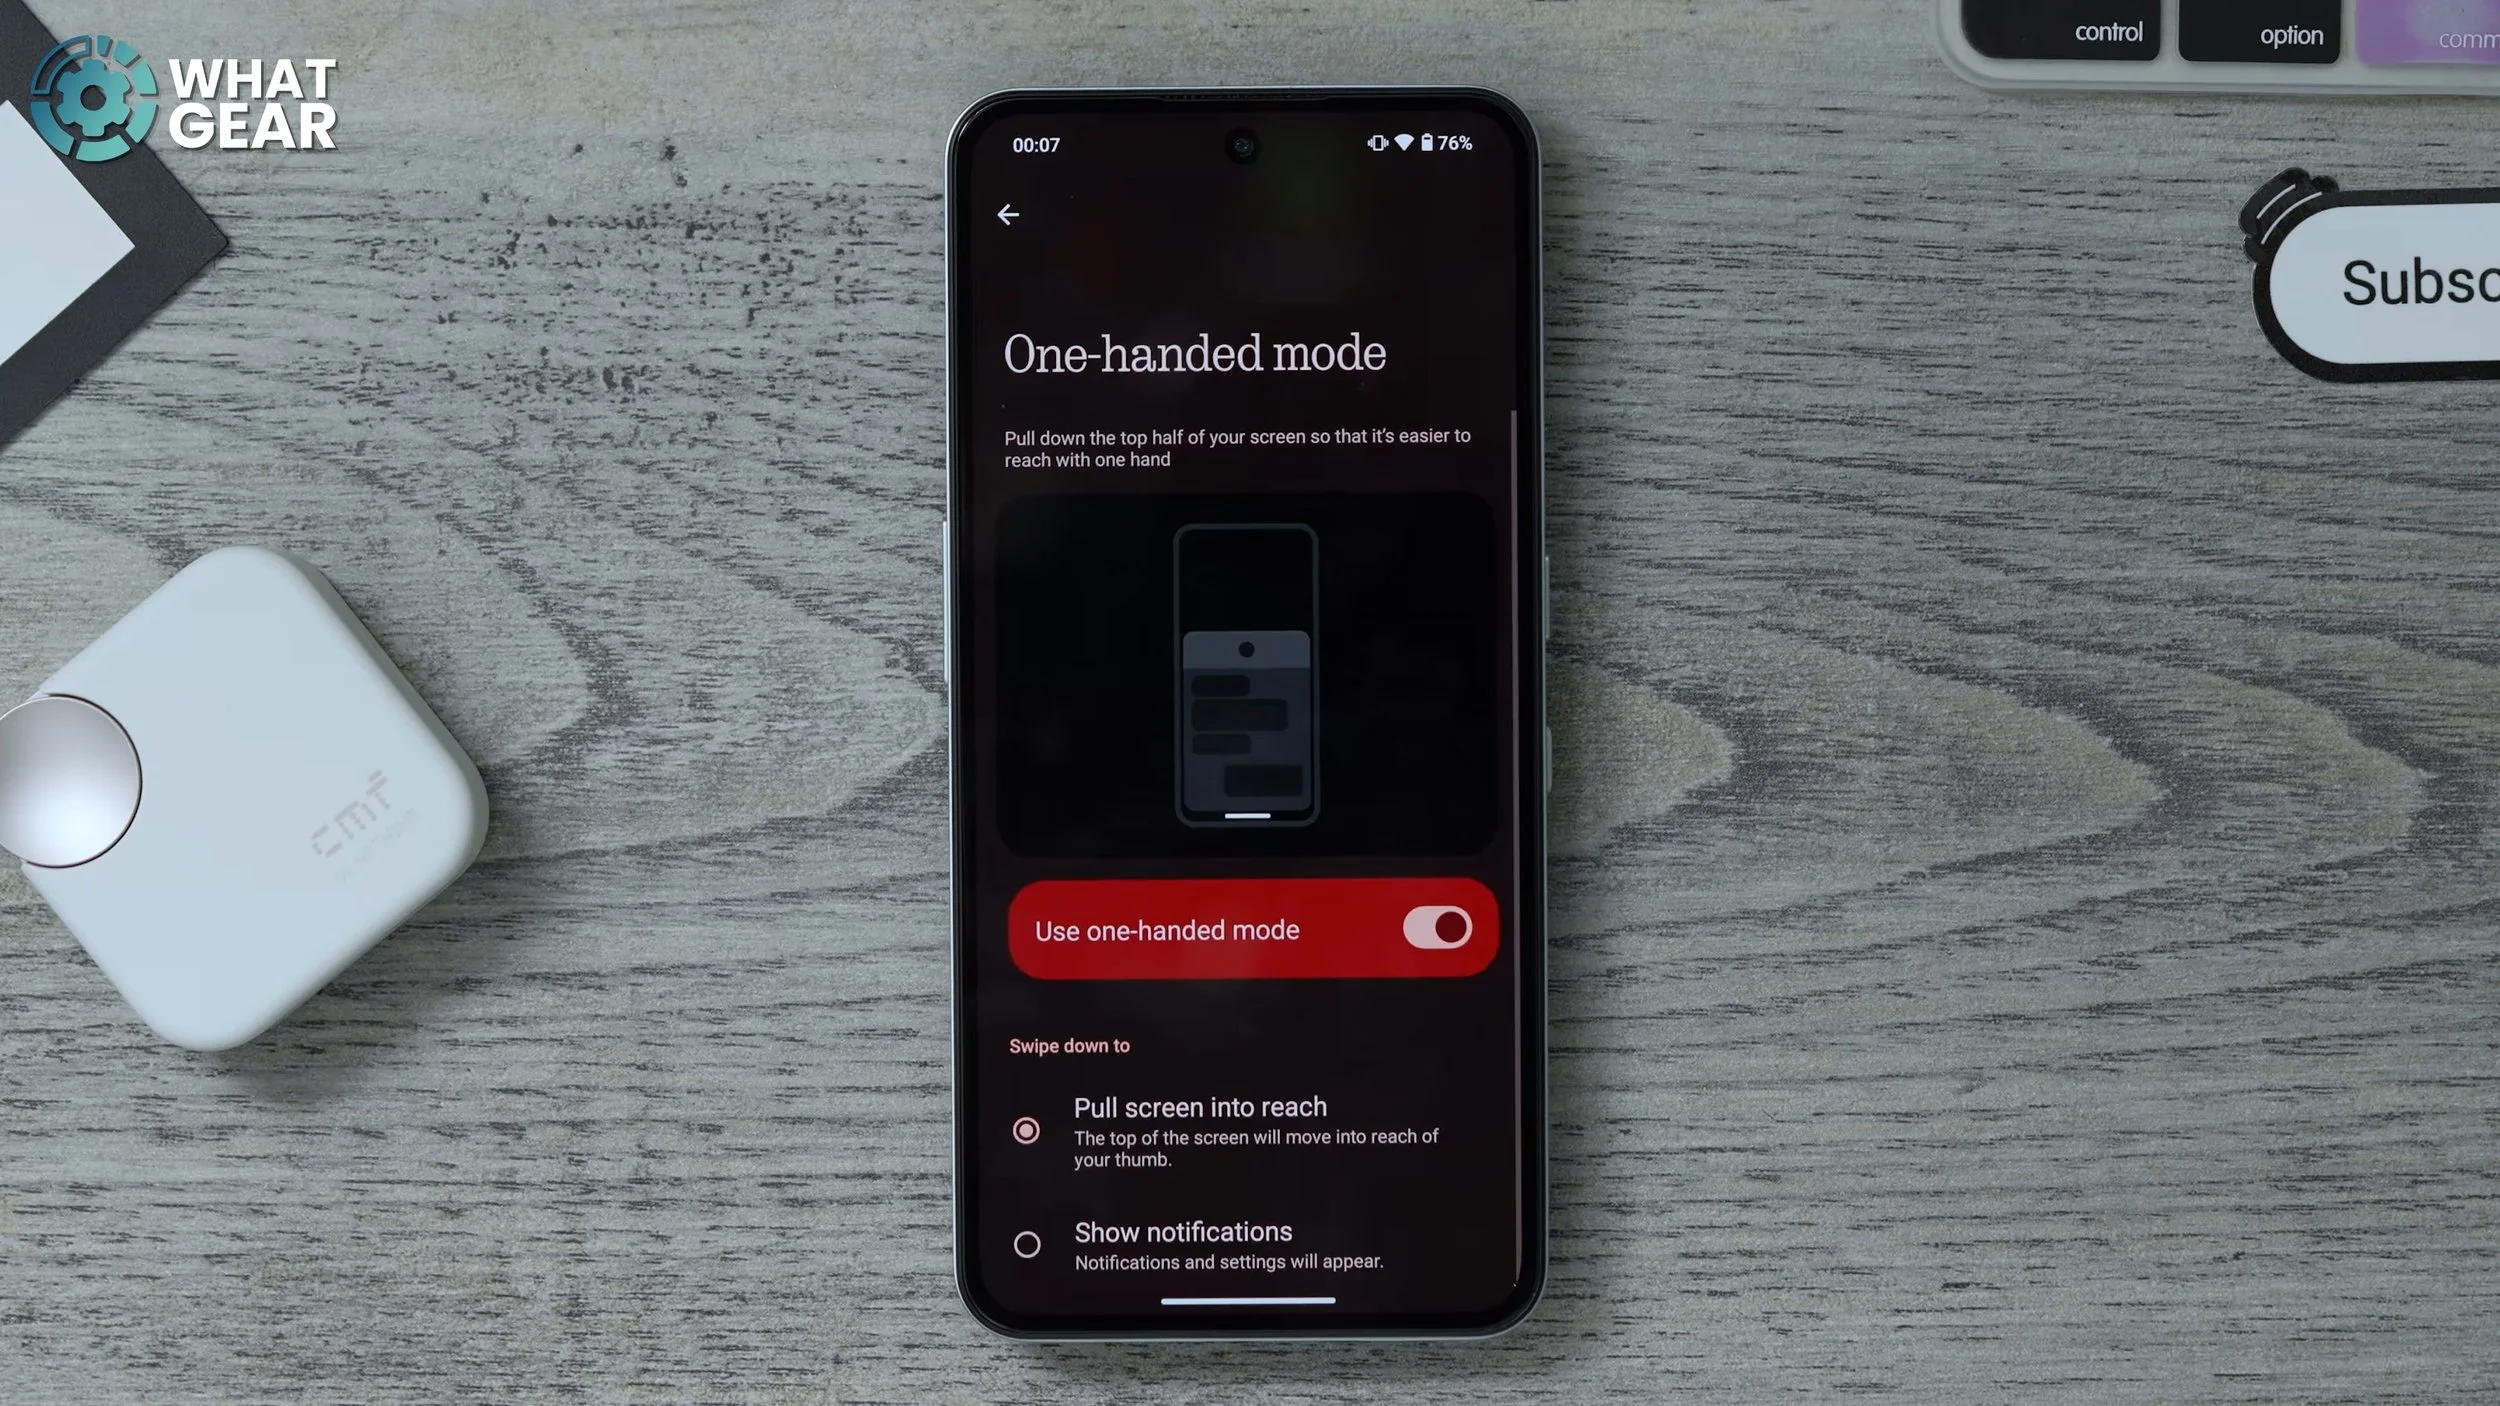
I'm using the gestures right now, so in order to access this you would just swipe down over the little white line at the bottom to bring the entire top half of the screen closer to the bottom, and then to expand it back, you just tap the empty area. So if you are walking down the street one day, you need to tap the clock or something like that, you can just swipe down, and there we go, you've got your one-handed mode activated, and then just hit the top again, and it goes back.
Reach The Top
Here's another hidden feature which is switched off on day one. You might want to switch it on, jump back into your settings, go all the way down to special features. Here, go to gestures, and you'll see the screenshot gesture.

So this is where you use three fingers to swipe down the screen to take a screenshot. That's pretty nice, and you can share straight away from here, and then also, if you're on a web page and there's much more screen available, you can actually scroll up and down the screen to capture more.
Essential Upgrade
The CMF phone 2 Pro has a new button, and it is the essential key. So when you use this essential key, let's say you're researching a pair of headphones. You push the button to capture a screenshot. You can record some audio. So the reason why I've screenshotted this is because it shows the price and the colours of these new headphones. Now it's captured all of that information there with the screenshot. So now, when we jump into the essential space, we have the screenshot that I just captured, the key information here, and also the recording of why I captured it in the first place.
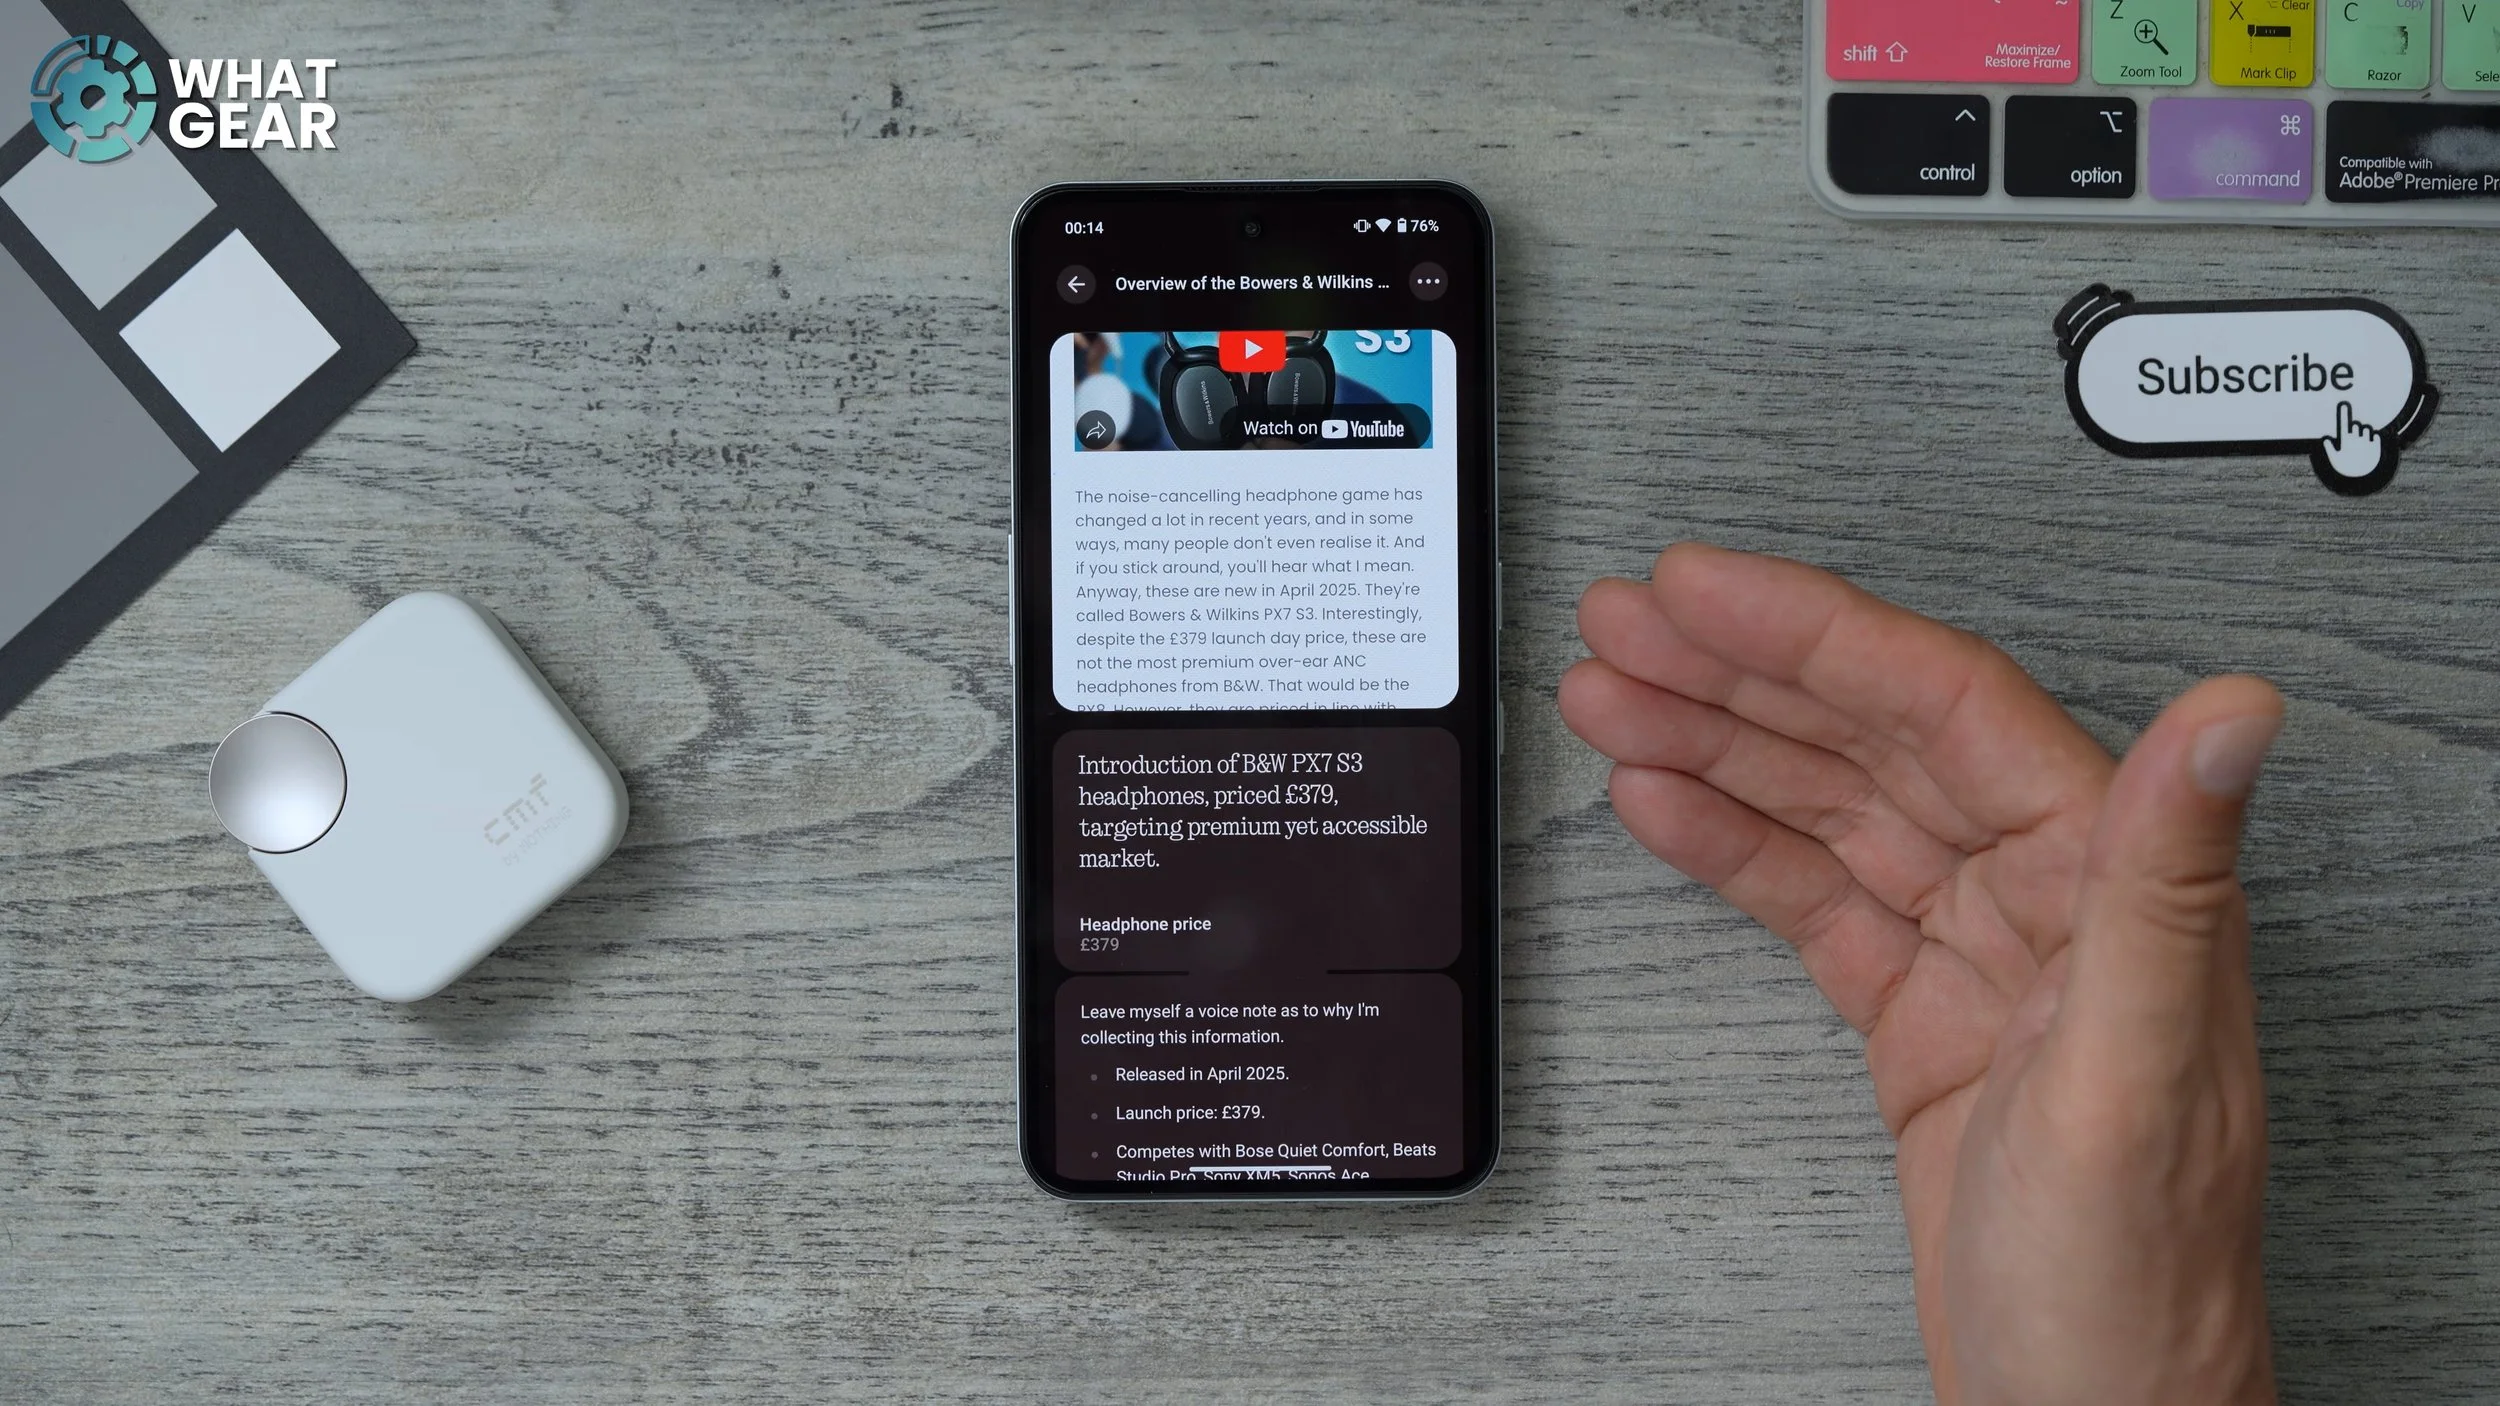
And then I can create a collection. So let's say I wanted to look at five, six, seven, eight, and ten different reviews on these headphones, I could add them all into one collection and then have all that valuable information there at the touch of a button whenever I need it. This essential key and essential space could be very, very useful for you for research purposes. So yeah, this is definitely something you want to get used to using if you've got this phone.
Sparkle Circles
This next feature is available on all Android phones, all of the new ones anyway. But you should familiarise yourself with it because it's a super powerful tool. Let's say you're browsing the internet. You see something, you're like, dunno where to buy it from.
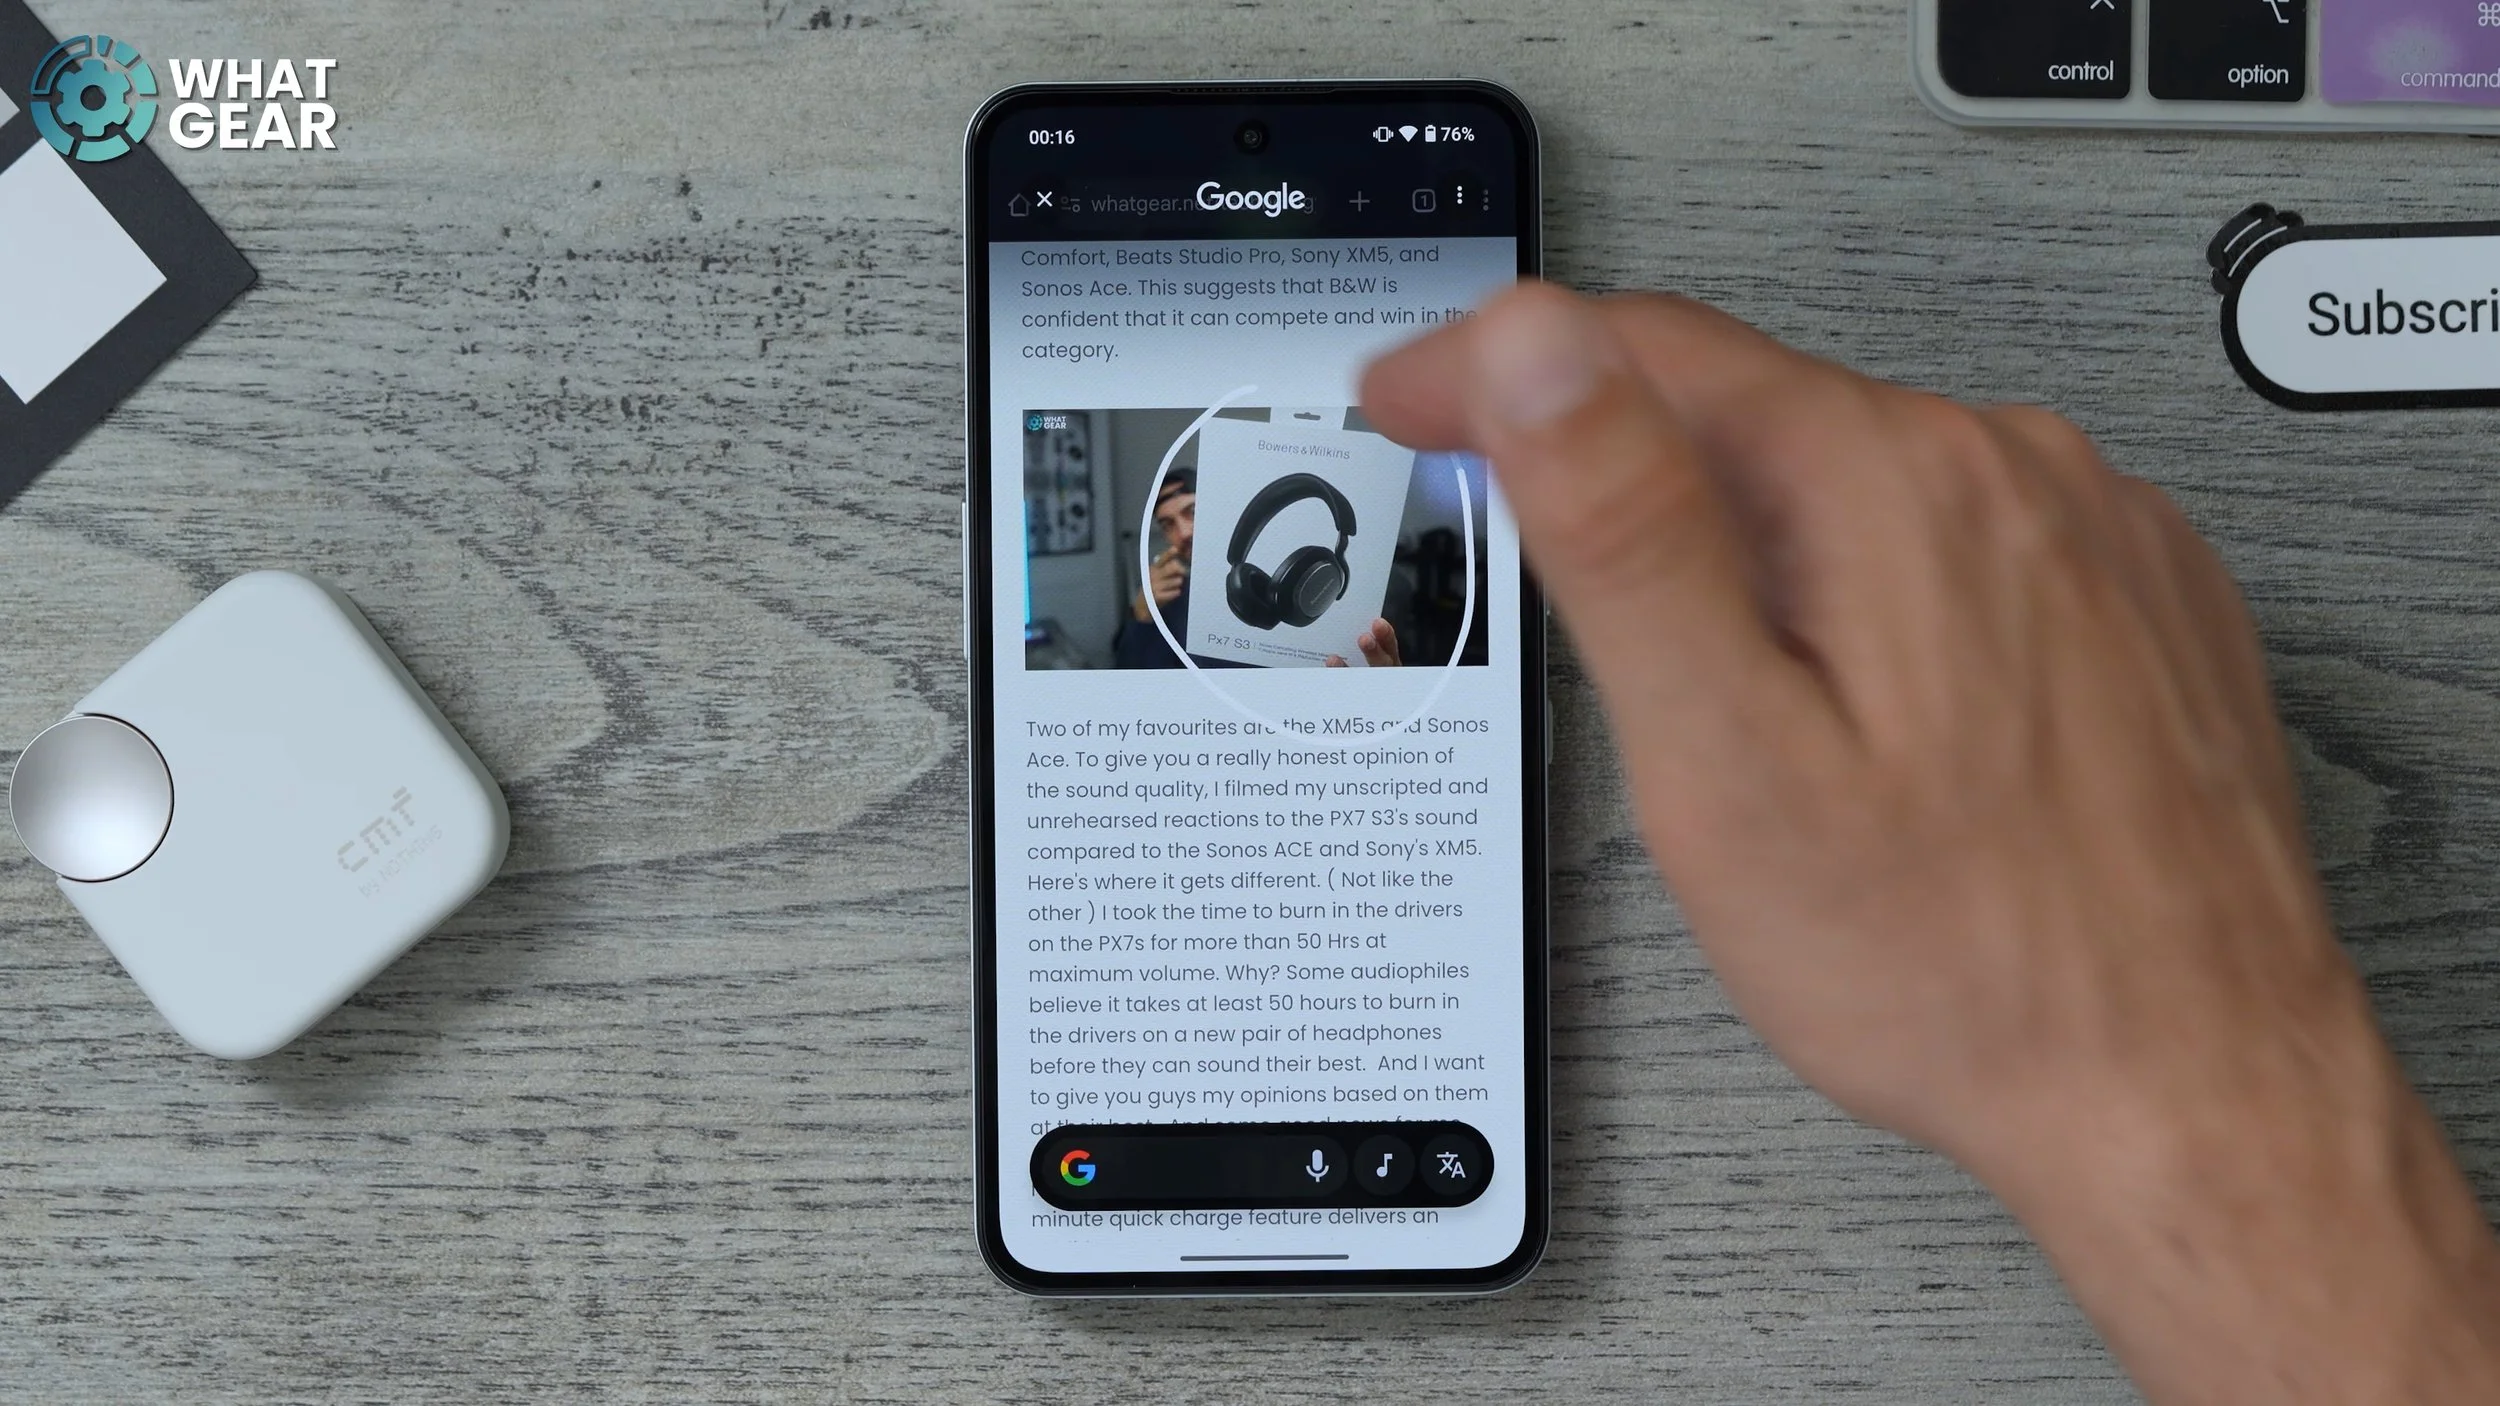
If you hold your finger down on your gesture bar or your home button, you've got circles to search so you can go around anything and search for things that are on screen right now. We can see what that was without even reading any of the article. We can see how much it costs, where we can get it from, and all that kind of stuff.
Always On Display
Something this really impressed me about this phone is the screen. You know, it's 120Hz. It can scale back to 60Hz when it needs to. And it is an Amoled and is incredibly bright, is super bright for a budget phone, pretty unbelievable. But there is a feature here that you might want to make use of because it is an amoled, jump into your settings, go to Lock Screen, scroll all the way down and you'll see the Always on Display menu here.

Tap on that. This will be switched off by default. You might want to switch this on, because that way when your phone is off and it's facing up on a table, you can literally just tap on the screen to see the time. But also you've got quick access to the widgets that you set up earlier on in this video.
Power Verify
Here's another bit of security advice. This is just an optional thing, but you might want to use it because it is a feature on this phone. Jump into your settings - security and privacy - More security, in here you see power off verify. So there's been a spike in phone theft crimes, particularly in busy cities where you literally just be looking at your phone walking down the street, and a motorbike or someone on electric bike will just fly past you, snatch out your hand.

That's it. Your phone's gone, and the first thing these thieves will do is switch off your phone. If you turn this on, they can't switch off your phone. And this can give you the extra time to use your Google Find to figure out where they've taken your phone. And if you wanted to, you could hunt them down. I'm not suggesting that you should do that, but you could. But you probably shouldn't
Bigger Quick Settings
This is the feature I love about the Nothing OS operating system. If you swipe down, you've got your quick settings. This is pretty standard for any Android, but one of the cool things you can do here is you can actually enlarge and minimize specific things.

For example, if you're always using airplane mode, just make it bigger. Let's say, for example, you always hear music that you like, but you never know what song it is. You can actually just choose the song search shortcut, make it bigger, bring that over to the front, so next time, whenever there's a song playing, you want to know what it is, you've got a quick way to find out.
Bonus tip
If you're coming over from a pixel phone, I know you're going to appreciate this one, and also, if you just want to make the most of your home screen space, you'll appreciate this. So jump into your settings - Go to customisation - go to layout - and in here at the bottom you'll see the option to switch off the search bar.

So this gets rid of the Google search bar at the bottom of the screen. There we go, we freed up an entire extra row on your home screen, and if you really wanted to, you could just add the widget for the Google search bar and just make it a bit smaller. I do think some people will prefer this approach than having the static bar on every single home screen.
Camera Settings
One of the things that's been massively upgraded on the Nothing Phone 2 Pro is the cameras. So let me show you a couple of camera settings that you need to know about. So if you launch the Nothing Camera app, use the little dropdown arrow. You see a bunch of standard stuff, but there are a couple of things I want to draw your attention to the quality so you can switch this to 50 megapixels. Because the primary camera is a 50 megapixel camera, this will capture more data. The file sizes will be bigger. However, it won't work quite so well in Darker lighting conditions. The 12 megapixel mode will pixel bin all the information down into that 12 megapixel photo, which definitely works better at night. There are two other things you need to be aware of: the grid.
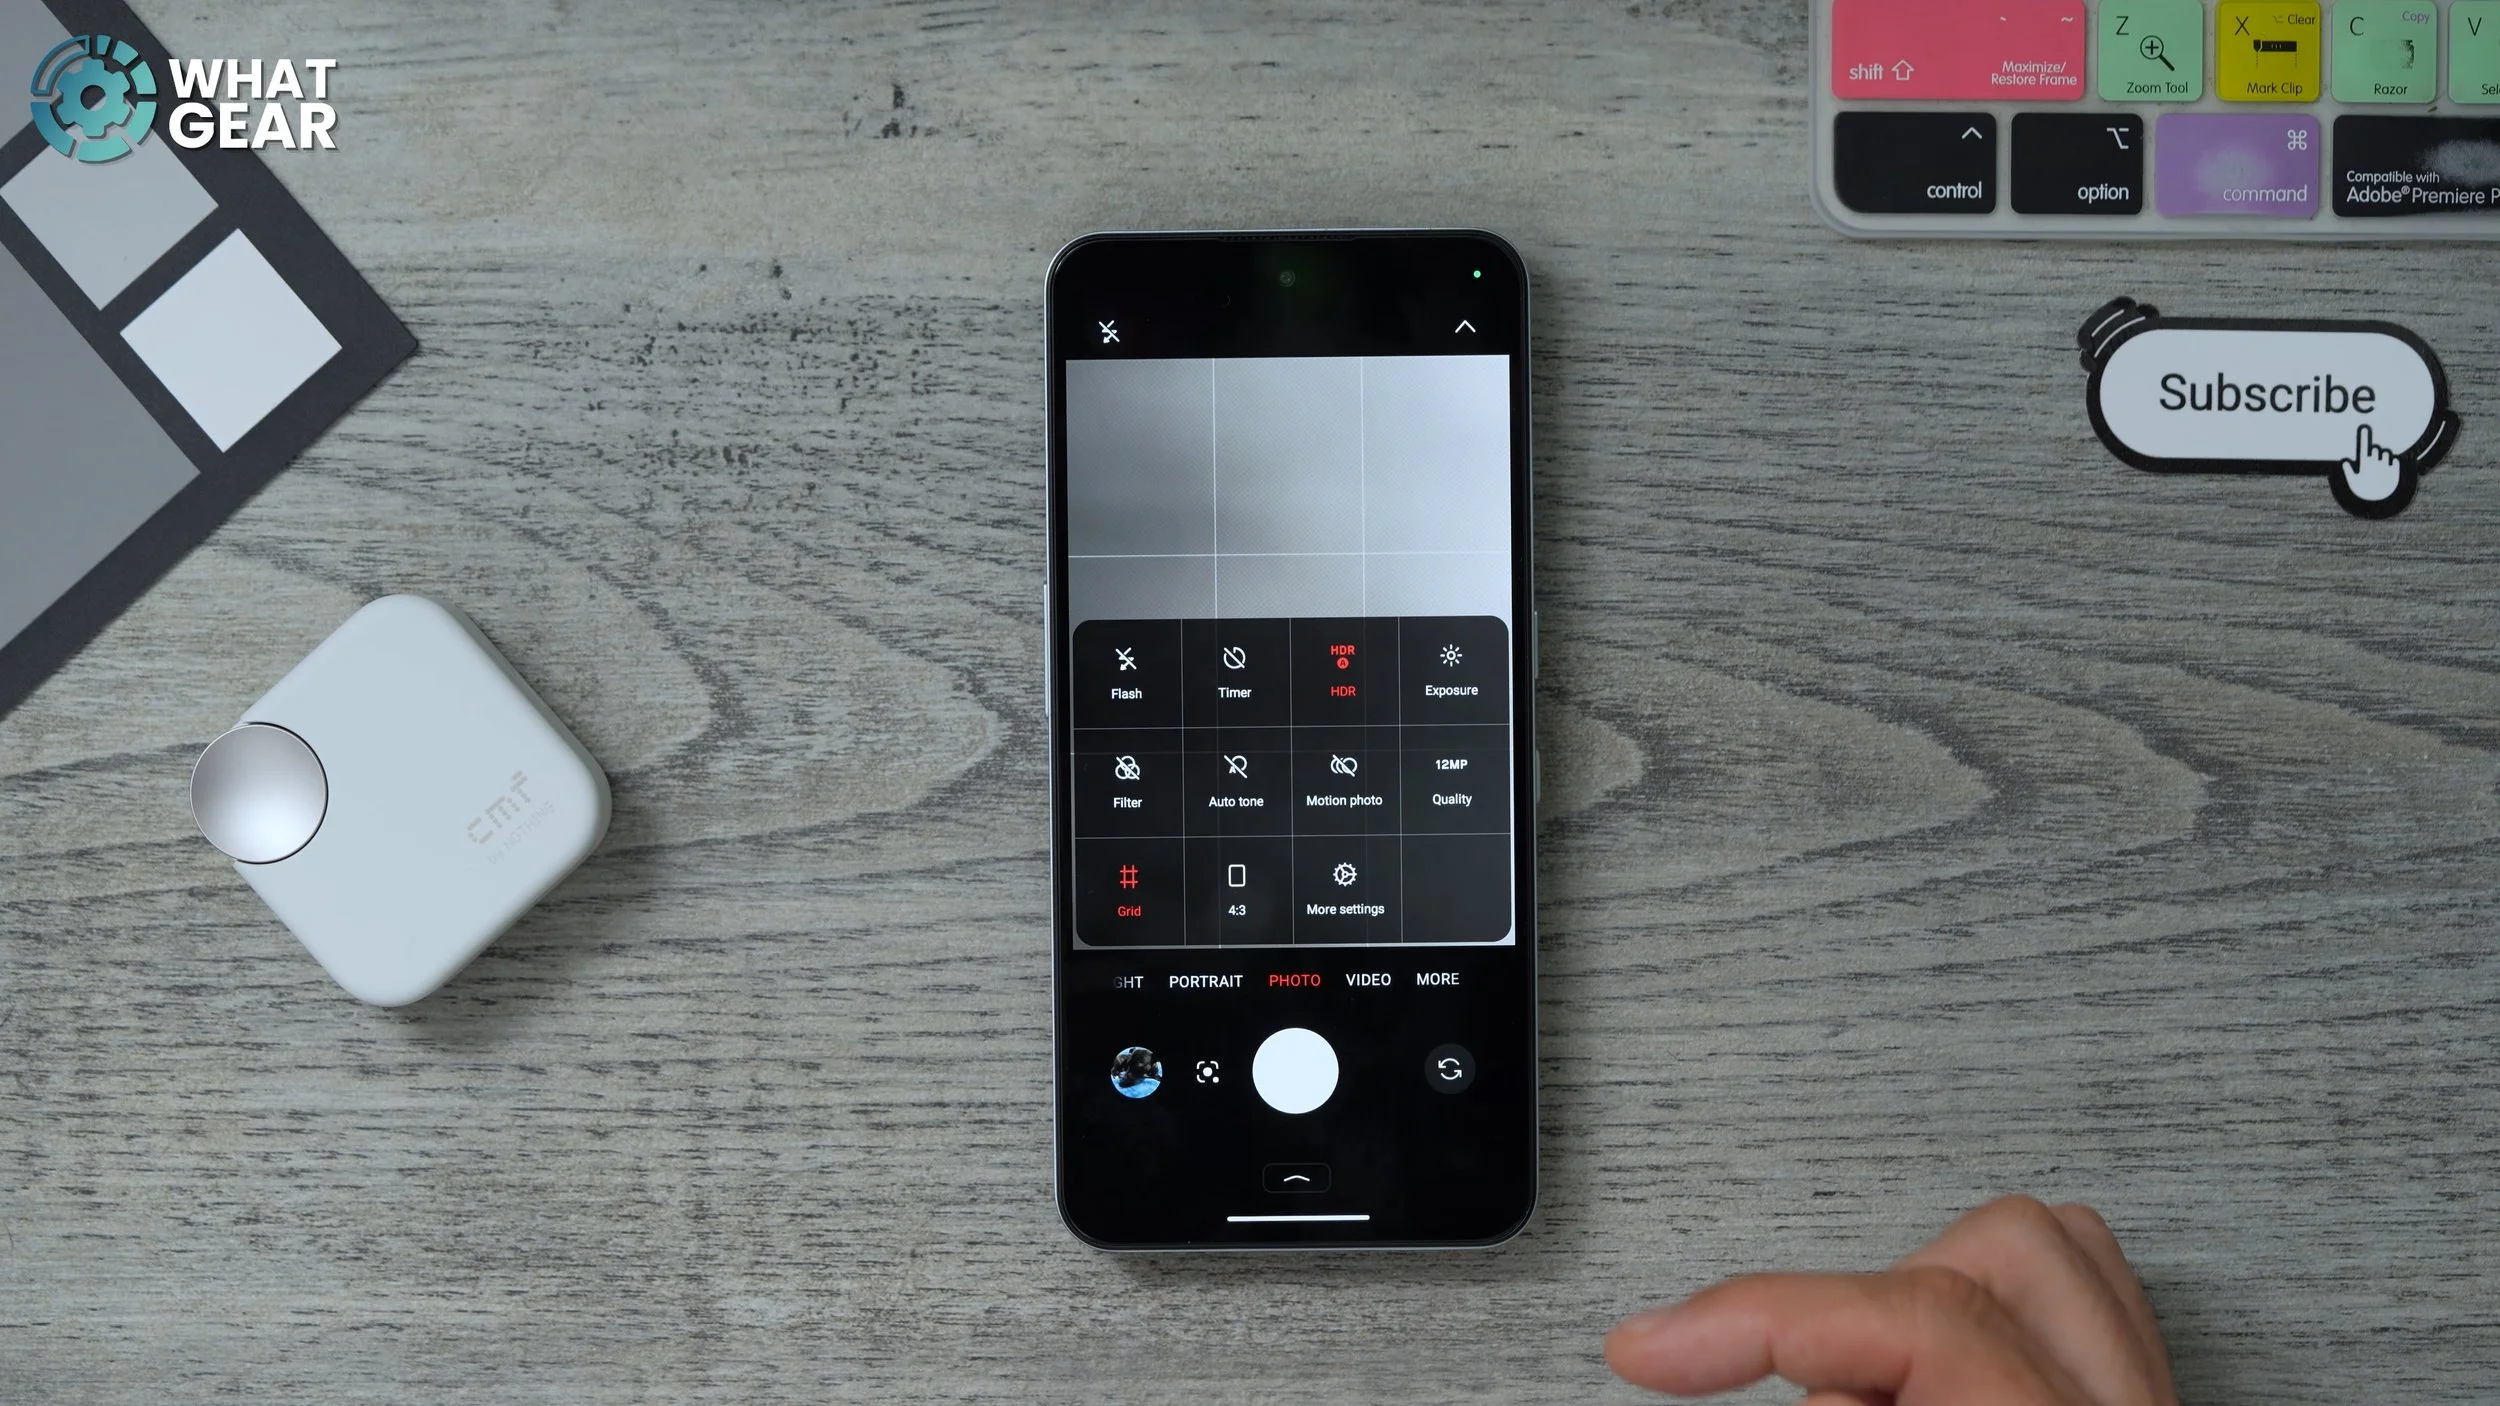
This is fantastic for composing better photos. You also have the option to do motion photos, so this is where I will capture a few frames before and after you take the picture. So you have this kind of animated style photo. And then if you go to more settings, I do recommend you switch on the level. So this adds a nice sort of spirit level. So you know if you're holding the phone level or not. And also while you're here, you can actually change the storage location for your photos and videos. So one of the nice things about this particular phone is that the SIM tray does allow for up to a two-terabyte SD card to be added to the phone. So if you're going to be doing lots of videos, lots of photos, you can change the, storage location to the SD card.
Preset Looks
Here's another camera feature. So, see this little arrow here at the bottom of the camera app. If you tap that, you've got some presets here which have been dialled in by Nothing themselves. So the soft focus that's kind of a bokeh effect. You've got the black and white and a few others, but let's say you want to create one of your own. If you hit the little plus at the top, go to Create Preset.

You can give the preset a cover, give it a name, give it a description, and then go in and tile the actual set up that you want. So if it's selfie photo, choose whether it's a 22 mil or 27 mil. The 22 mil will be a wide angle. You can choose the exposure, the filters and all these other advanced settings. So if you spend a bit of time doing this, you can create a bunch of different presets for different types of photos that you like to take a lot, and then just switch to them whenever you want.
More Or Less
So, quite surprising to me, this phone is so fast and smooth for such a budget phone, but you can actually make it even better when it comes to multitasking and also improve the gaming performance a little bit. If you do this, go into your settings - special features - go to Ram booster. By default, the phone will be set to 2 GB of RAM booster. This is where the phone uses the internal memory to expand the RAM. You can set this up to 16 gigs, doubling the RAM that is on the device. Now, the other thing I want to show you is the gaming mode on this menu.
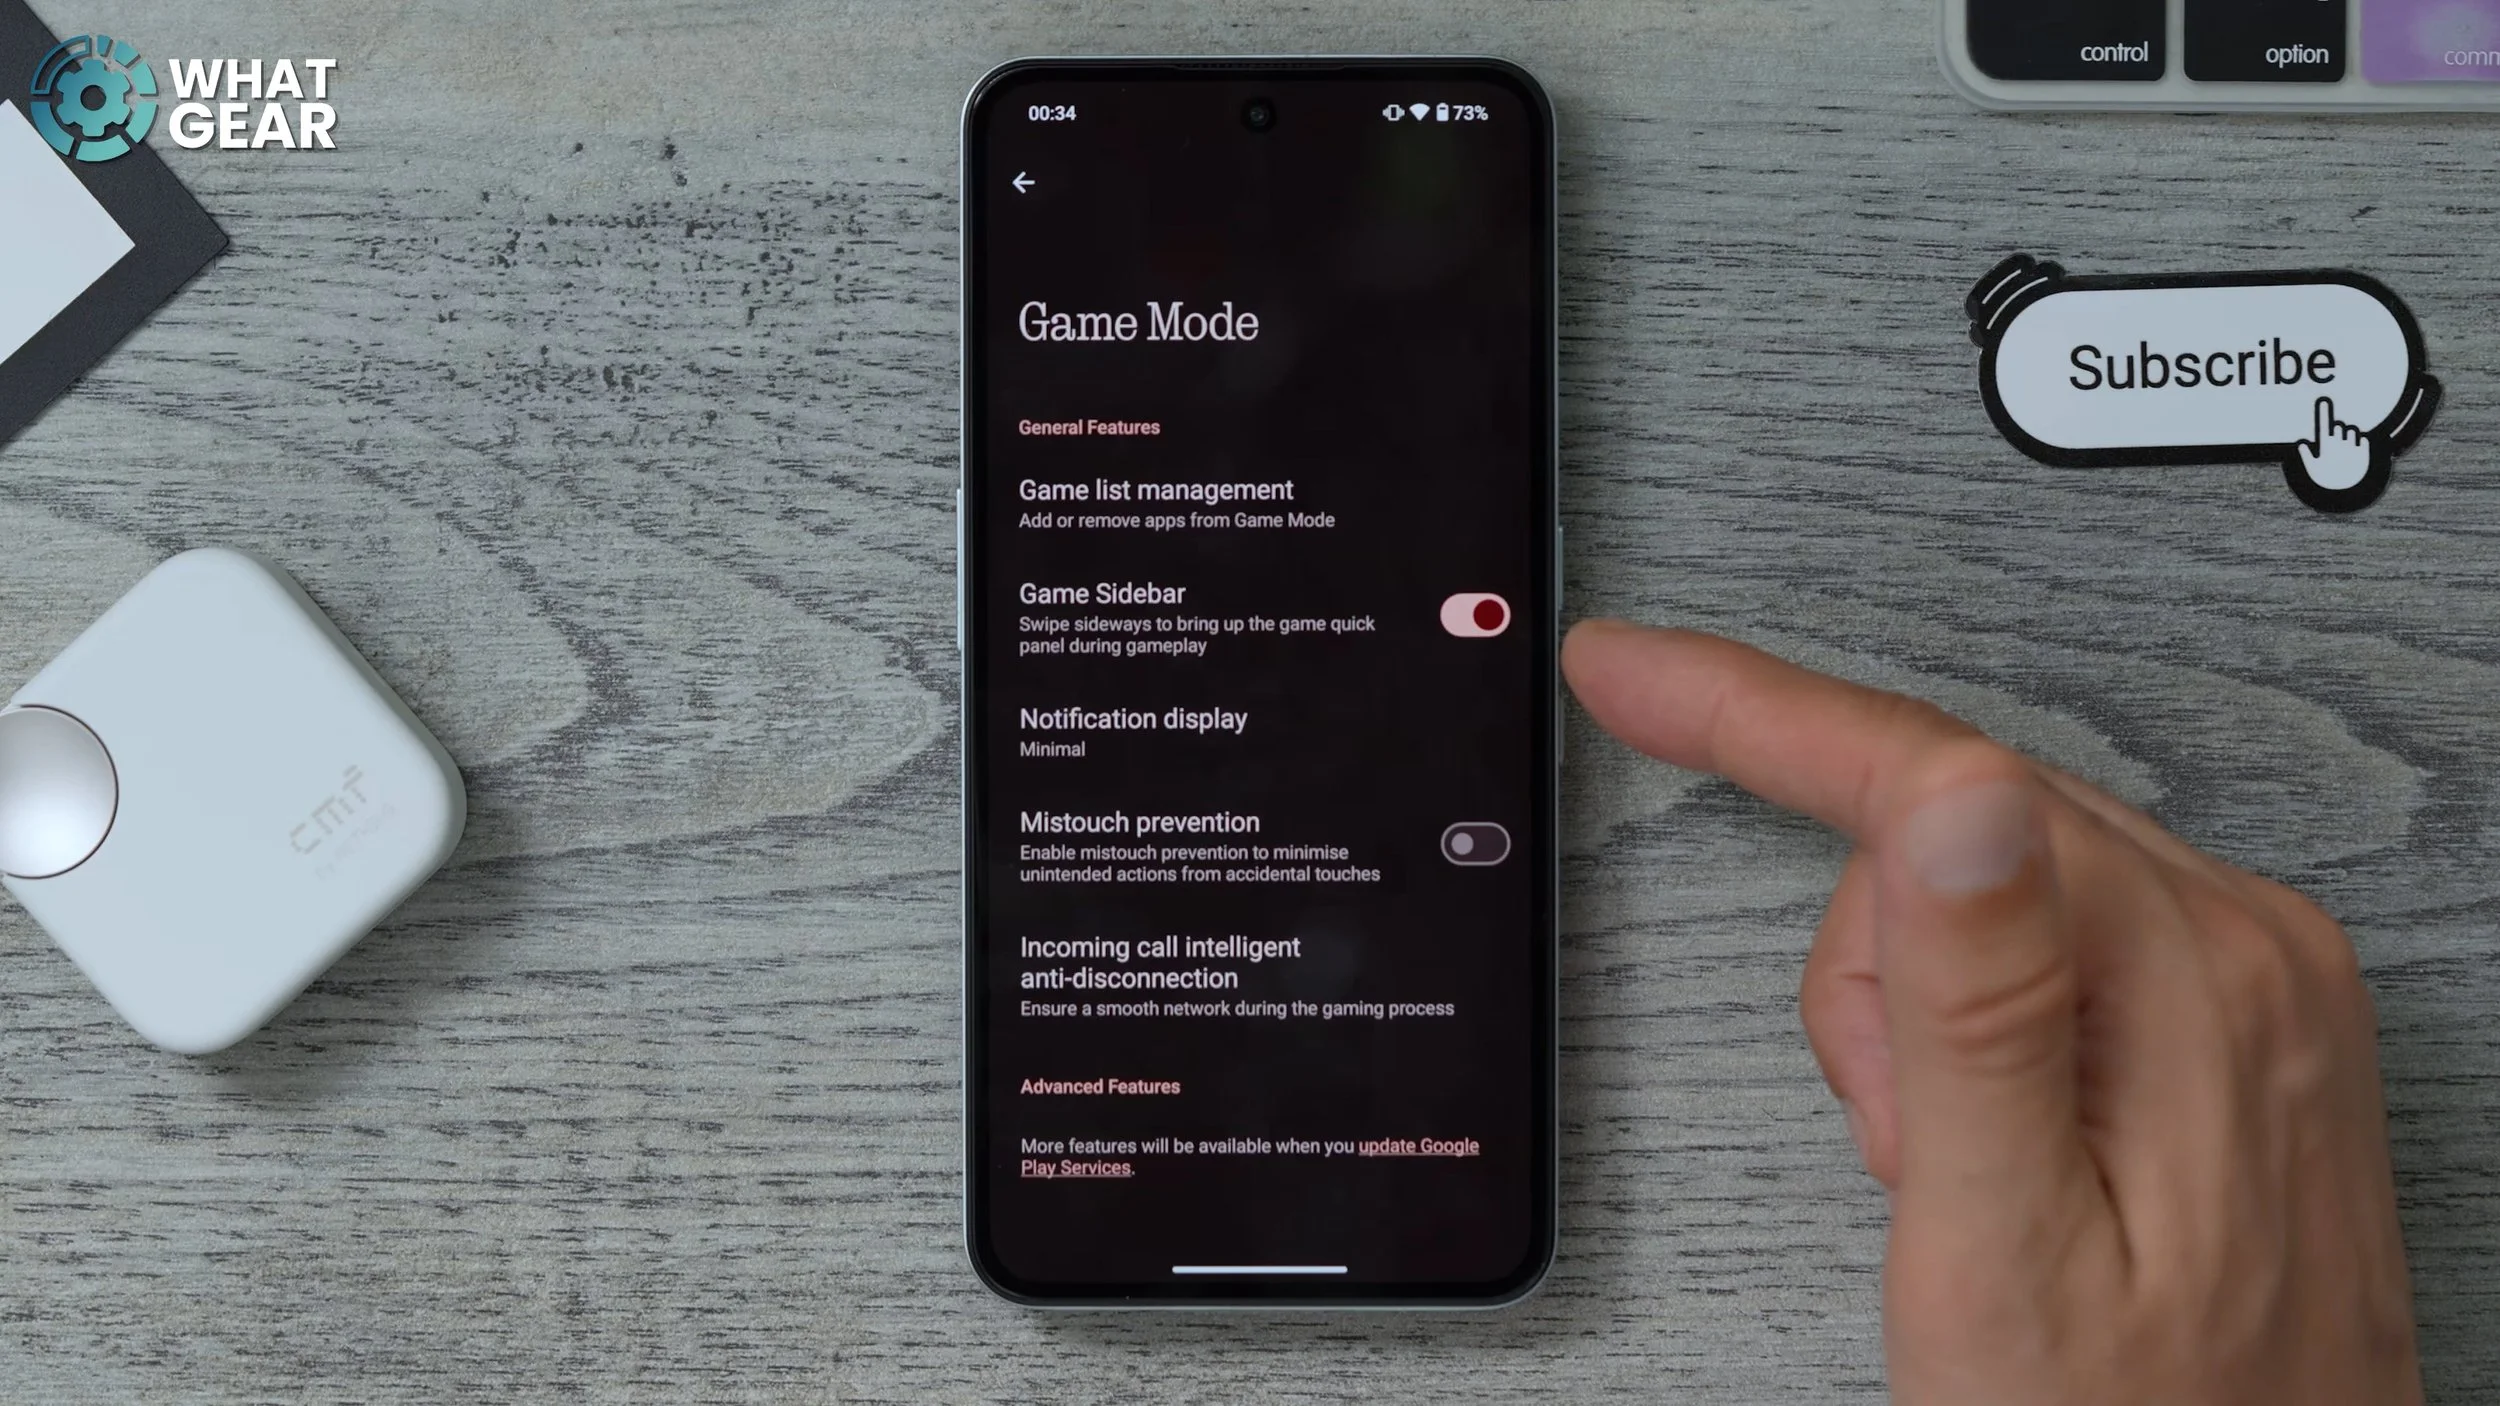
Make sure the game sidebar is switched on. Now when you open up a game, you'll see the little side bar, which you can swipe out and you can switch on the performance mode. This will actually be switched off by default, and then you can mess around with some of these other settings here, like the notifications and the cores and the screen recording feature. But just make sure when you are gaming that the performance mode is on. As a brand new heat pipe and a new approach to dispersing heat from this device, So it should perform really, really well even during longer gaming sessions.
Hidden Game
On the topic of gaming, there is a game on this device. It isn't on this device straight away, but it is an absolute classic, and it's been redesigned for this device. You can play snake on this phone, but to actually get this game on this phone is not that straightforward.
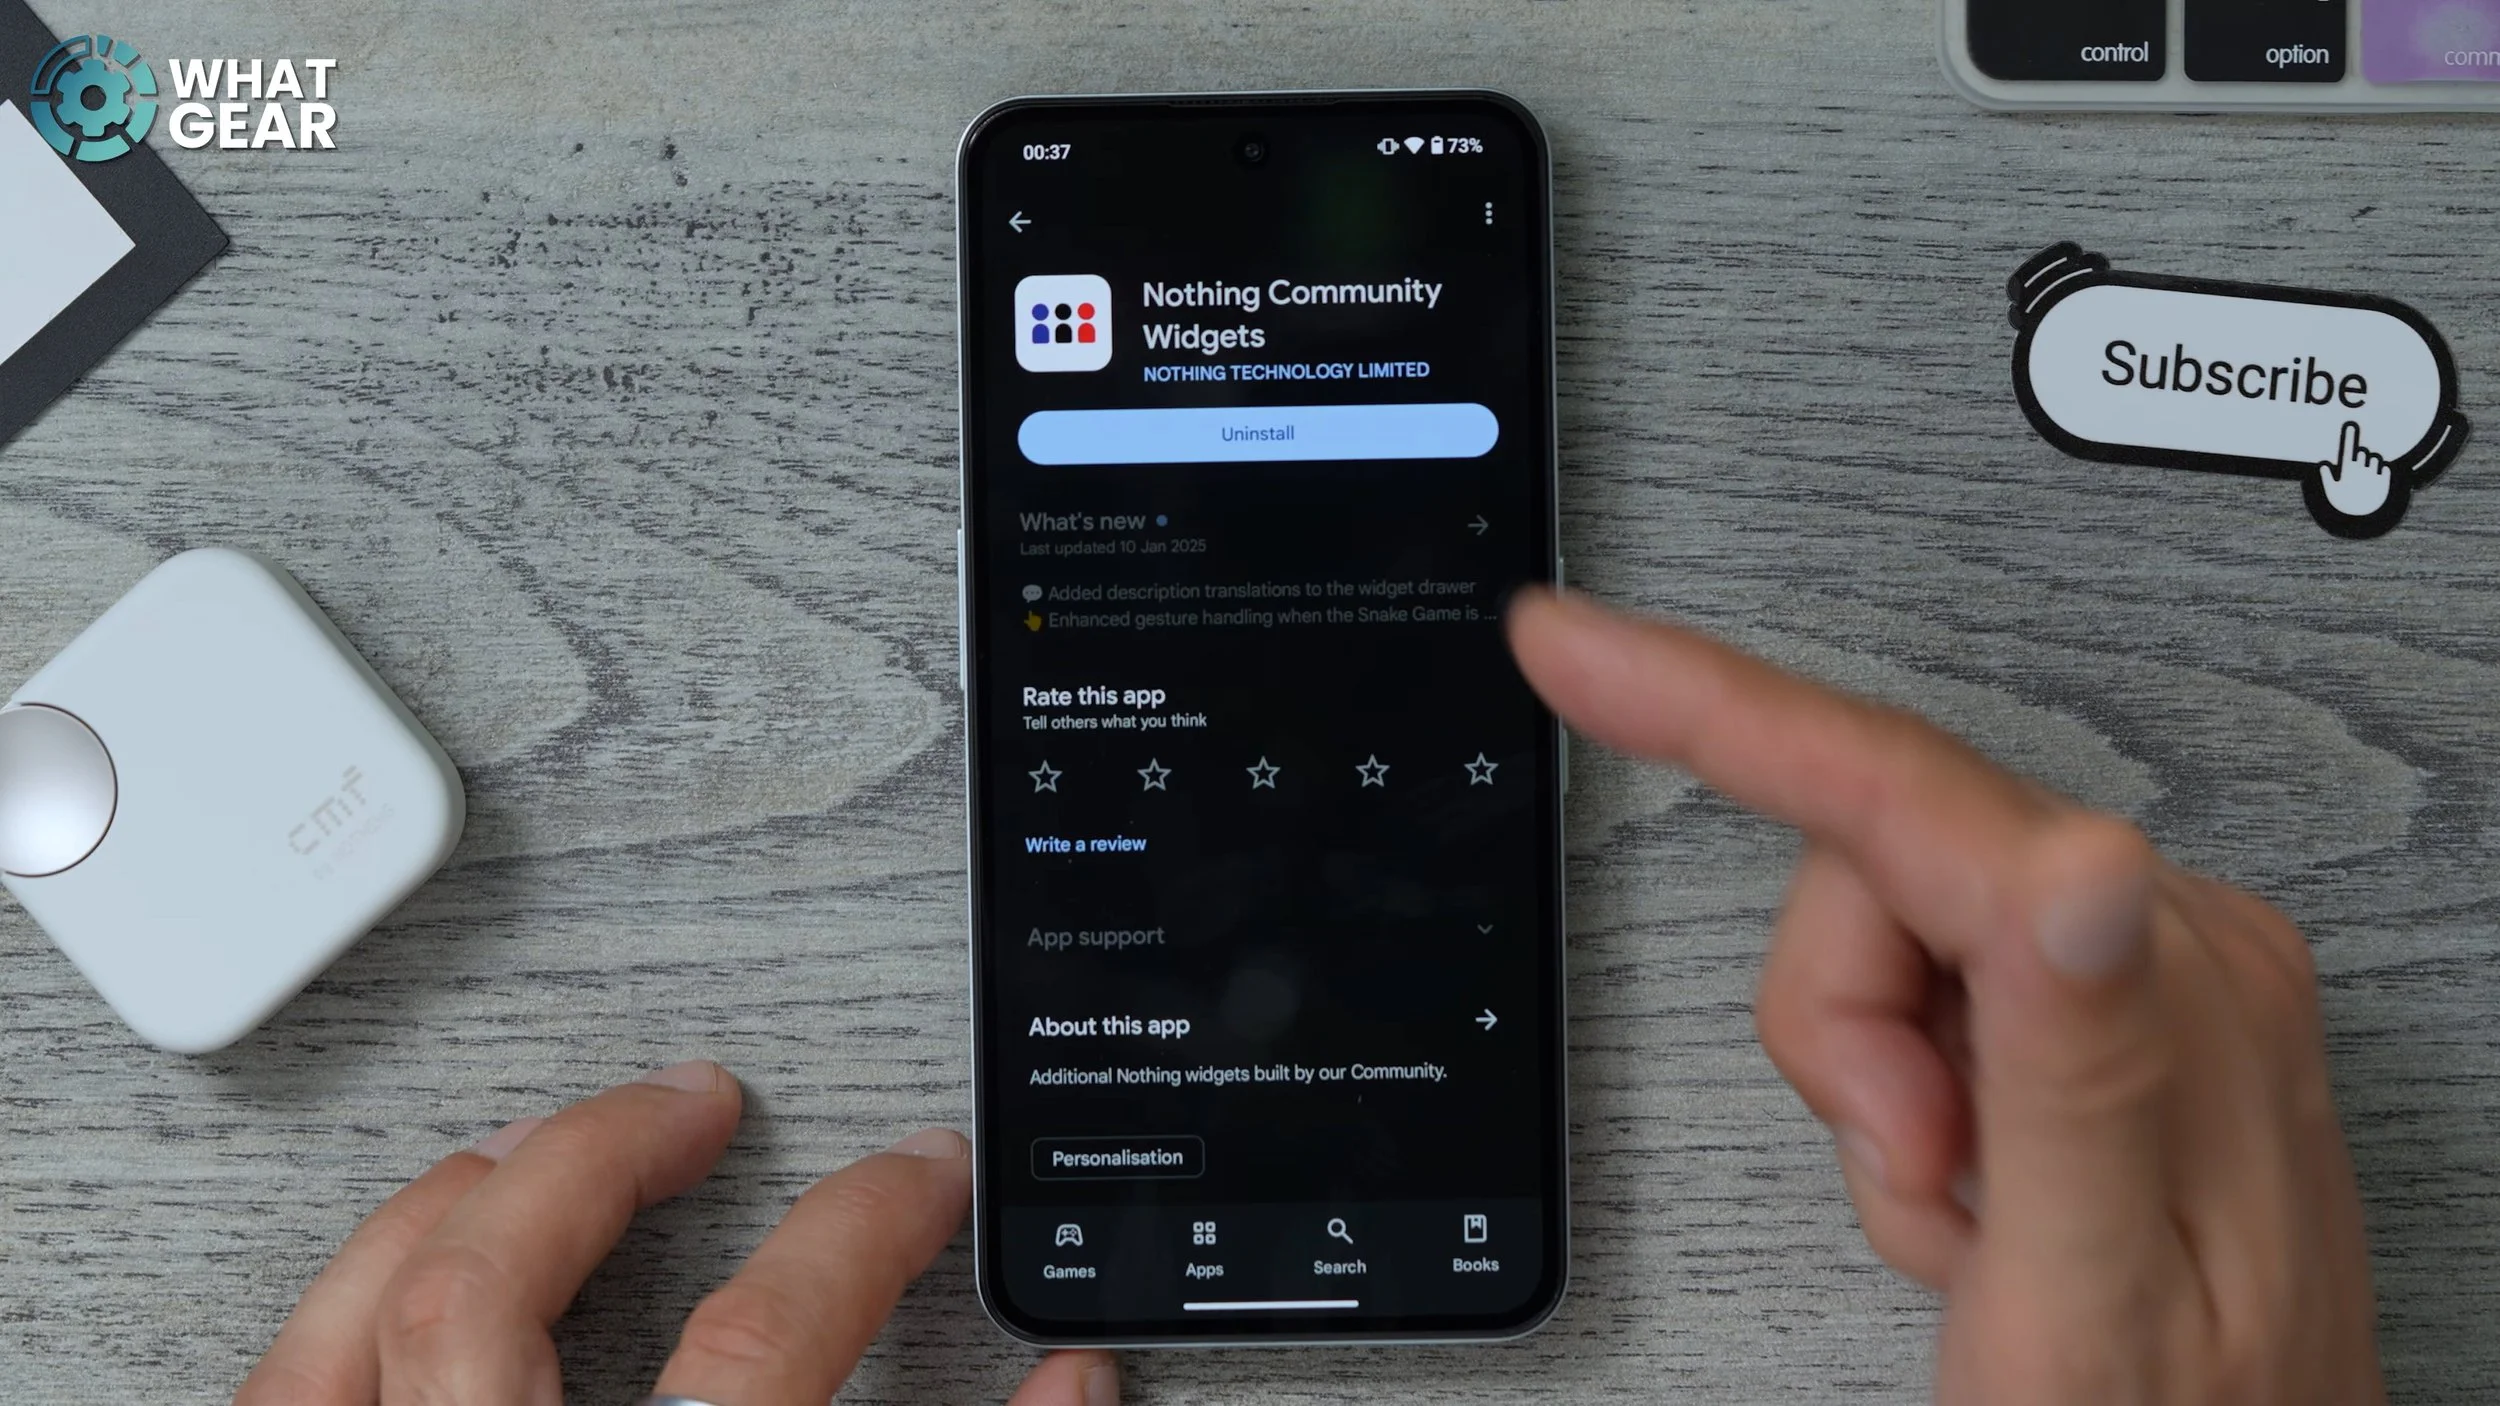
You go to the Play Store and you type in nothing Community widget and install this, now when you go to the widget options on your phone, you will see the community widget, which is the snake game. I do kind of wish you could make this a bit bigger, so you could take up a bigger section of the screen, but it's just nice to do this here at all, to be honest. So you might want to set up.
So there are a lot more features which I haven't shown you. If you do want to dive deeper into nothing OS, well, I've made a separate video all about that. if you guys got any questions for me about this phone, make sure you leave those in the comments.